IDrive e2
Steps to connect your IDrive storage to SimpleBackups
How to Connect your IDrive e2 bucket to SimpleBackups
1. Create your IDrive e2 Bucket
- Go to the Buckets page and click on Create Bucket
- Fill in your Bucket name, select a region and create the Bucket

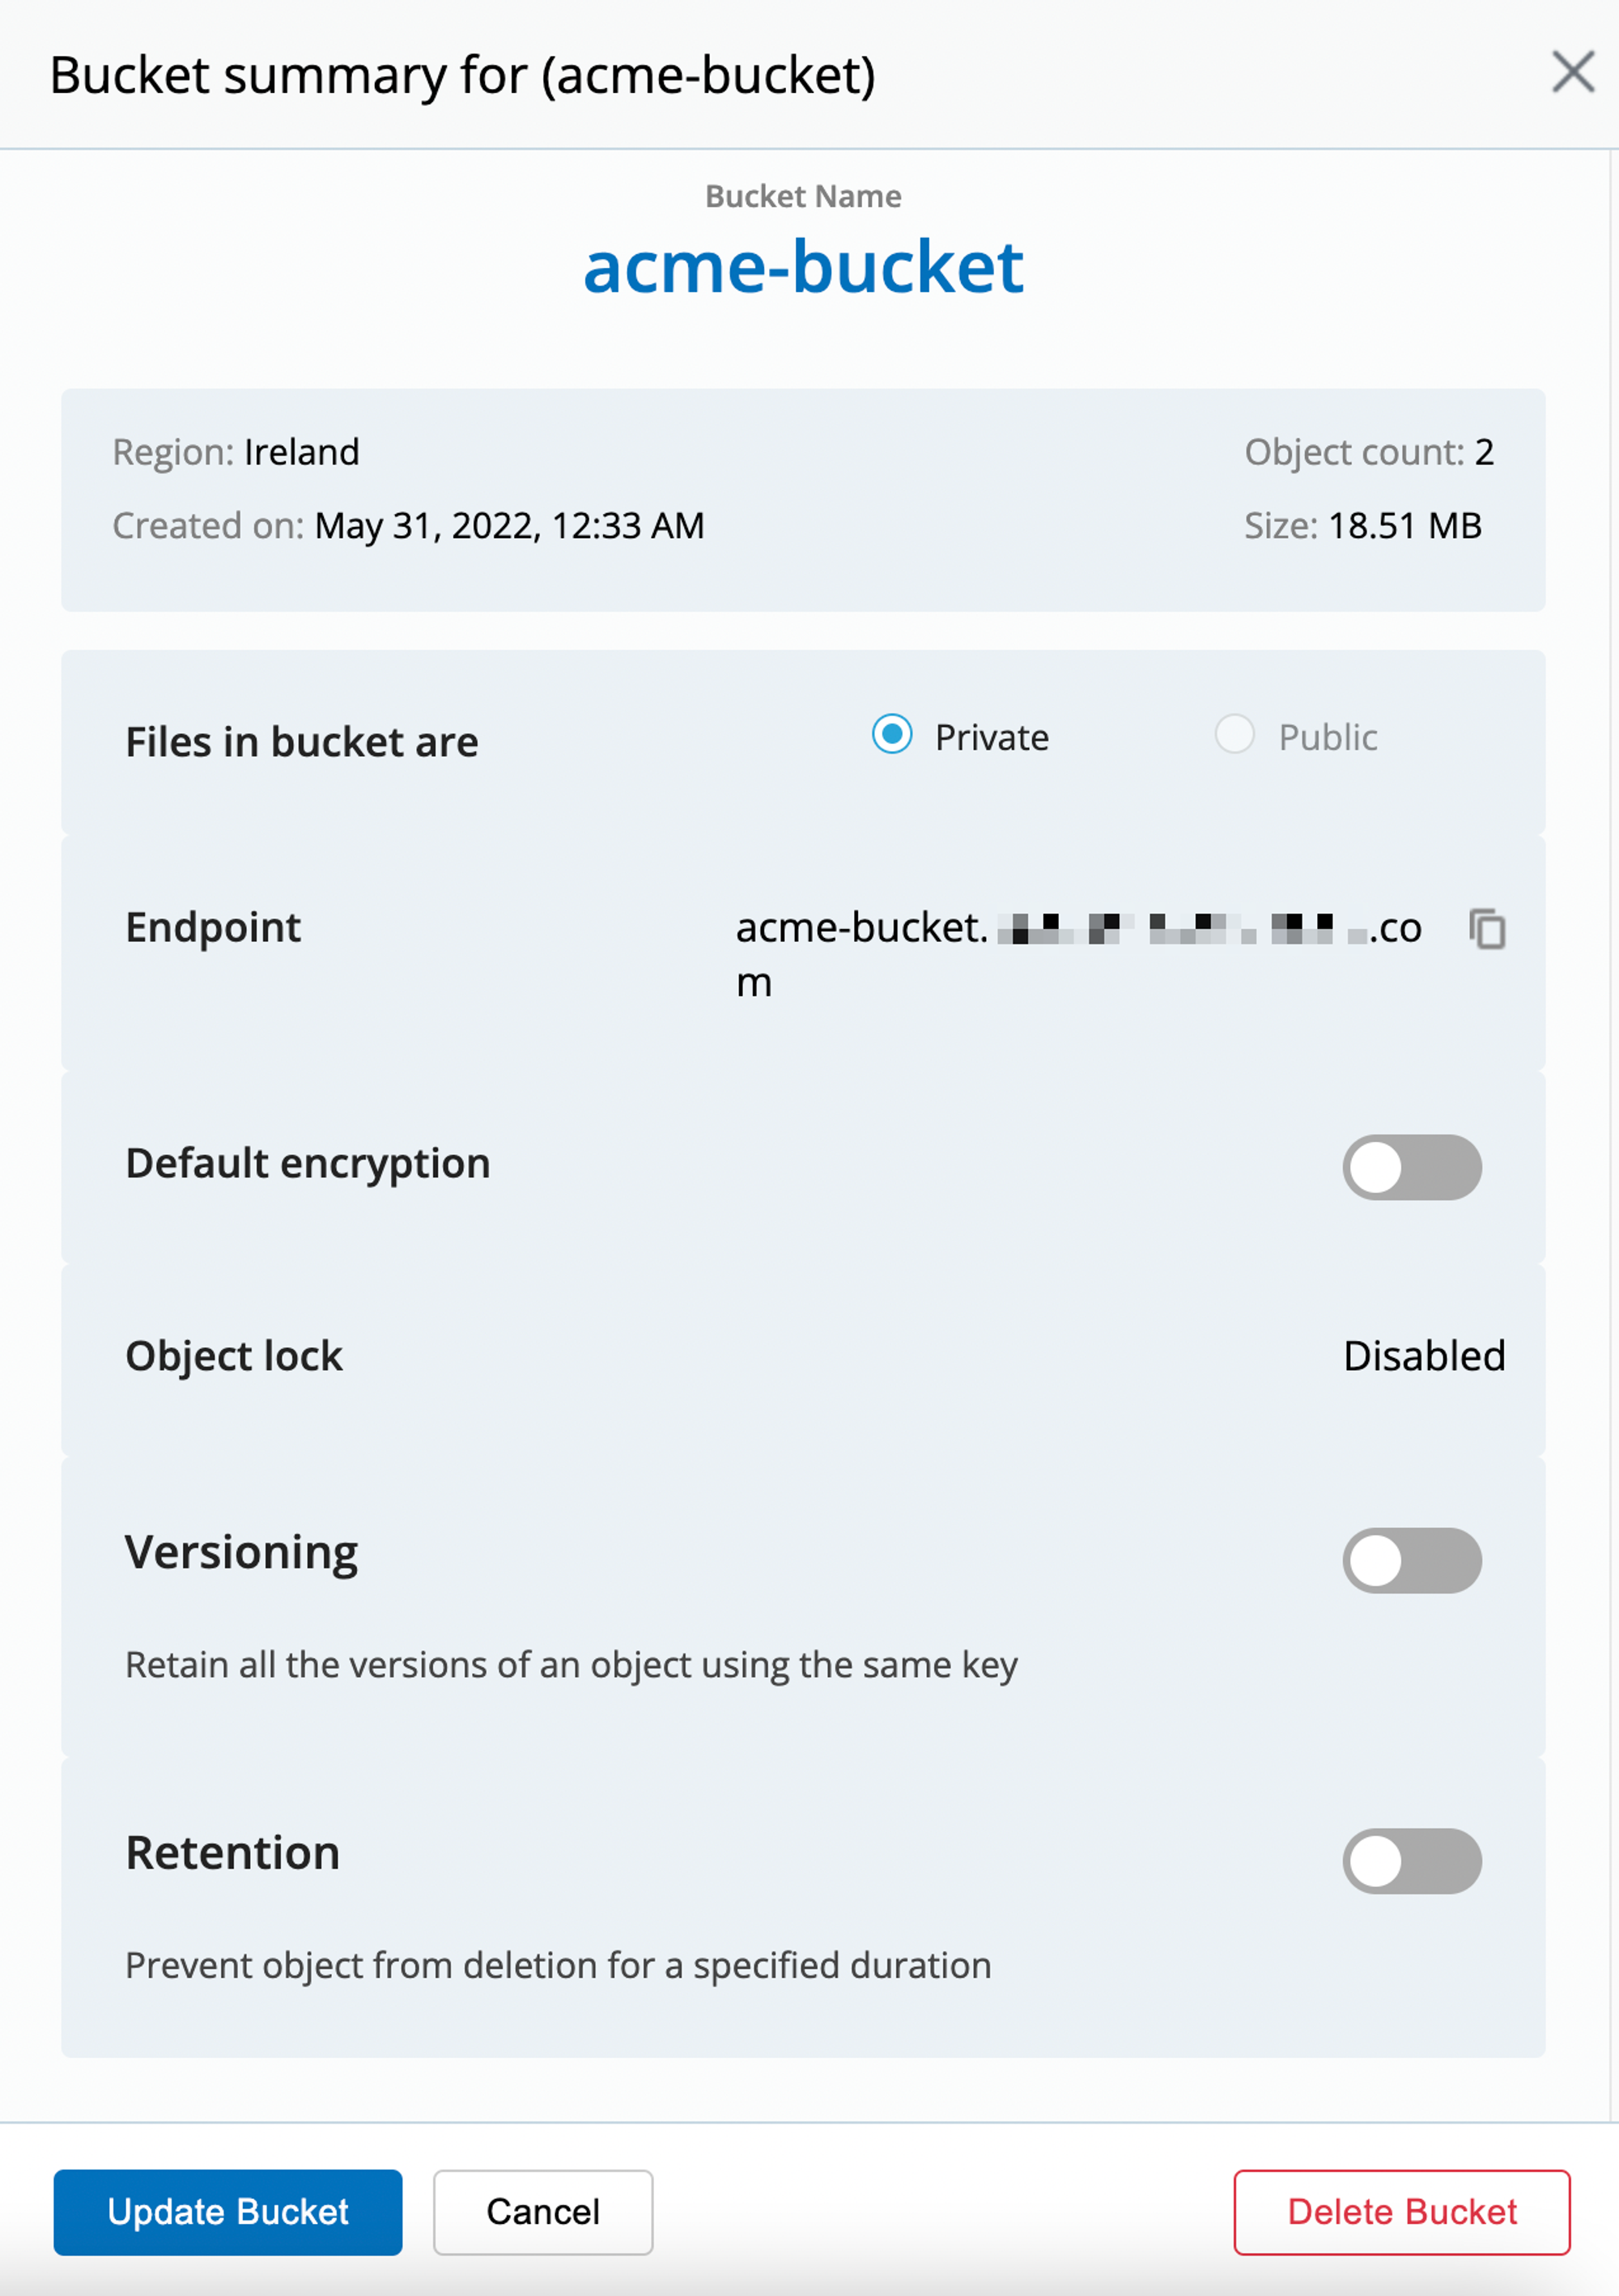
Good job, your bucket is created!
Don't leave the Idrive interface yet, we'll now have to create your credentials.
Information you'll need in step 3:
- Your Bucket name, in this case "acme-bucket"
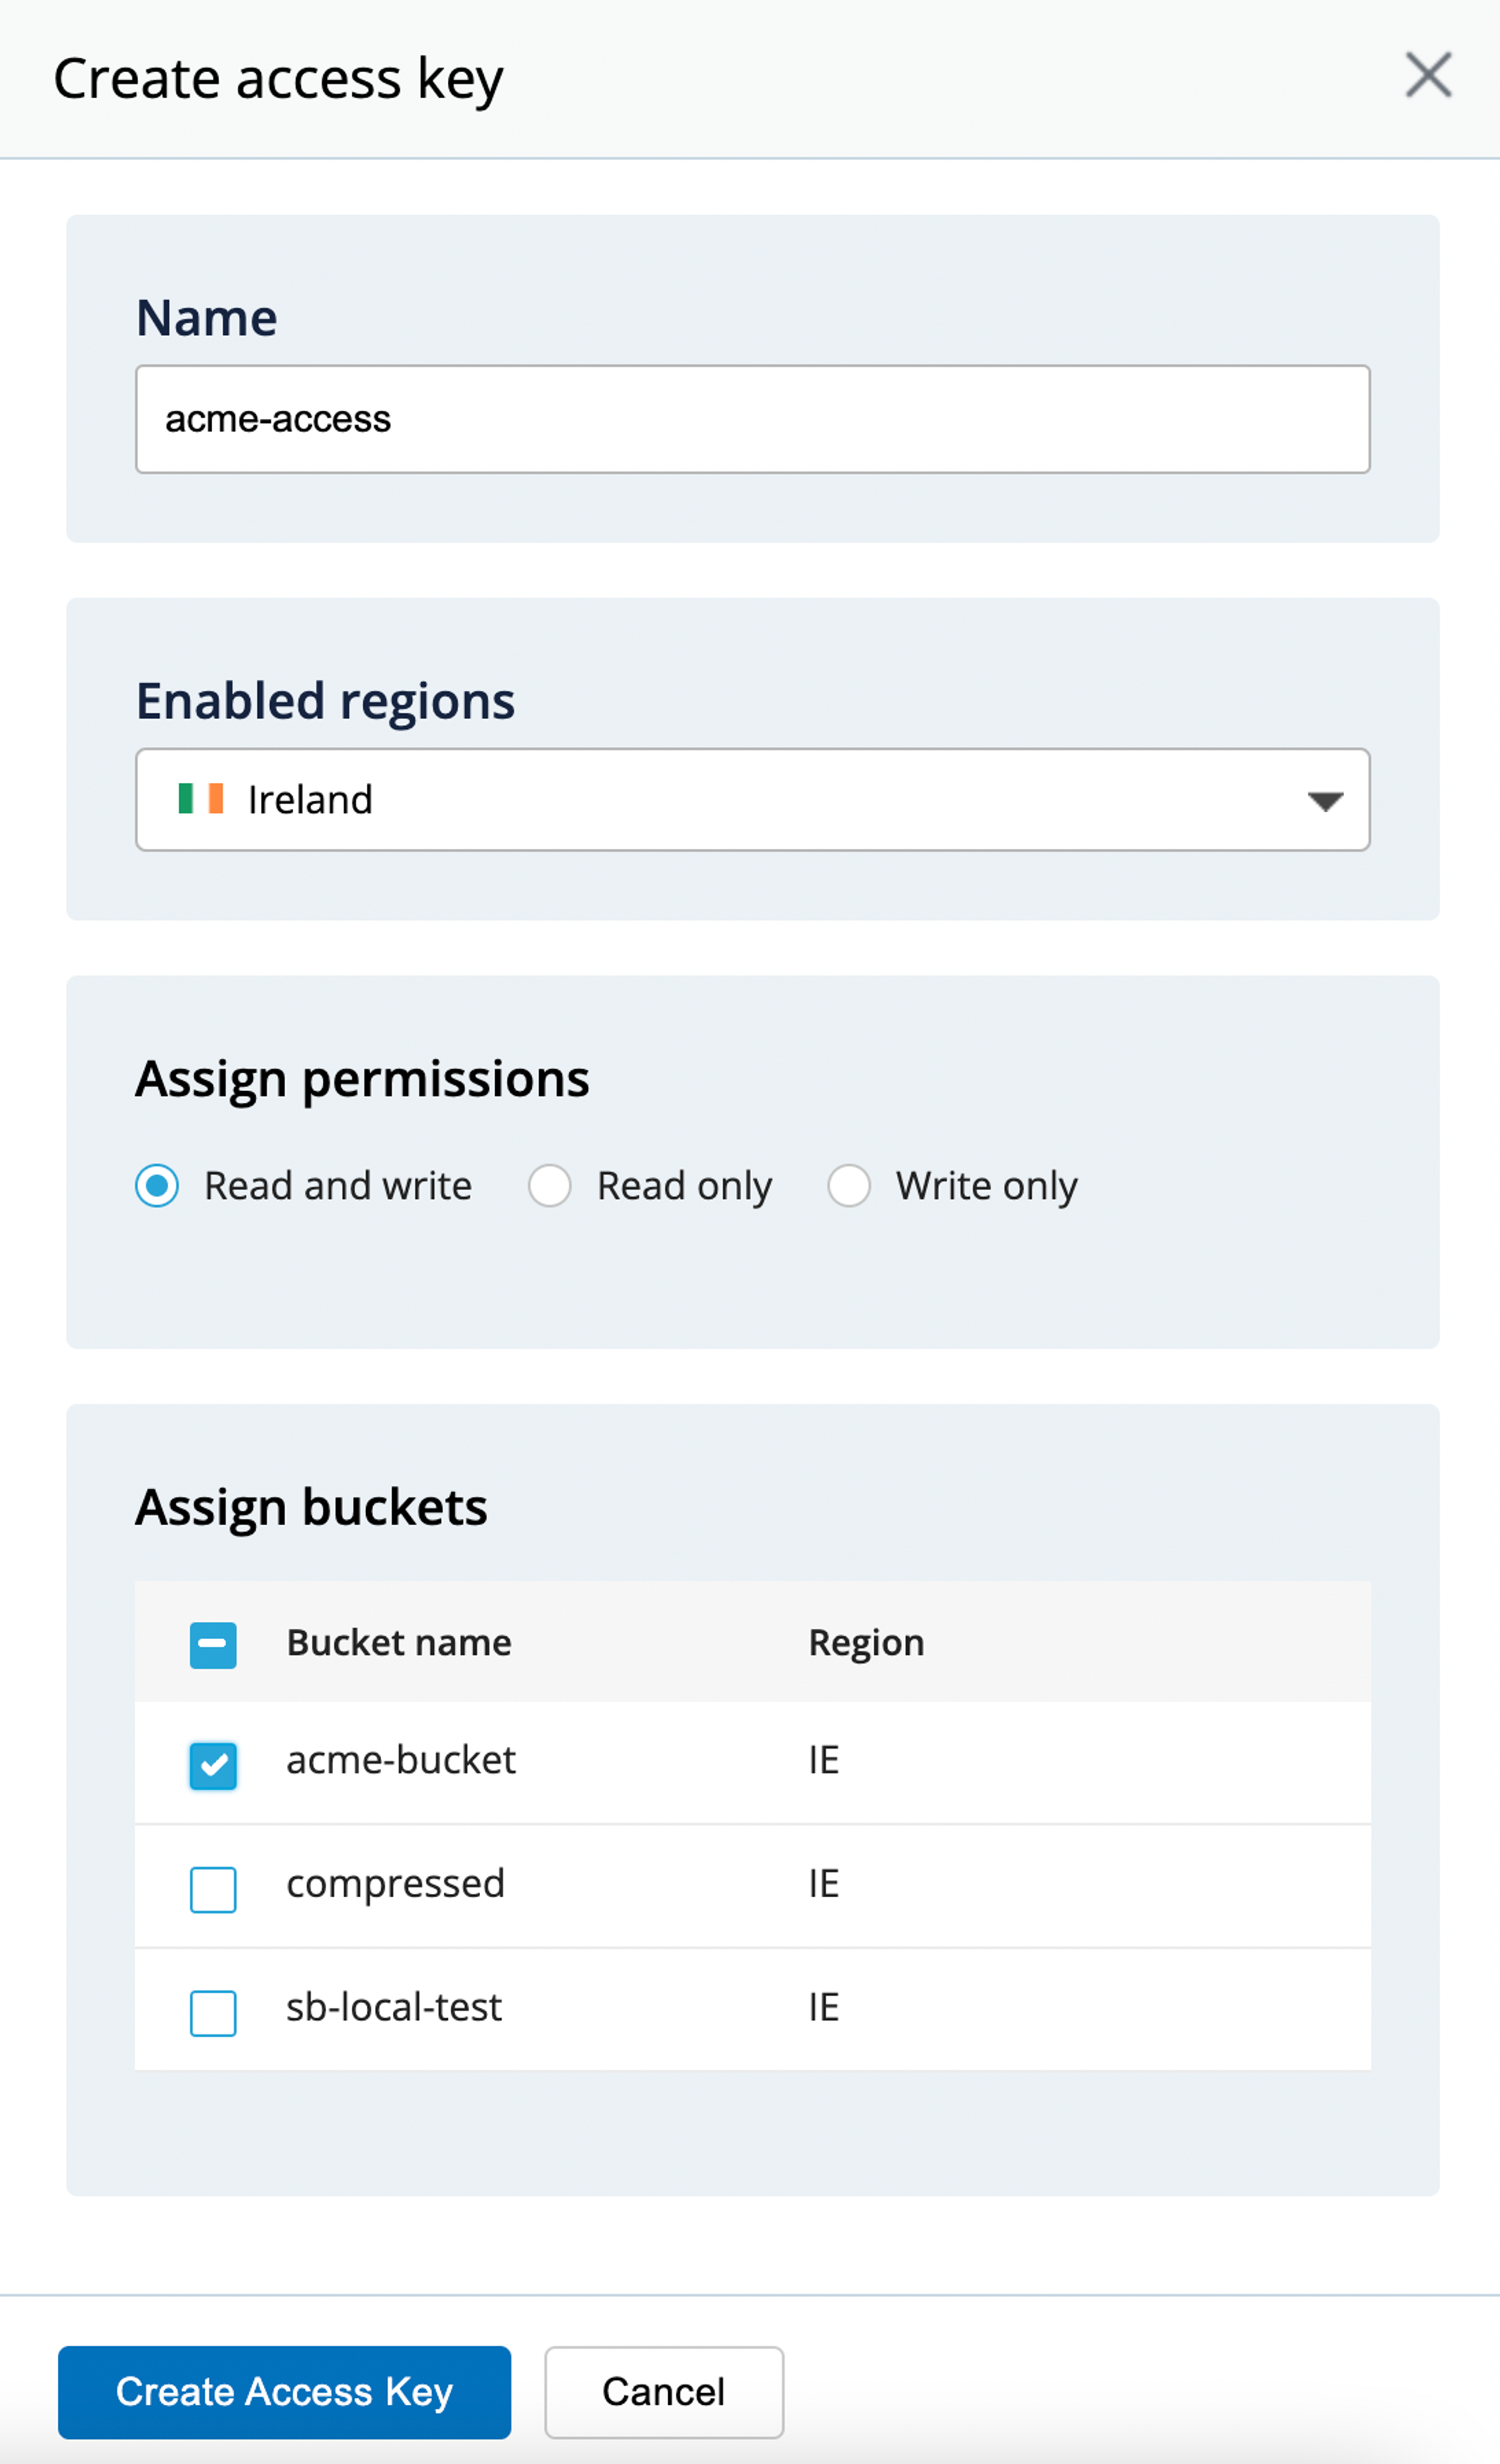
2. Create your Bucket credentials
Now that we have a Bucket, we need to create the credentials required to access it.
- Go to the "App Keys" page and click on "Create Access Key" button
Fill in the form with:
- Name of the Key: we like to use a reference of the Bucket we're creating the credentials for
- Allow access to Bucket(s): Access to "All Buckets" is less secure, we strongly recommend that you select the bucket you want to use only.
- Assign permissions: Read and write - Allows write backup archives but also to retrieve them during the backup restore process
You'll get a confirmation message including your KeyID and applicationKey, which is what we need to connect your storage to SimpleBackups.

Information you'll need in step 3:
- Endpoint Key
- Access Key
- Secret Key
3. Connect your Bucket to SimpleBackups
So far we have created a Bucket and have created the required credentials to get access to this it. The only remaining step is connecting this new storage to SimpleBackups.
- Log into SimpleBackups and head to the connect your storage page
- Select "IDrive e2" as the storage provider and fill in the "Connect your storage" form with the information from step 1 and 2.
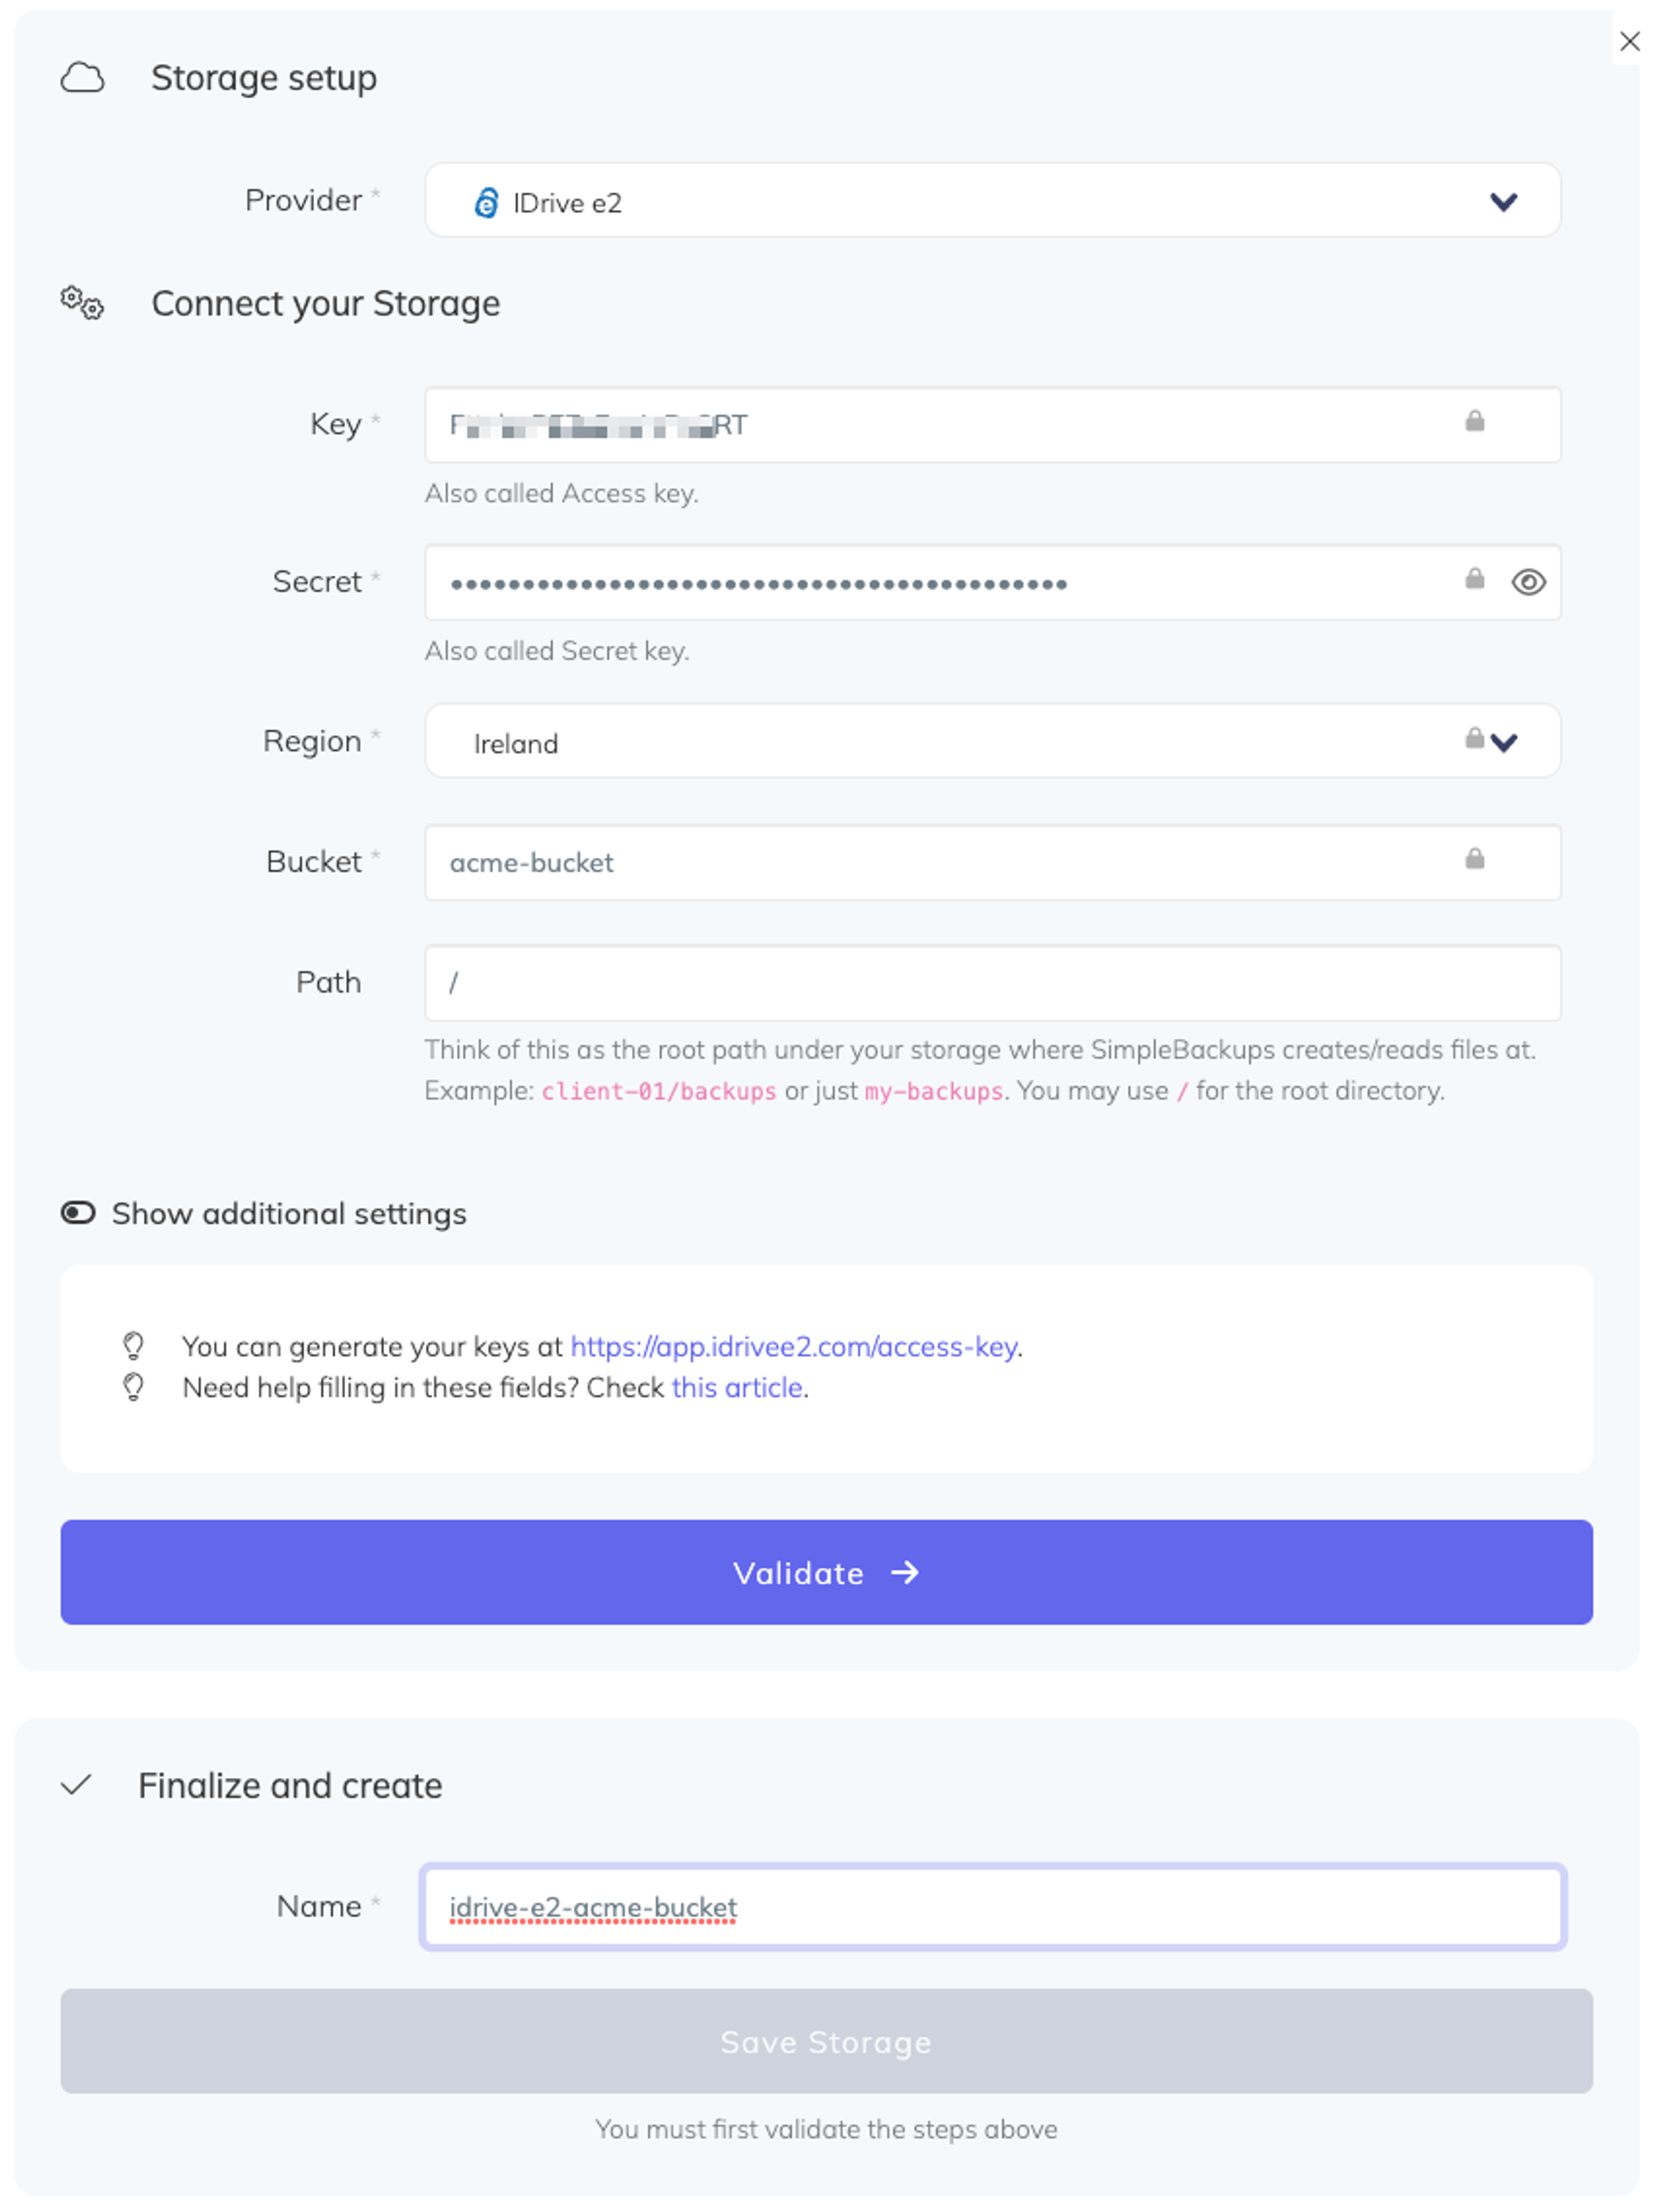
You'll have to input :
- Key: Access Key described in (step 2)
- Secret: Secret Leu described in (step 2)
- Endpoint: Endpoint url generated in step 2, preceded by "https://"
- Bucket: Bucket name described in (step 1)
- Give your storage a name (usually we like to use the Bucket name) and click on "Save new storage".
Once saved, your IDrive e2 bucket will be available as a storage destination for your backups.
Last updated on August 4, 2021