Backblaze B2
Steps to connect your Backblaze B2 storage to SimpleBackups
How to Connect your Backblaze bucket to SimpleBackups
1. Create your Backblaze b2 Bucket
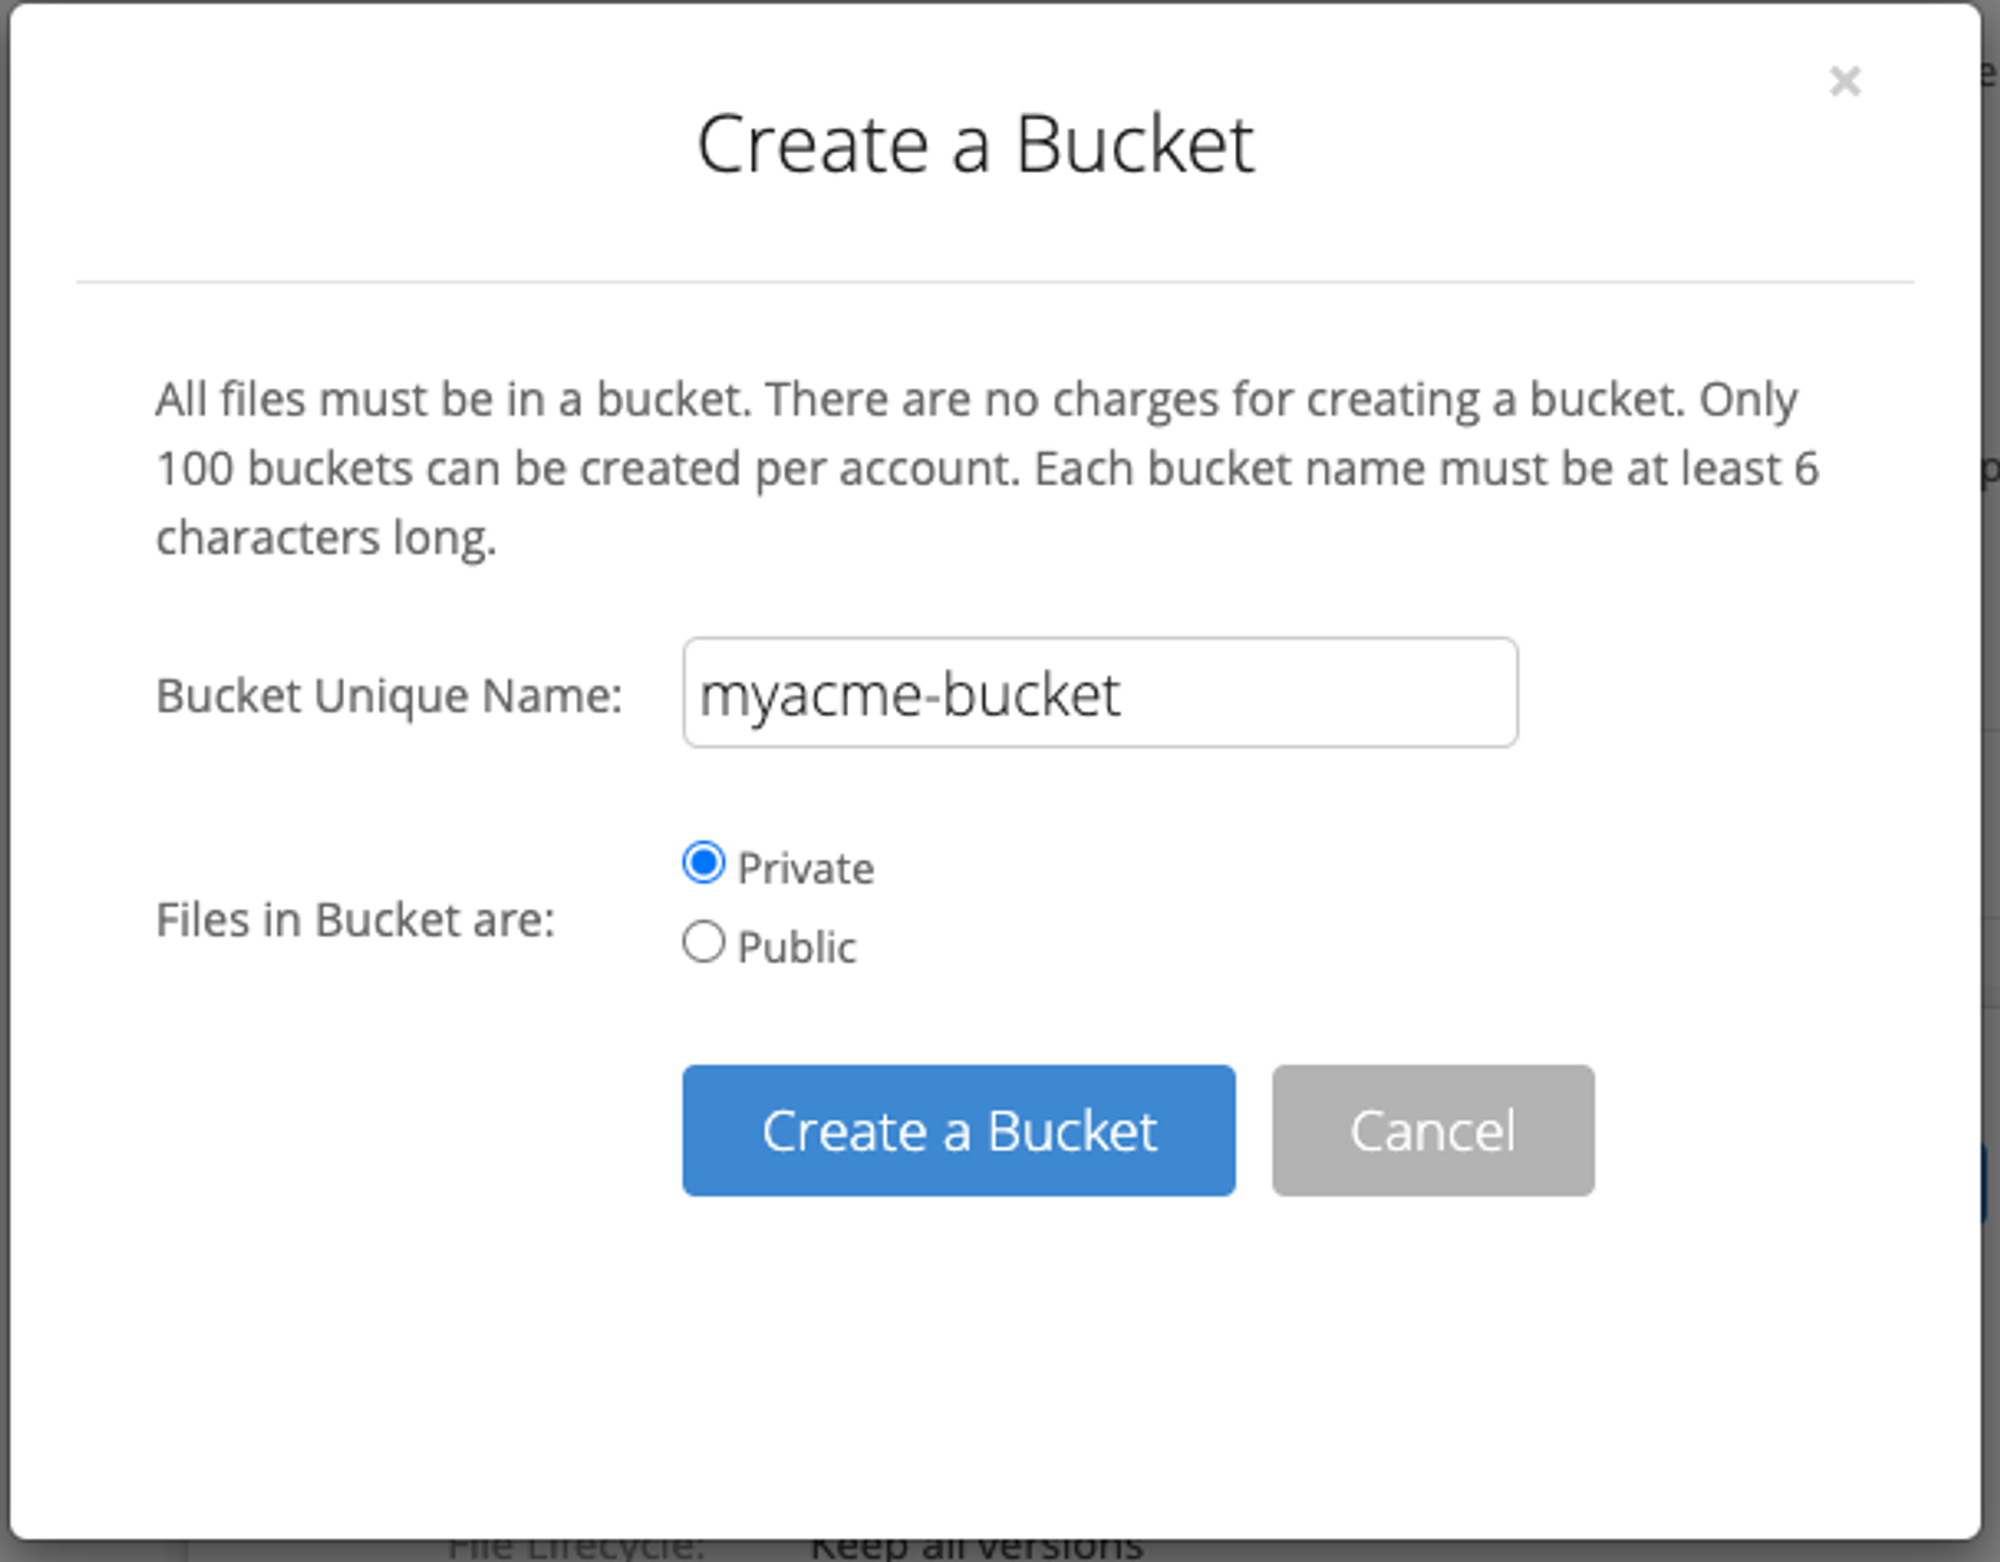
- Go to the Bucket page create a new Bucket

- Fill in your Bucket name and create the Bucket

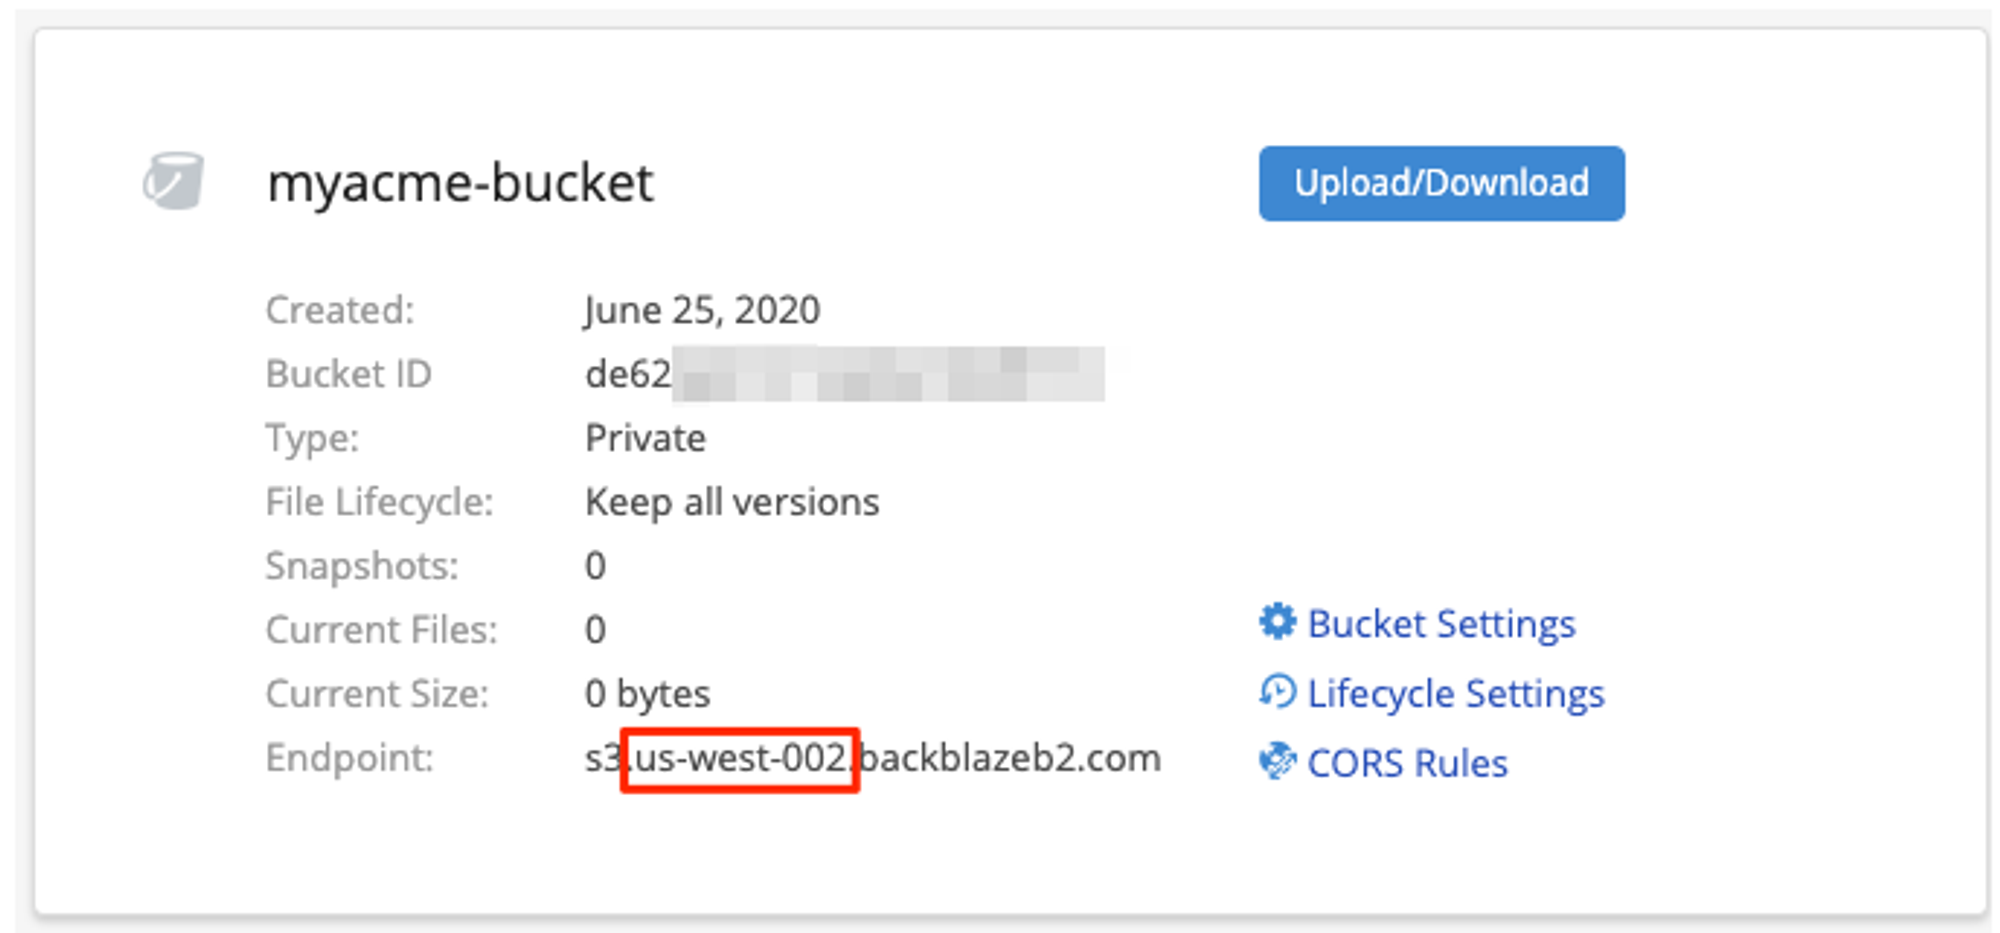
Good job! Your bucket is created.

Don't leave the Backblaze interface yet, we'll now have to create your credentials.
Information you'll need in step 3:
- Your Bucket name, in this case "myacme-bucket"
- Your Bucket region, in this case "us-west-002"
2. Create your Bucket credentials
Great! Now that we have a Bucket, we need to create the credentials required to access it.
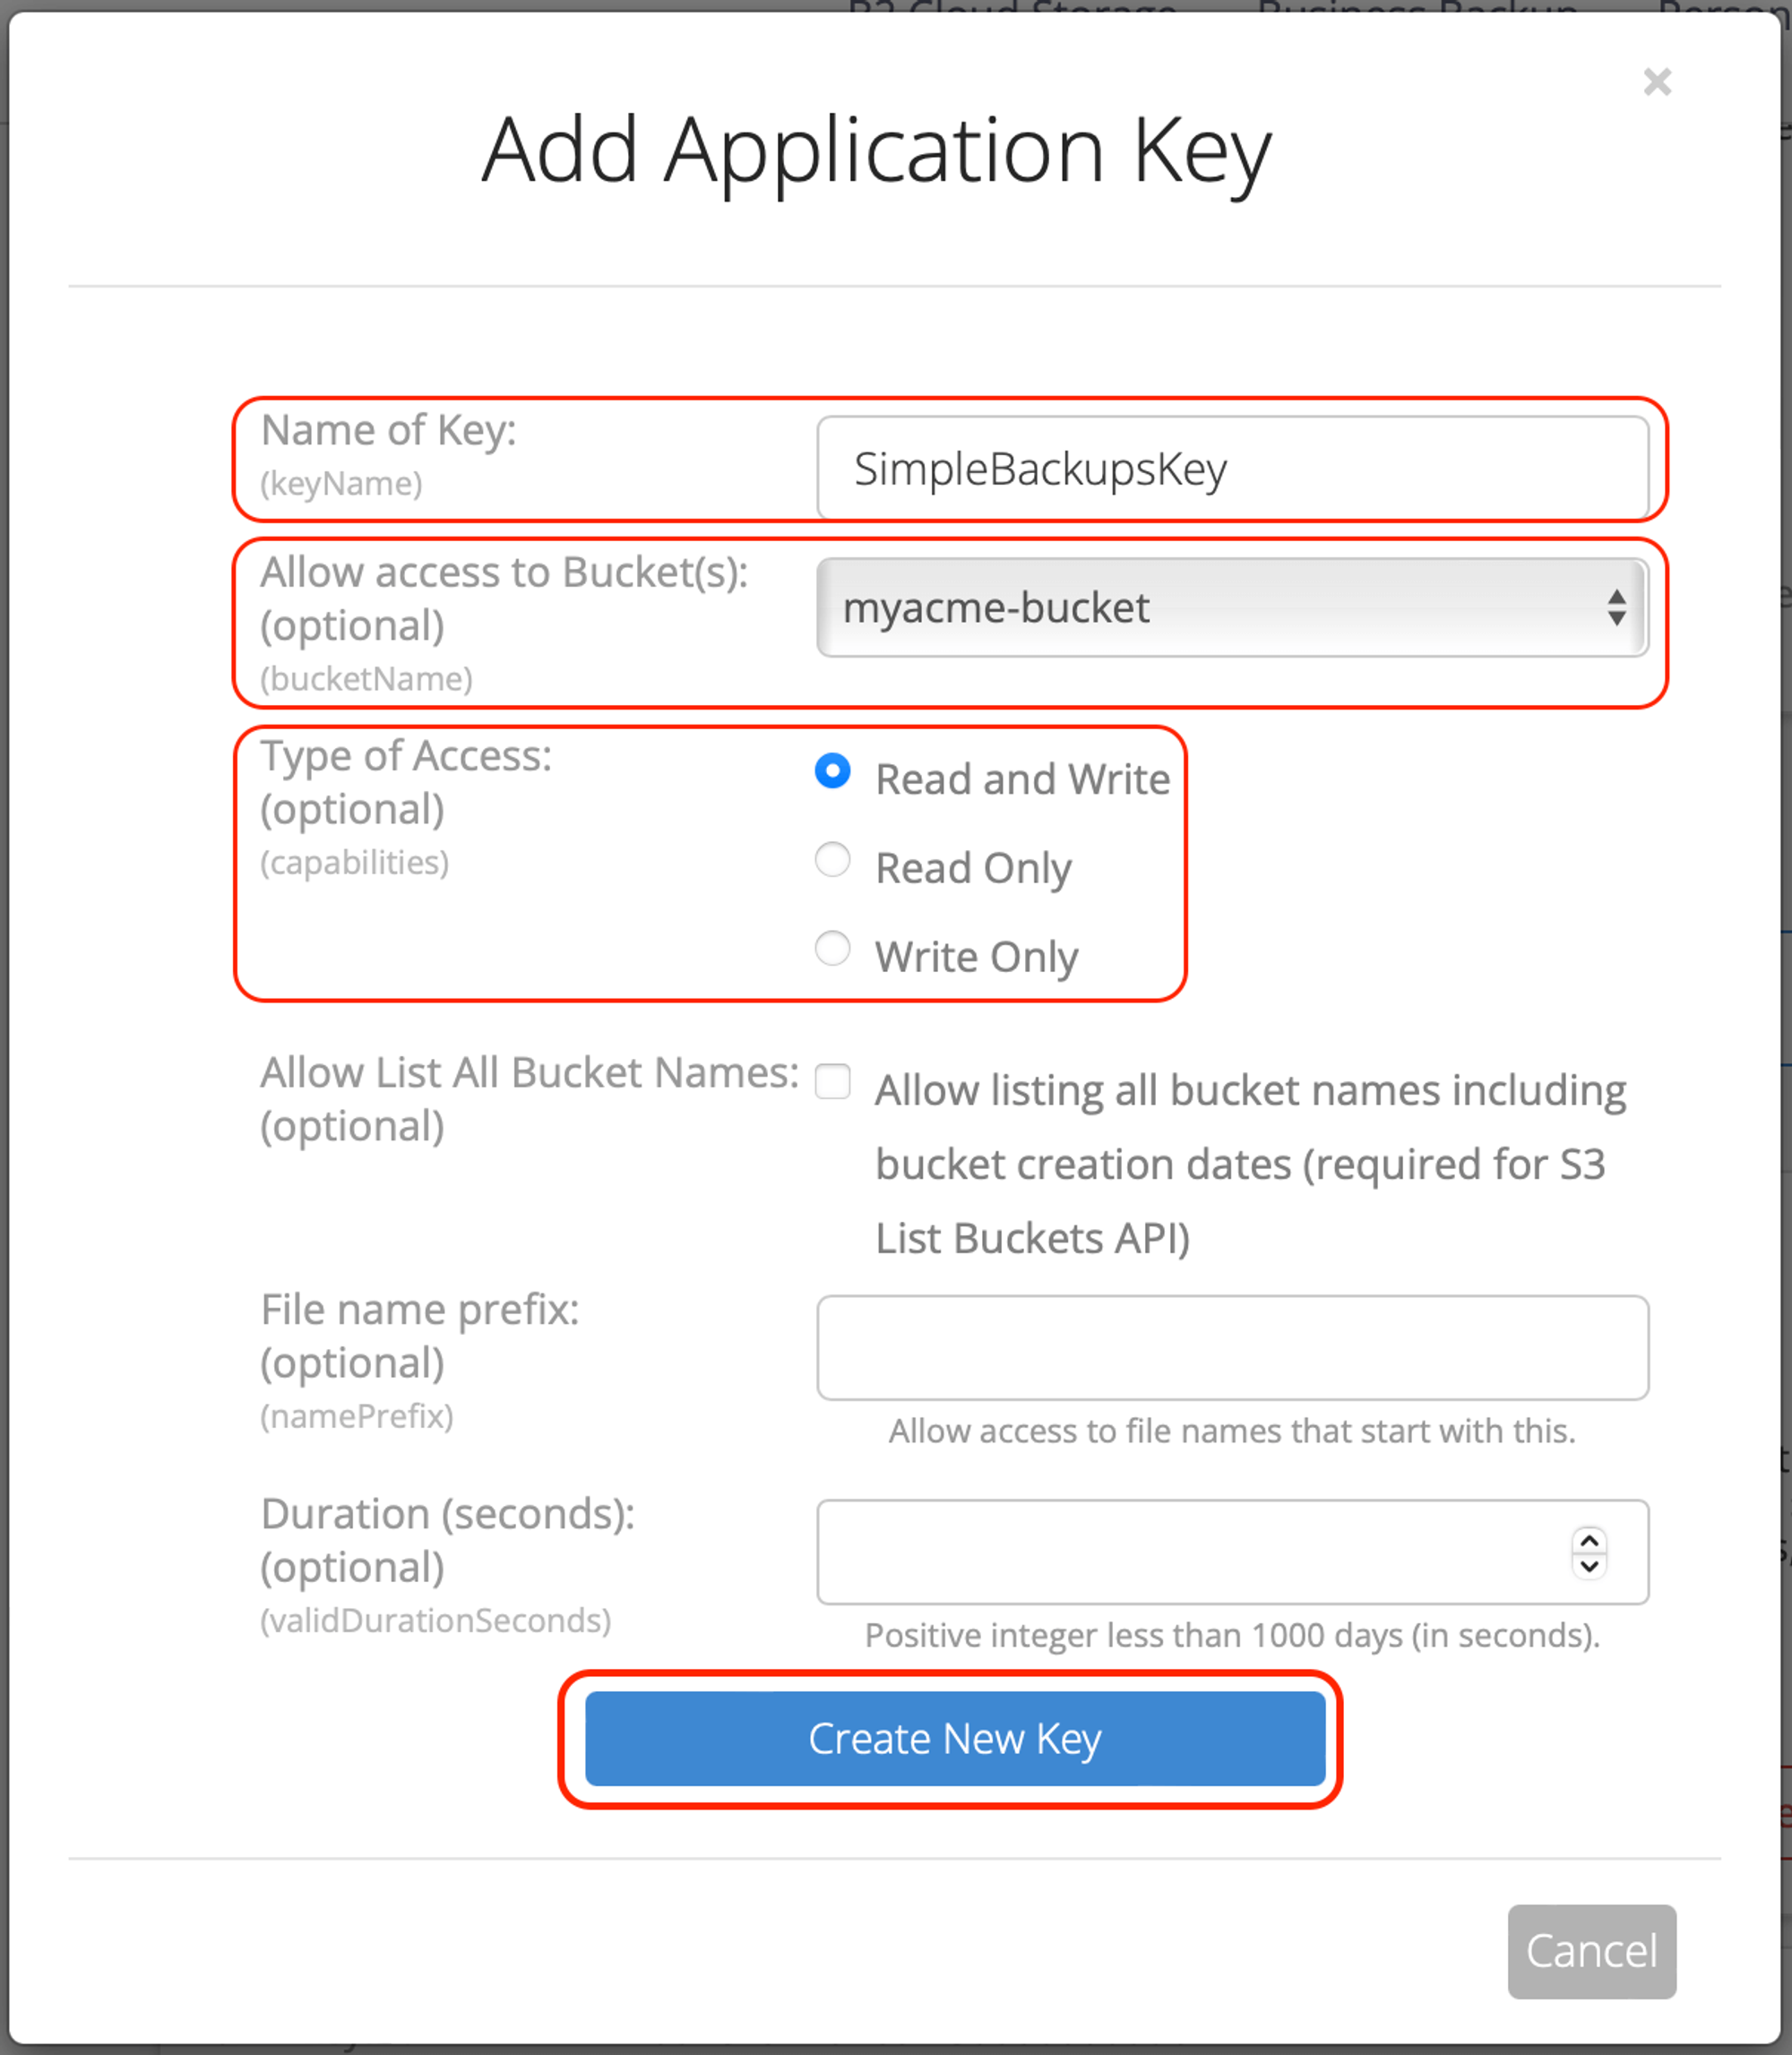
- Go to the "App Keys" page and click on "Add a new Application Key" button
Fill in the form by defining:
- Name of the Key: we like to use a reference of the Bucket we're creating the credentials for
- Allow access to Bucket(s): Access to "All Buckets" is less secure, we strongly recommend that you select the bucket you want to use only.
Leave the rest of the option empty and create your key.

You'll get a confirmation message including your KeyID and applicationKey, which is what we need to connect your storage to SimpleBackups.

Information you'll need in step 3:
- applicationKey
- KeyID
3. Connect your Bucket to SimpleBackups
So far we have created a Bucket and have created the required credentials to get access to this it.The only remaining step is connecting this new storage to SimpleBackups.
- Log into SimpleBackups and head to the connect your storage page
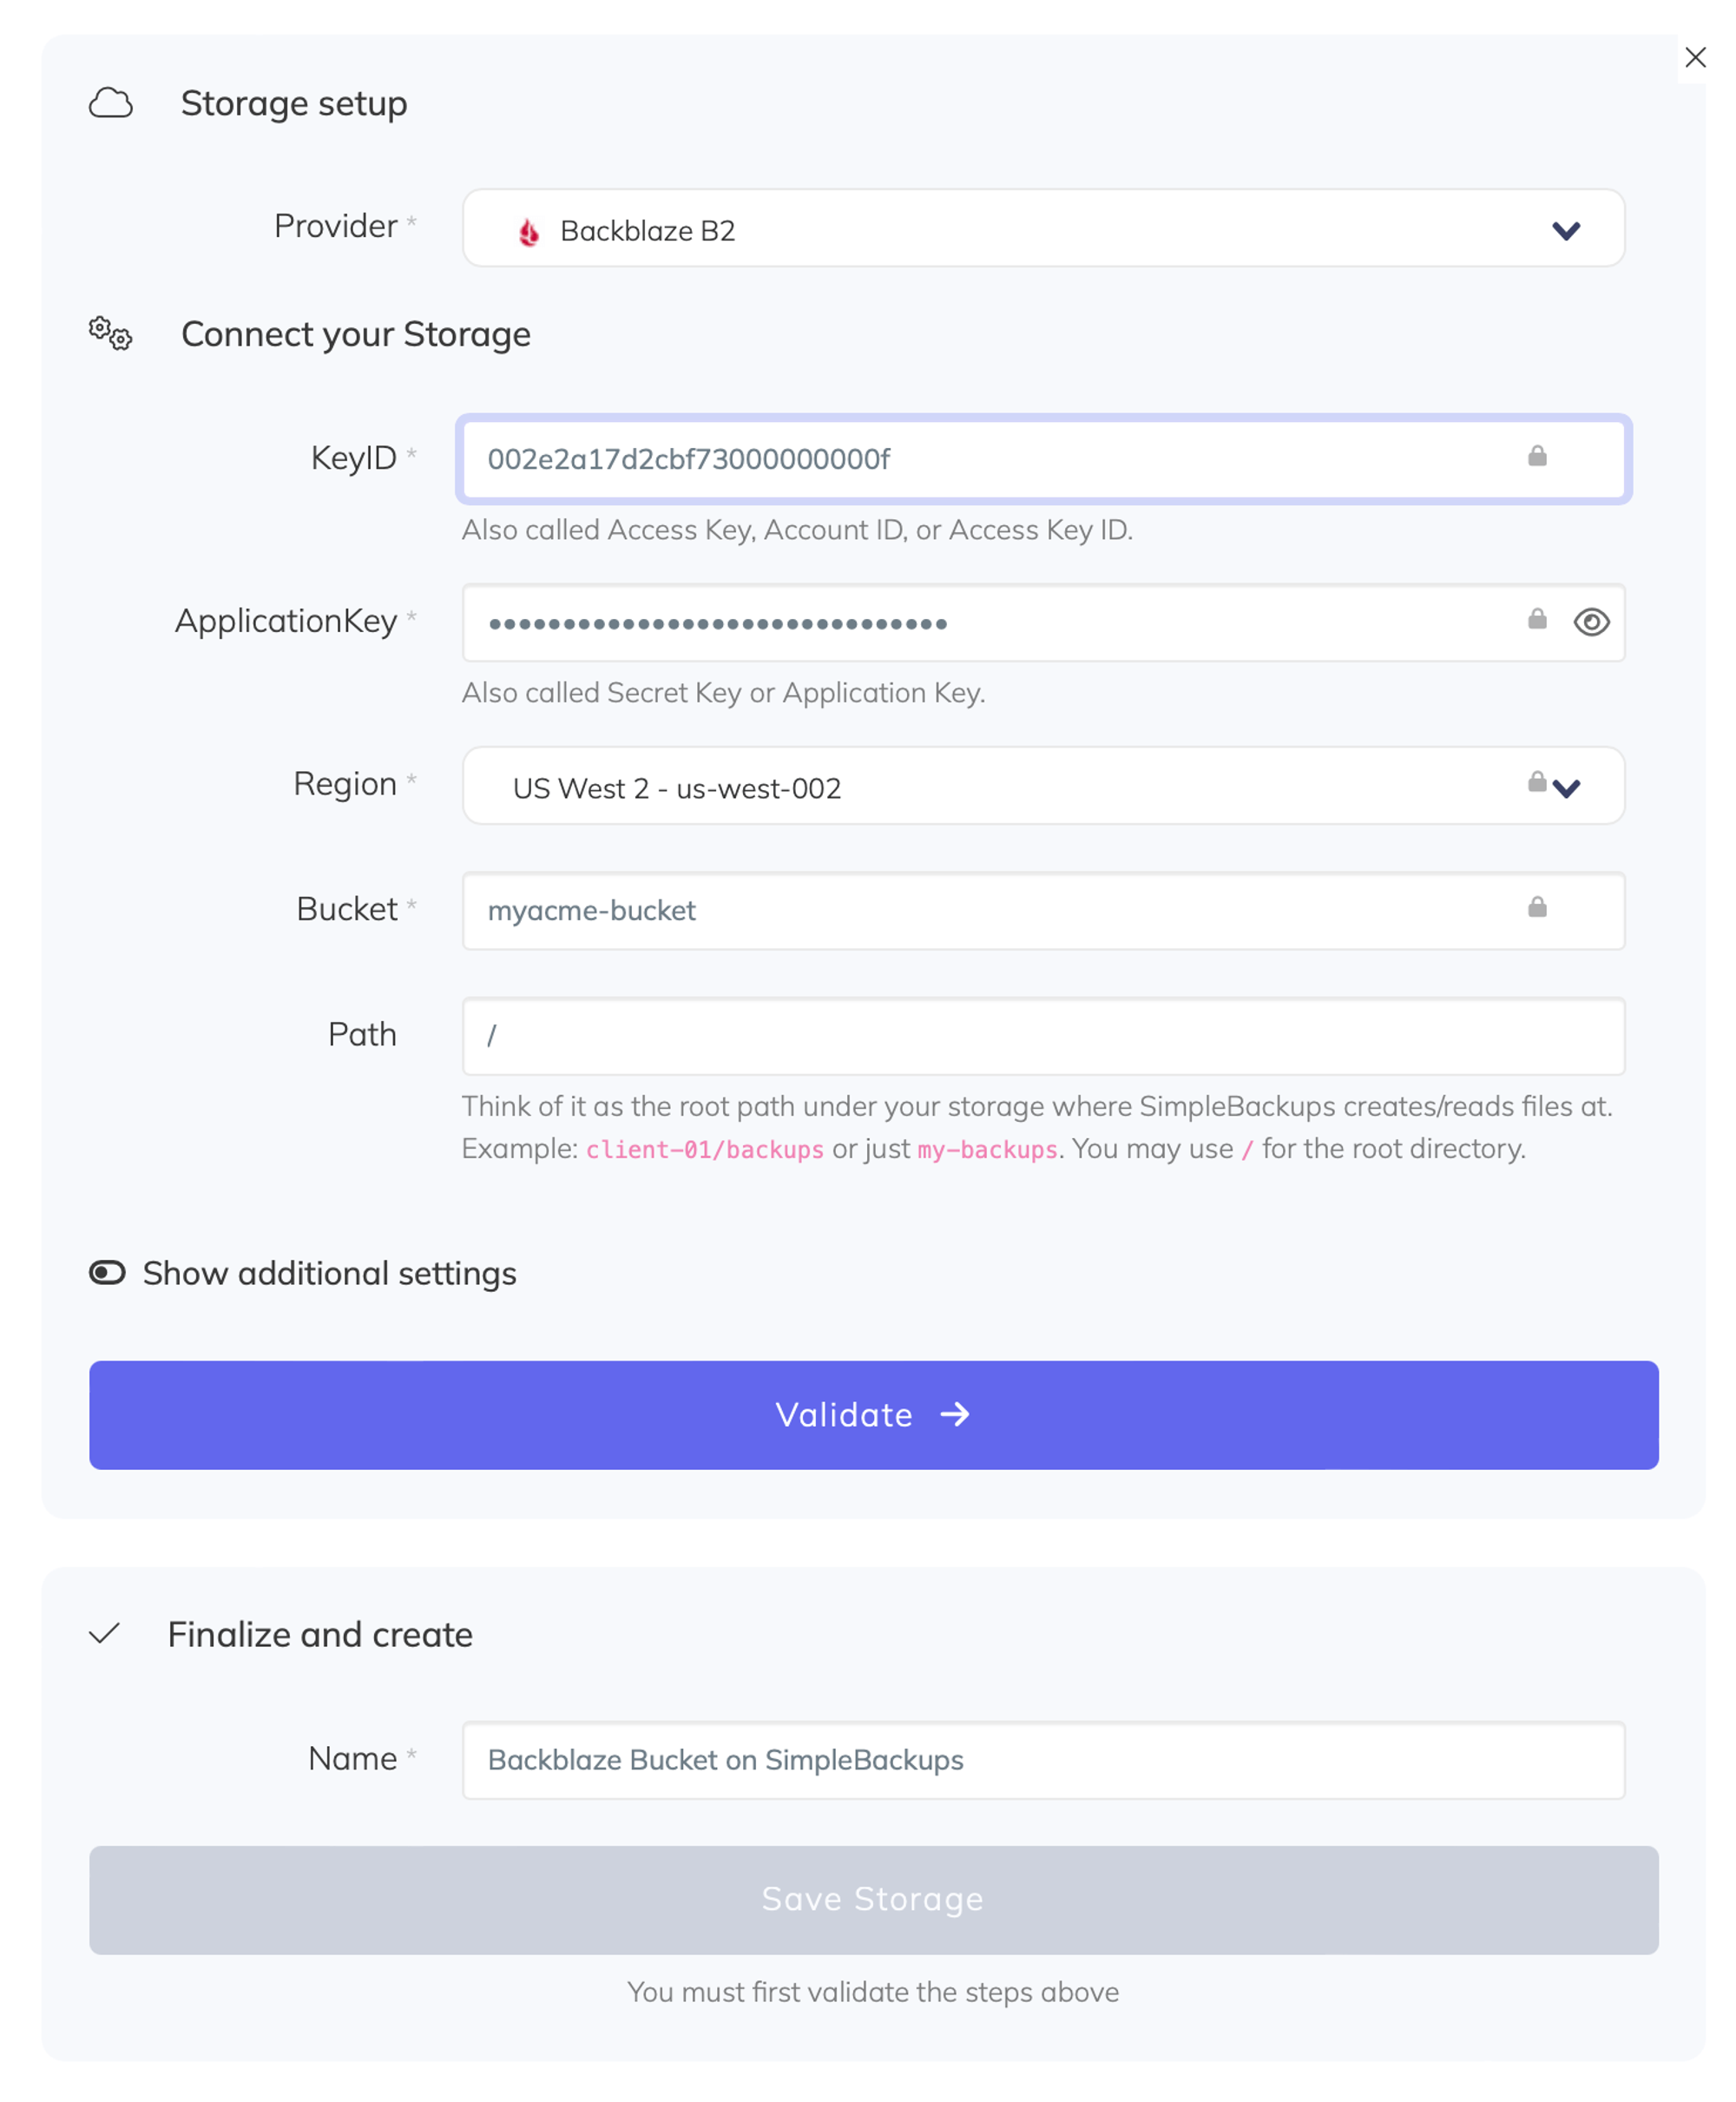
- Select "Backblaze B2" as storage provider and fill in the "Connect your storage" form with the information from step 1 and 2.

You'll have to input :
- Key: KeyID described in (step 2)
- Secret: applicationKey described in (step 2)
- Region: Bucket region described in (step 1)
- Bucket: Bucket name described in (step 1)
- Give your storage a name (usually we like to use the Bucket name) and click on "Save new storage".
Last updated on August 4, 2021