Hetzner
Step by step guide to automate Hetzner server snapshots and back them up on a custom schedule, daily, hourly, weekly, etc.
Step 1. Connect your Hetzner account to SimpleBackups
In this step, we will generate a unique API Token on Hetzner that will allow us to automate Hetzner snapshots from SimpleBackups dashboard.
Obtain your Hetzner API credentials as shown below: go to https://console.hetzner.cloud/projects/ and choose your project,
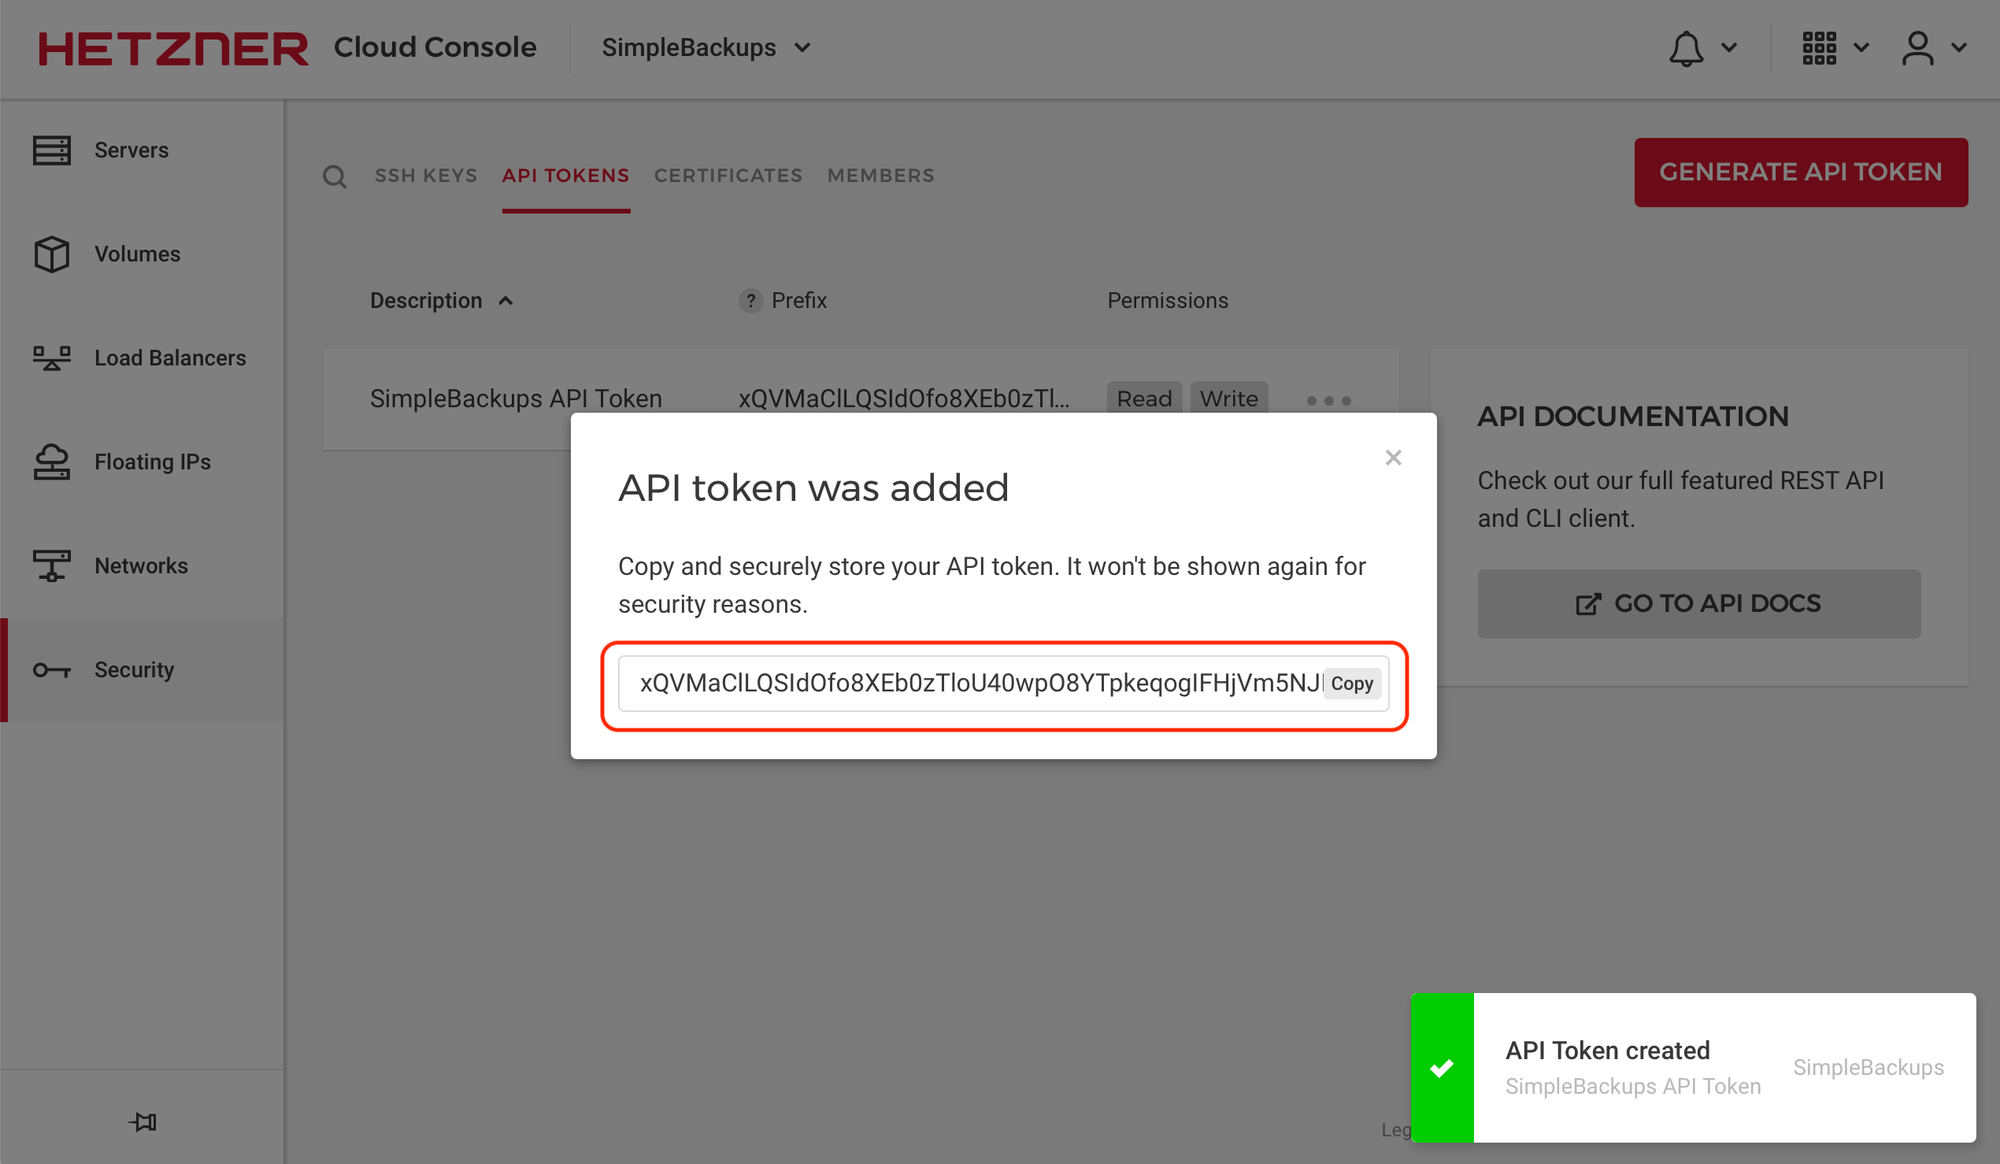
then click Security => API Tokens => Generate API Token
![](https://www.notion.so/image/https%3A%2F%2Fdownloads.intercomcdn.com%2Fi%2Fo%2F300188150%2Ff0f14bdee9081a0938d47703%2FSimpleBackups-Hetzner-Create-API-Token-Credentials-Step1.png?table=block&id=cd4a87da-ecad-49d4-9bfe-888ce31fe8c0&cache=v2)
Choose the Read & Write permission, enter a name for your token, then click Generate API Token
![](https://www.notion.so/image/https%3A%2F%2Fdownloads.intercomcdn.com%2Fi%2Fo%2F300188254%2Fc95a588f16f21c3e672c86ed%2FSimpleBackups-Hetzner-Generate-API-Token-Credentials-Step2.png?table=block&id=3684af0f-ed37-48a7-8e3a-9c7dc64dcbe3&cache=v2)
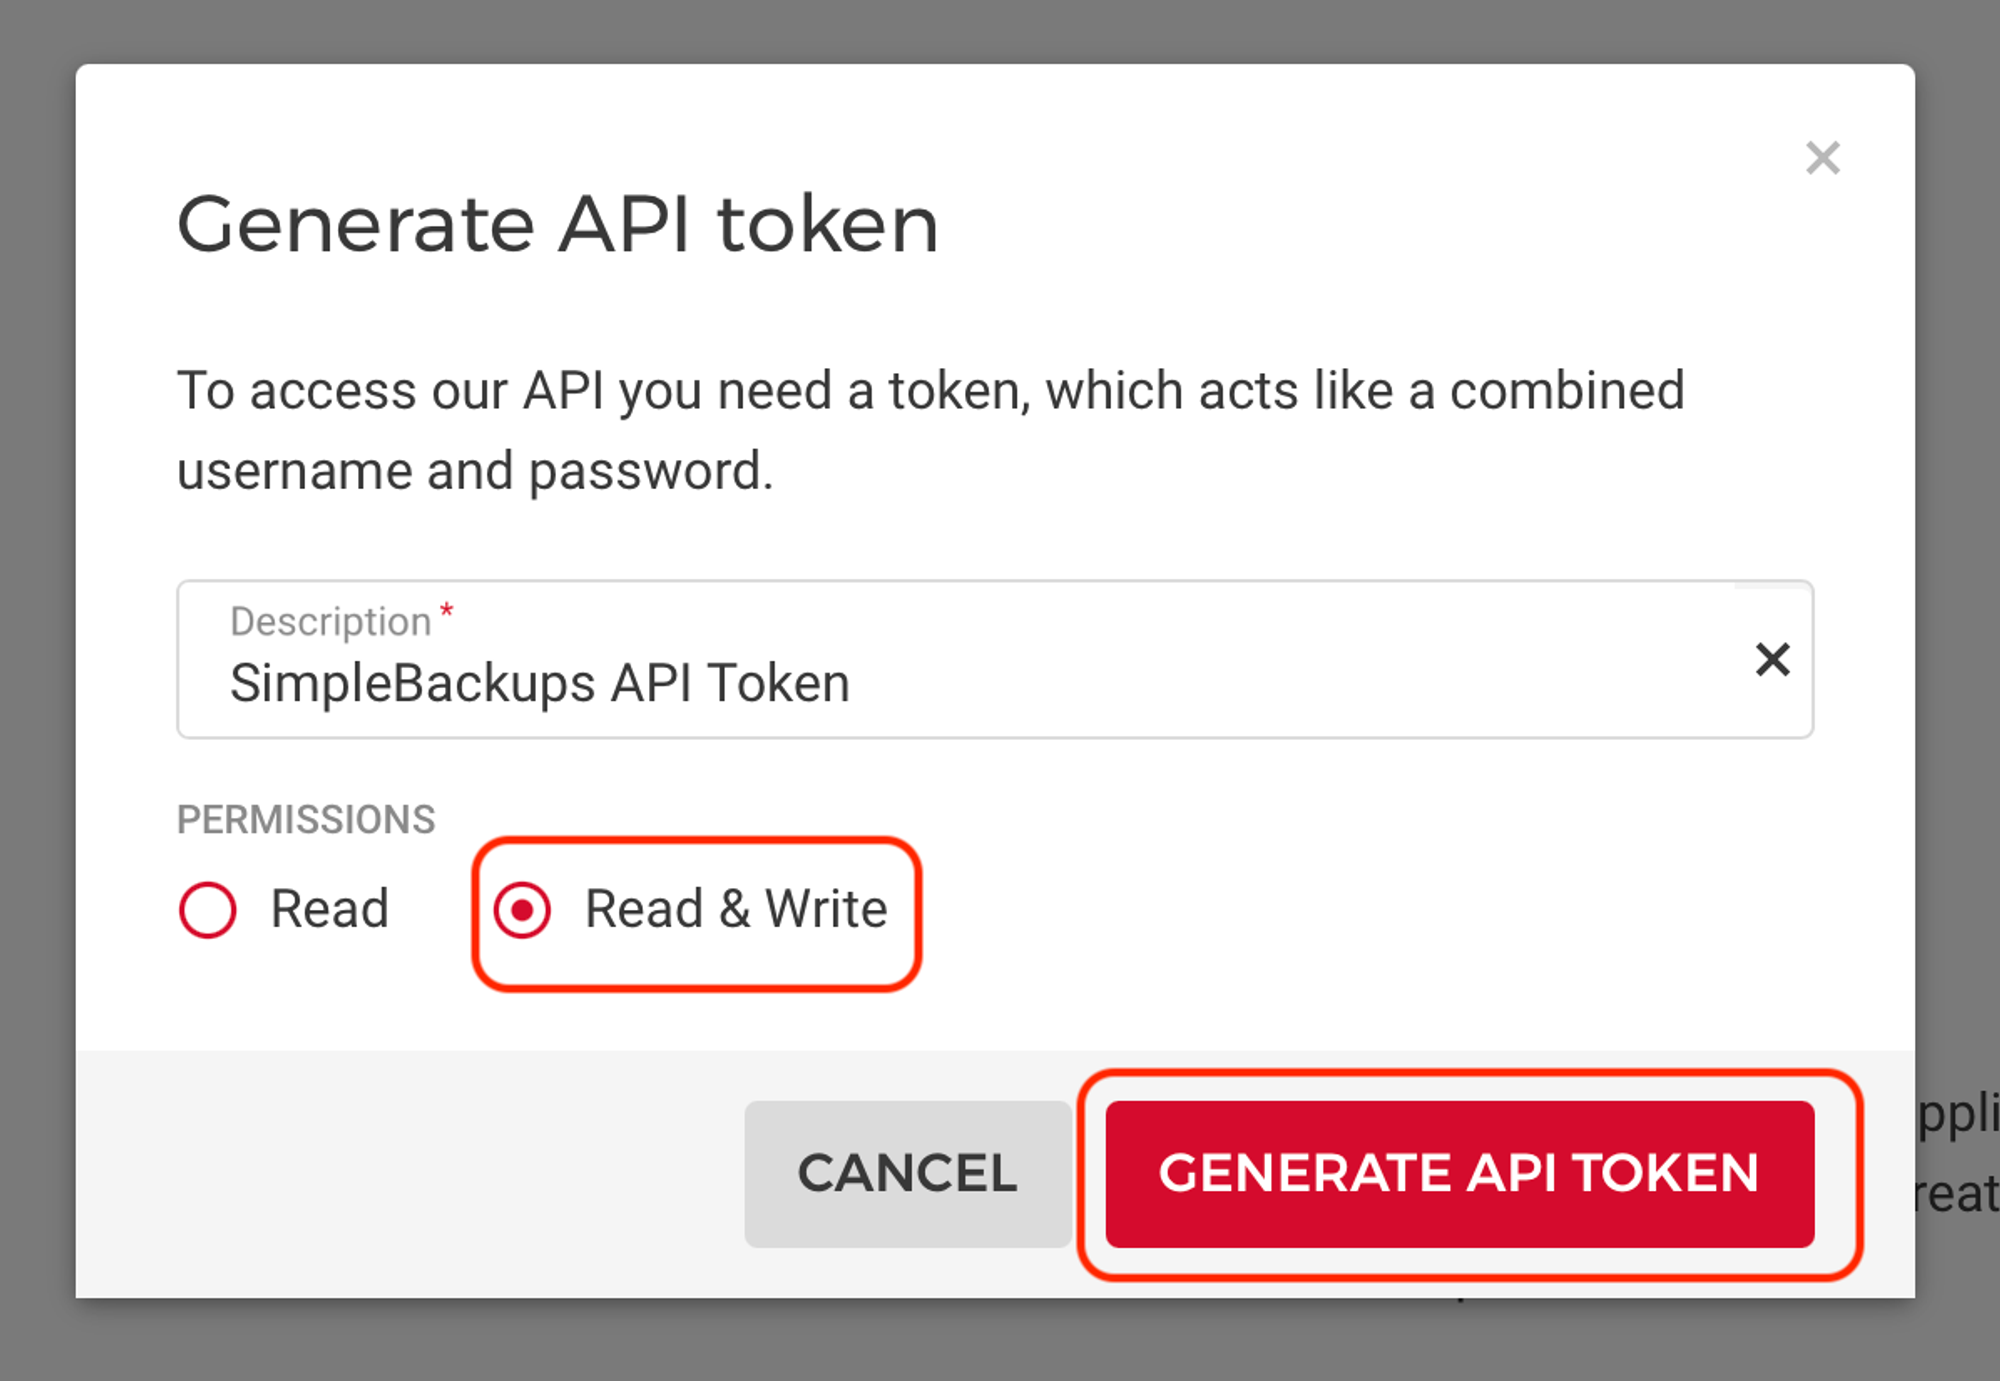
Your token will be shown once. Make you copy it and immediately add it to SimpleBackups.
![](https://www.notion.so/image/https%3A%2F%2Fdownloads.intercomcdn.com%2Fi%2Fo%2F300188489%2F97585adf53fee365338620b5%2FSimpleBackups-Hetzner-Create-API-Token-Credentials-Step3.png?table=block&id=3b962bd2-1804-47d9-a7d8-87b5bb1c2cfb&cache=v2)
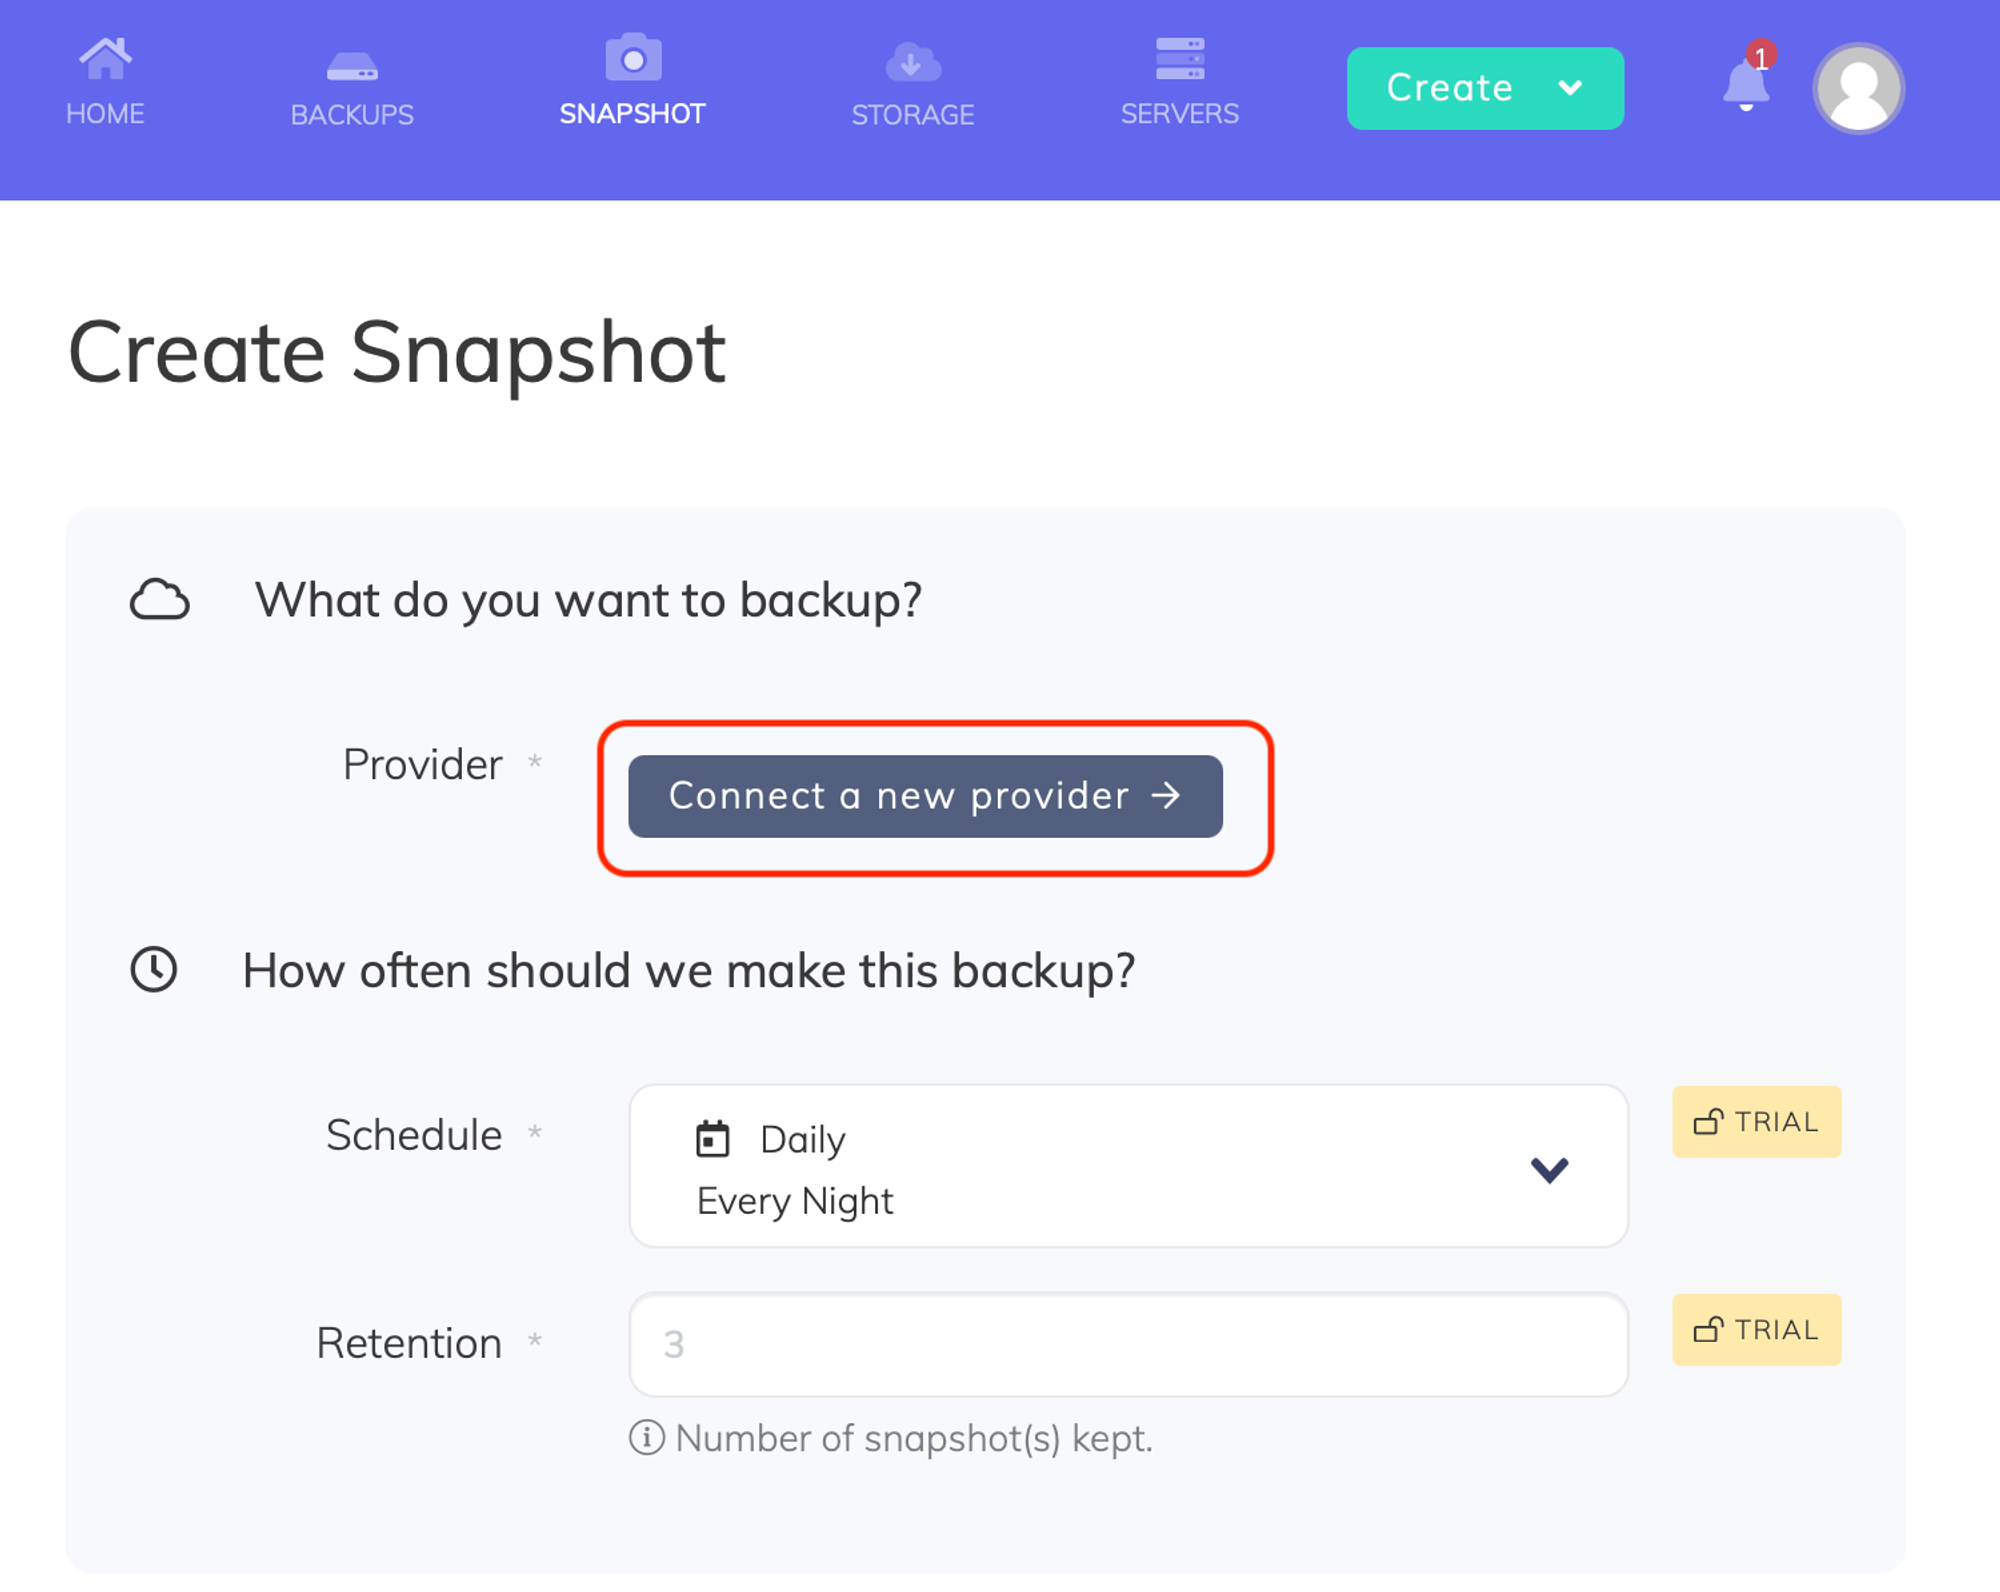
Afterwards, create a new provider on SimpleBackups with your Hetzner API Token by going to then snapshots creation section and click Connect a new provider as shown.
![](https://www.notion.so/image/https%3A%2F%2Fdownloads.intercomcdn.com%2Fi%2Fo%2F300188585%2F0f21685dce5316b8f043f3fa%2FSimpleBackups-Hetzner-Connect-Add-Provider-Step1.png?table=block&id=ebf39369-ff86-4115-b8cb-c42a502a04b8&cache=v2)
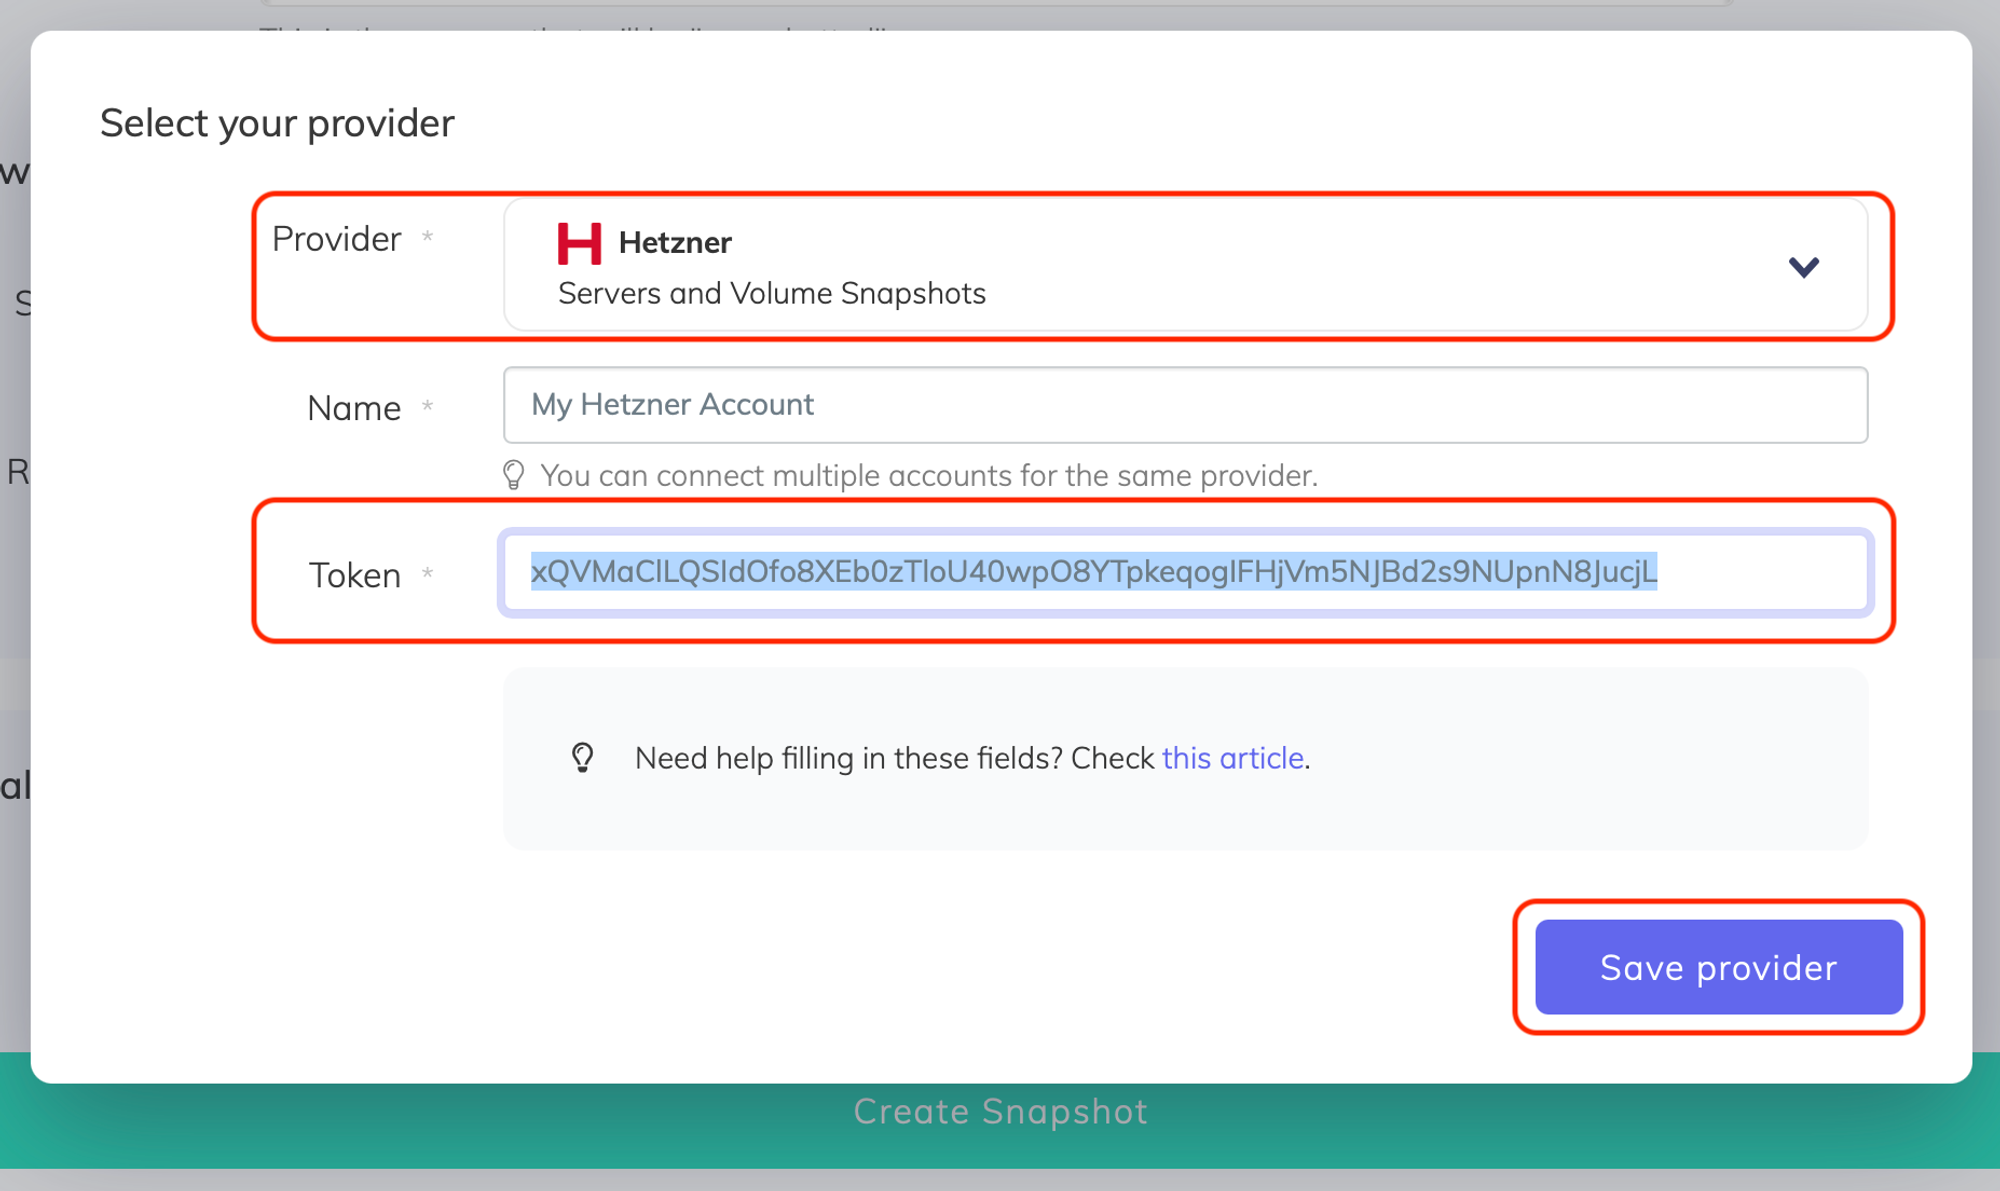
Select Hetzner from the Provider dropdown list, enter a name for your Hetzner account, then paste the Token we obtained in the previous step and click save provider.
![](https://www.notion.so/image/https%3A%2F%2Fdownloads.intercomcdn.com%2Fi%2Fo%2F300192831%2F89b38e716f6829242695ac6f%2FSimpleBackups-Hetzner-Connect-Add-Provider-Step2.png?table=block&id=8085a11e-7277-4d70-91ce-603007a5af75&cache=v2)
Step 2. Create a Hetzner snapshot backup job.
![](https://www.notion.so/image/https%3A%2F%2Fdownloads.intercomcdn.com%2Fi%2Fo%2F300194421%2Fa23893f3ddb66f0e9994c45b%2FSimpleBackups-Hetzner-Create-Snapshot-Volume-Backup-Job.png?table=block&id=6b3bc8ce-c3a2-47ba-9521-4d6b188f1562&cache=v2)
2a. Choose your Hetzner account
2b. Choose the server to automate its snapshots: choose a server under the Resource Type. The Resource dropdown will be populated by all the Hetzner resources accessible under your Hetzner account / project.
2c. Set the retention you need: this is a number of snapshots we will keep, anything more than this number will be pruned/rotated automatically for you.
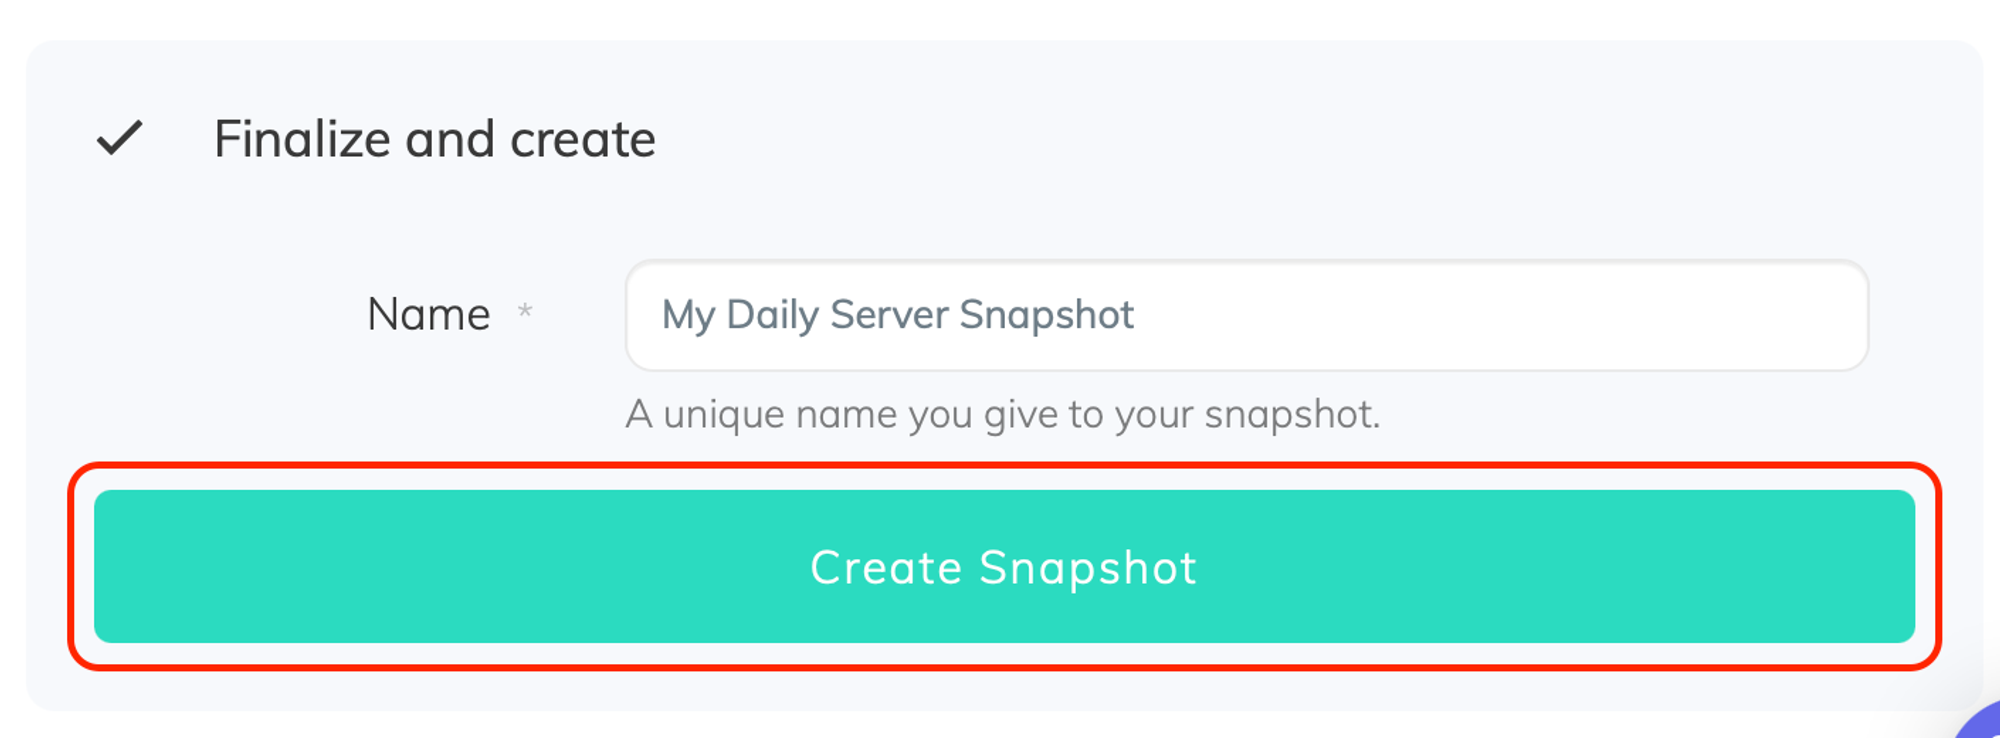
2d. Save the snapshot backup job: give your snapshot backup job a friendly name, then click Create Snapshot
![](https://www.notion.so/image/https%3A%2F%2Fdownloads.intercomcdn.com%2Fi%2Fo%2F300197330%2F3552930a22f9b5429831e374%2FSimpleBackups-Hetzner-Create-Snapshot.png?table=block&id=8514ee05-5ef1-4ca4-b663-60028433fca4&cache=v2)
Last updated on August 6, 2021