DigitalOcean
Step by step guide to automate DigitalOcean server and volume snapshots on a custom schedule, daily, hourly, weekly, etc.
How to automate DigitalOcean Server and Volume Snapshots?
A step-by-step guide to automate DigitalOcean server and volume snapshots and back them up on a custom schedule, daily, hourly, weekly, etc.
The following guide will help you, step by step, automate your DigitalOcean droplet and volume snapshots. The steps are very easy and will only involve minimal effort.
Afterward, you will be able to take snapshots, automatically on your own terms, whether you need to take them daily, weekly, every couple of hours or on-demand using our API. You will also have the option to choose the number of snapshots to keep on your provider to save snapshot storage cost.
Prerequisites
- Create a SimpleBackups account
- Create a DigitalOcean account
Step 1: Create a SimpleBackups Account
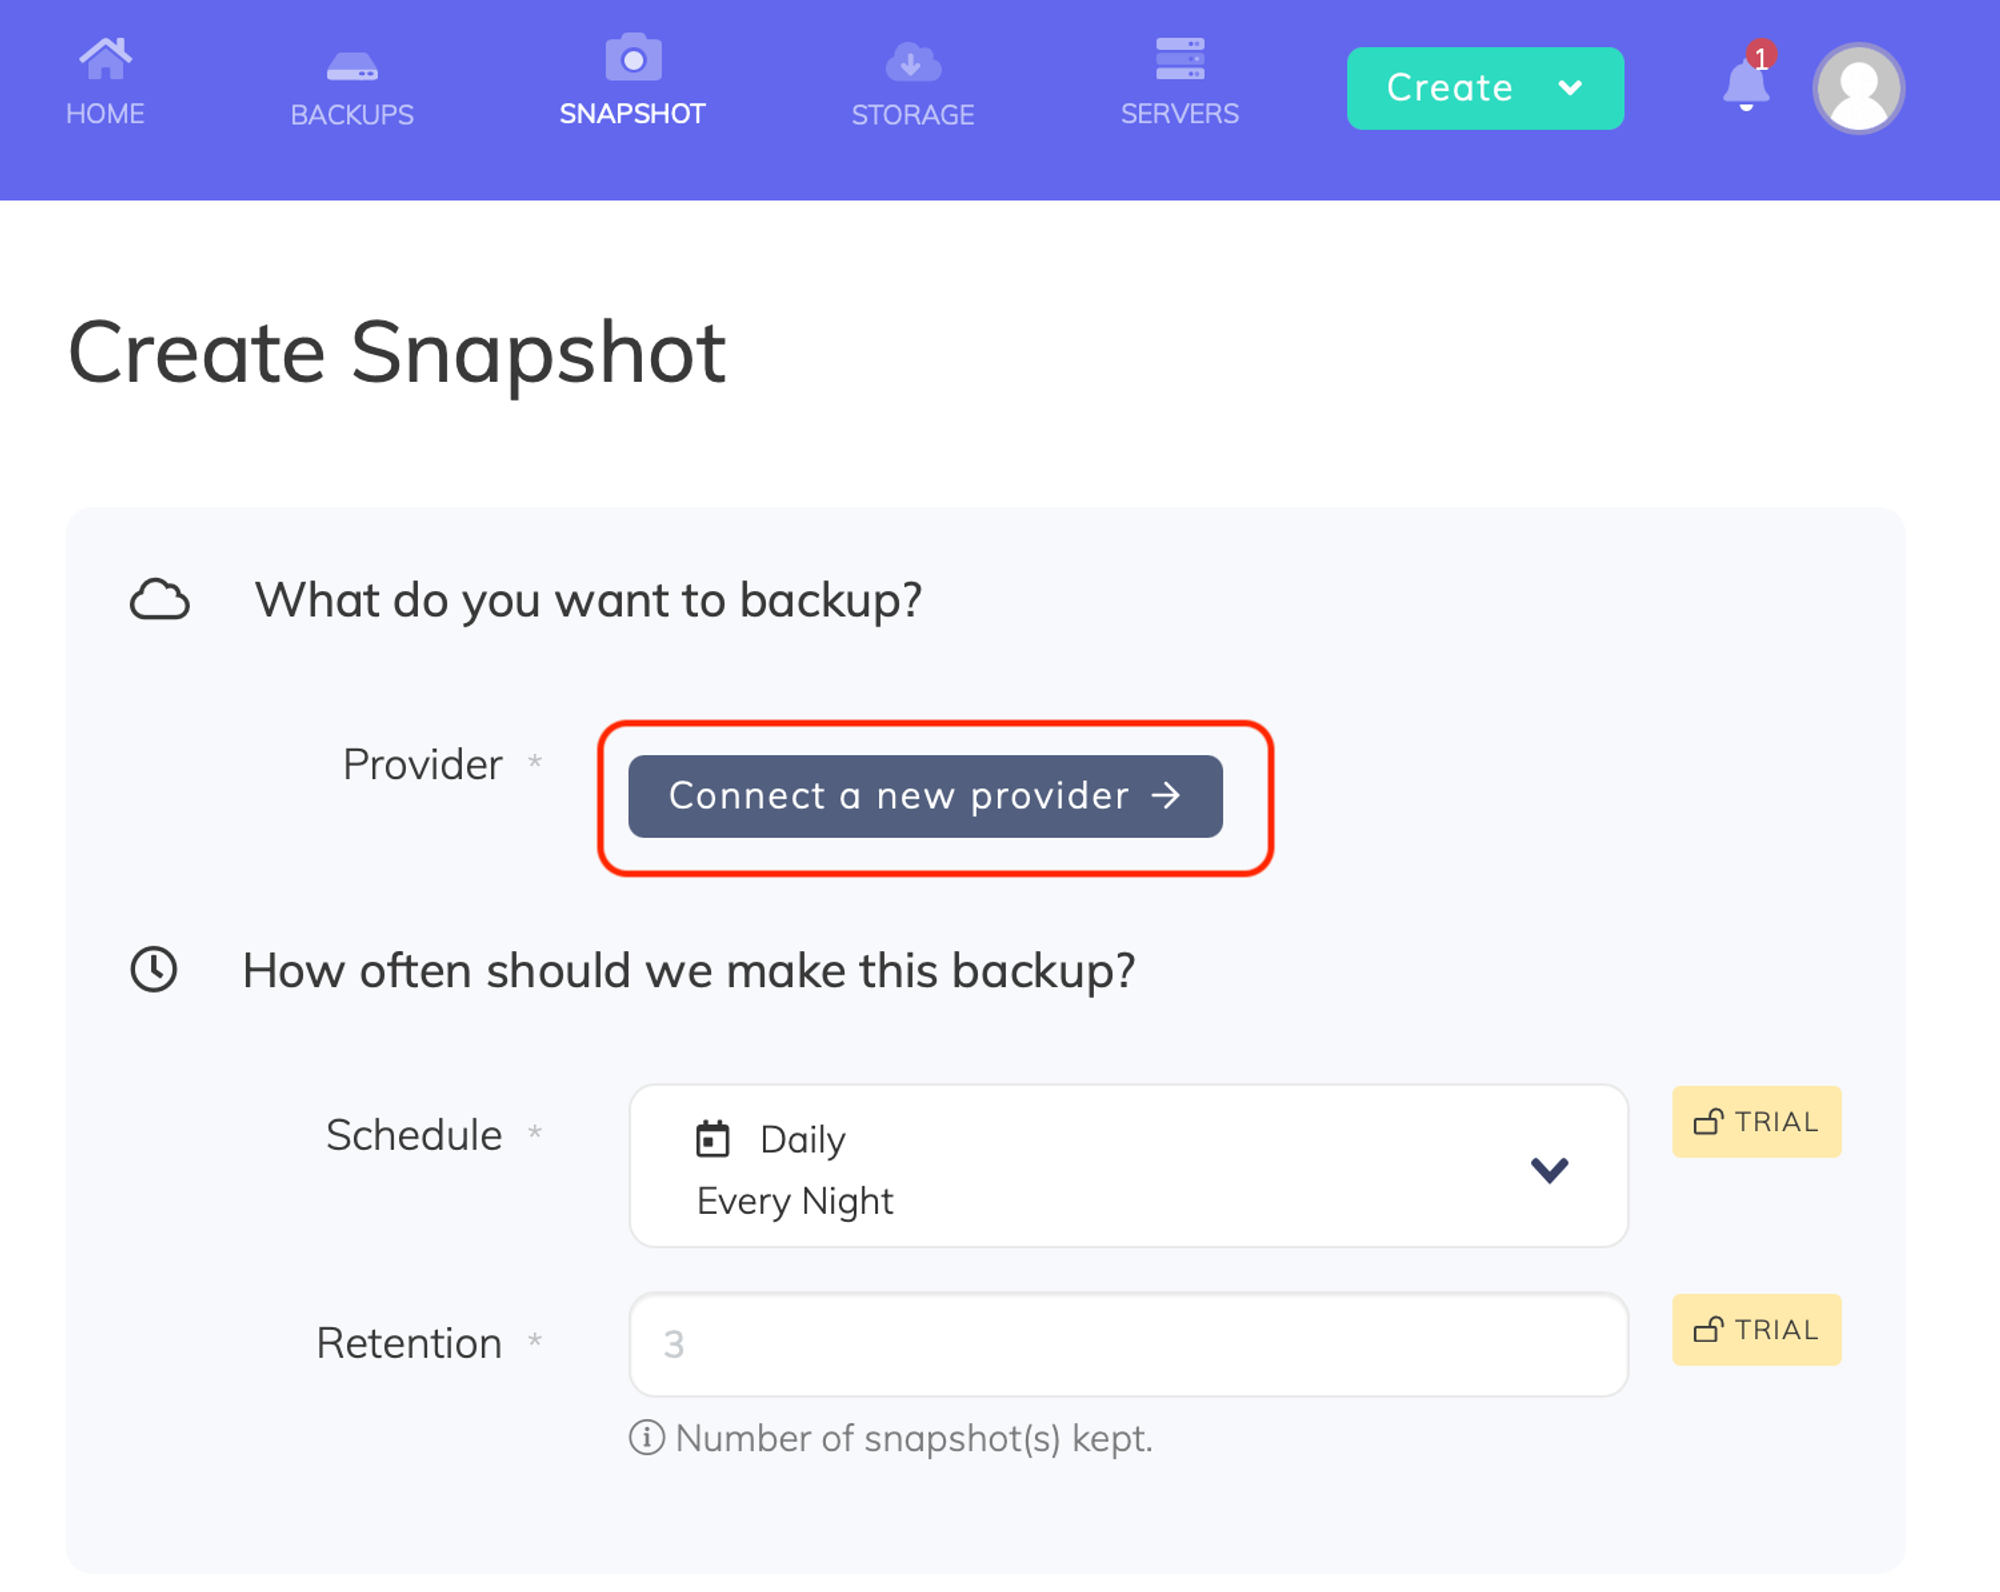
Create or log in to your SimpleBackups account, then head to the snapshot creation section.
Step 2: Connect DigitalOcean to SimpleBackups
In this step, we will connect DigitalOcean to SimpleBackups simply using the authorization flow (just login to DigitalOcean and authorize SimpleBackups), which will allow us to automate DigitalOcean snapshots from SimpleBackups dashboard.
Go to the snapshot creation section and click Connect a new provider as shown.
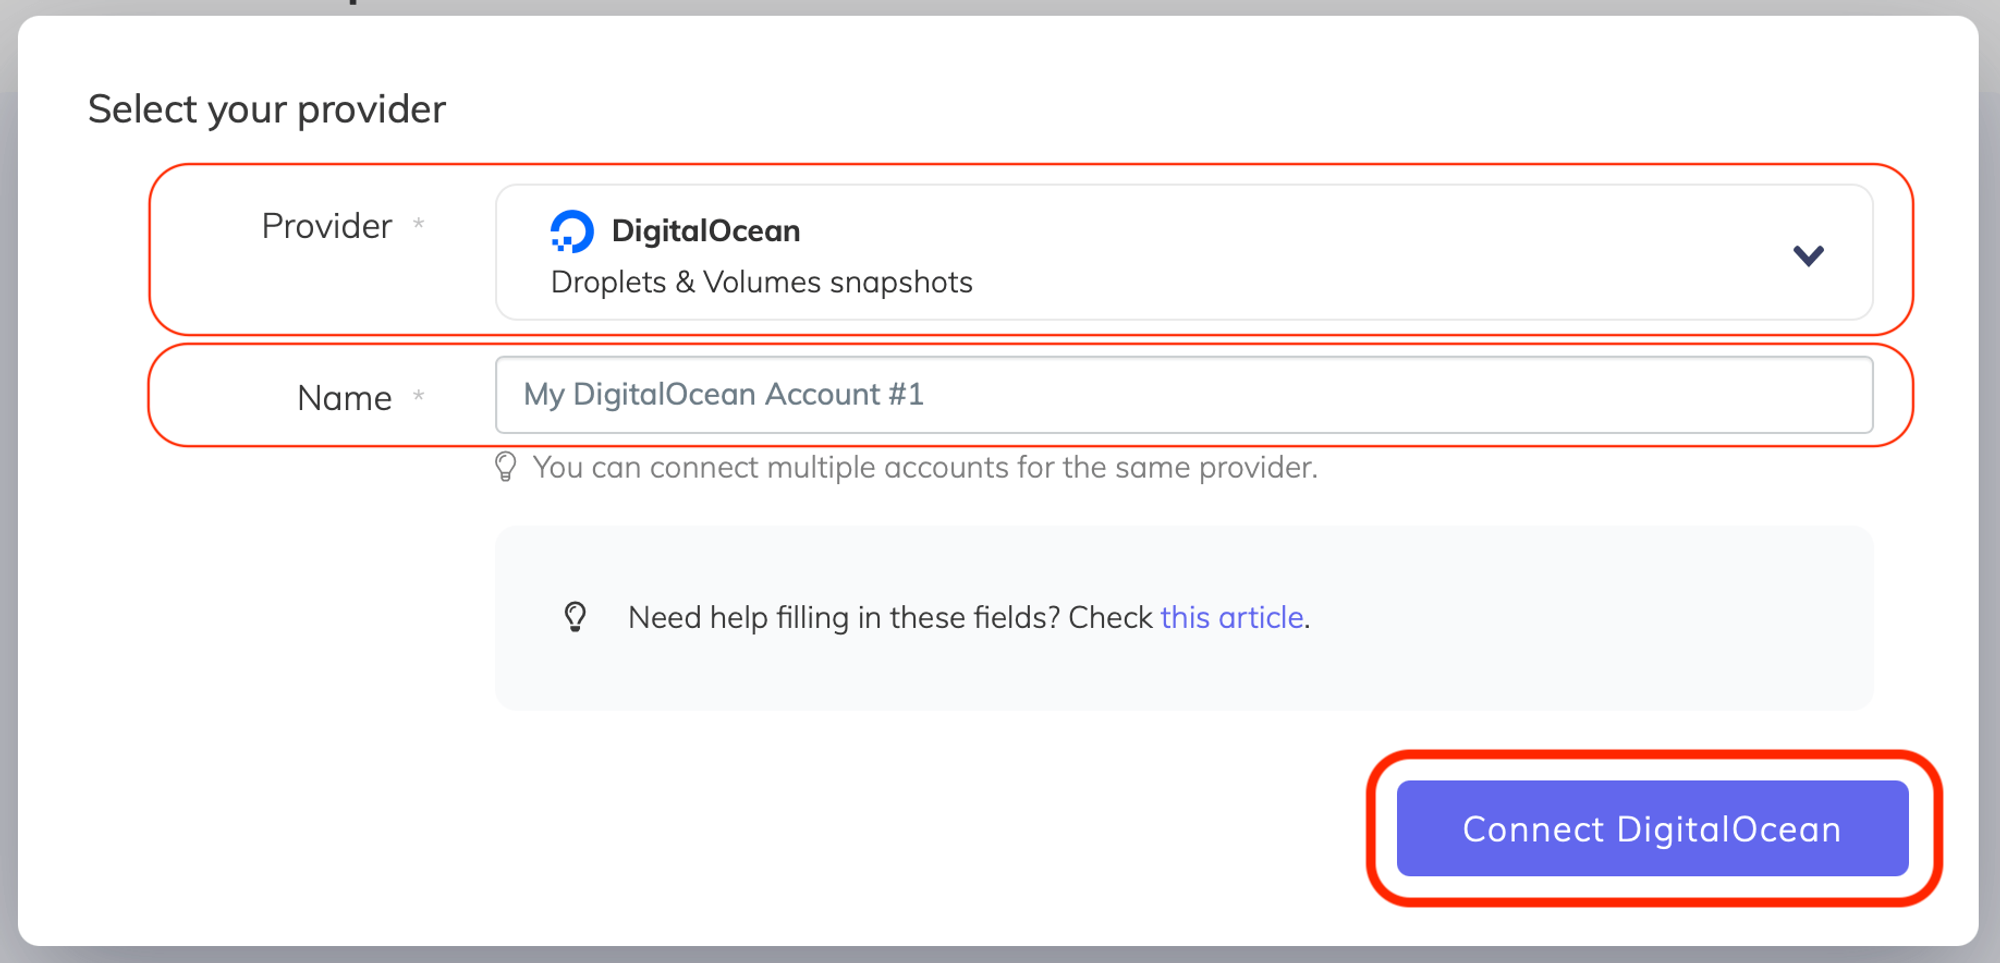
Select DigitalOcean from the Provider dropdown list, enter a name for your DigitalOcean account, then click Connect DigitalOcean.
Step 2a: Authorize SimpleBackups to Connect to DigitalOcean
You will be redirected to login screen of DigitalOcean.
✅ Make sure you are logged in to the DigitalOcean account you would like to connect
✅ Make sure you leave the checkbox next to your account email address checked
✅ Click Authorize application to complete the connection step

Step 3: Create a DigitalOcean snapshot backup job
In this step, and after connecting our DigitalOcean account, we will simply create the snapshot backup job and select the needed server or volume.

Step 3a: Choose your DigitalOcean account
From the list, choose the DigitalOcean account you need to take its snapshots. You may add as many DigitalOcean accounts as you need under your SimpleBackups account.
Step 3b: Choose DigitalOcean server or volume resource
You could either choose a server under the Resource Type or choose a volume. The Resource dropdown will be populated by all the DigitalOcean resources accessible under your DigitalOcean account / project.
Step 3c: Set the retention you need
The Retetion is a number of snapshots we will keep, anything more than this number will be pruned/rotated automatically for you.
Step 3d: Save the snapshot backup job
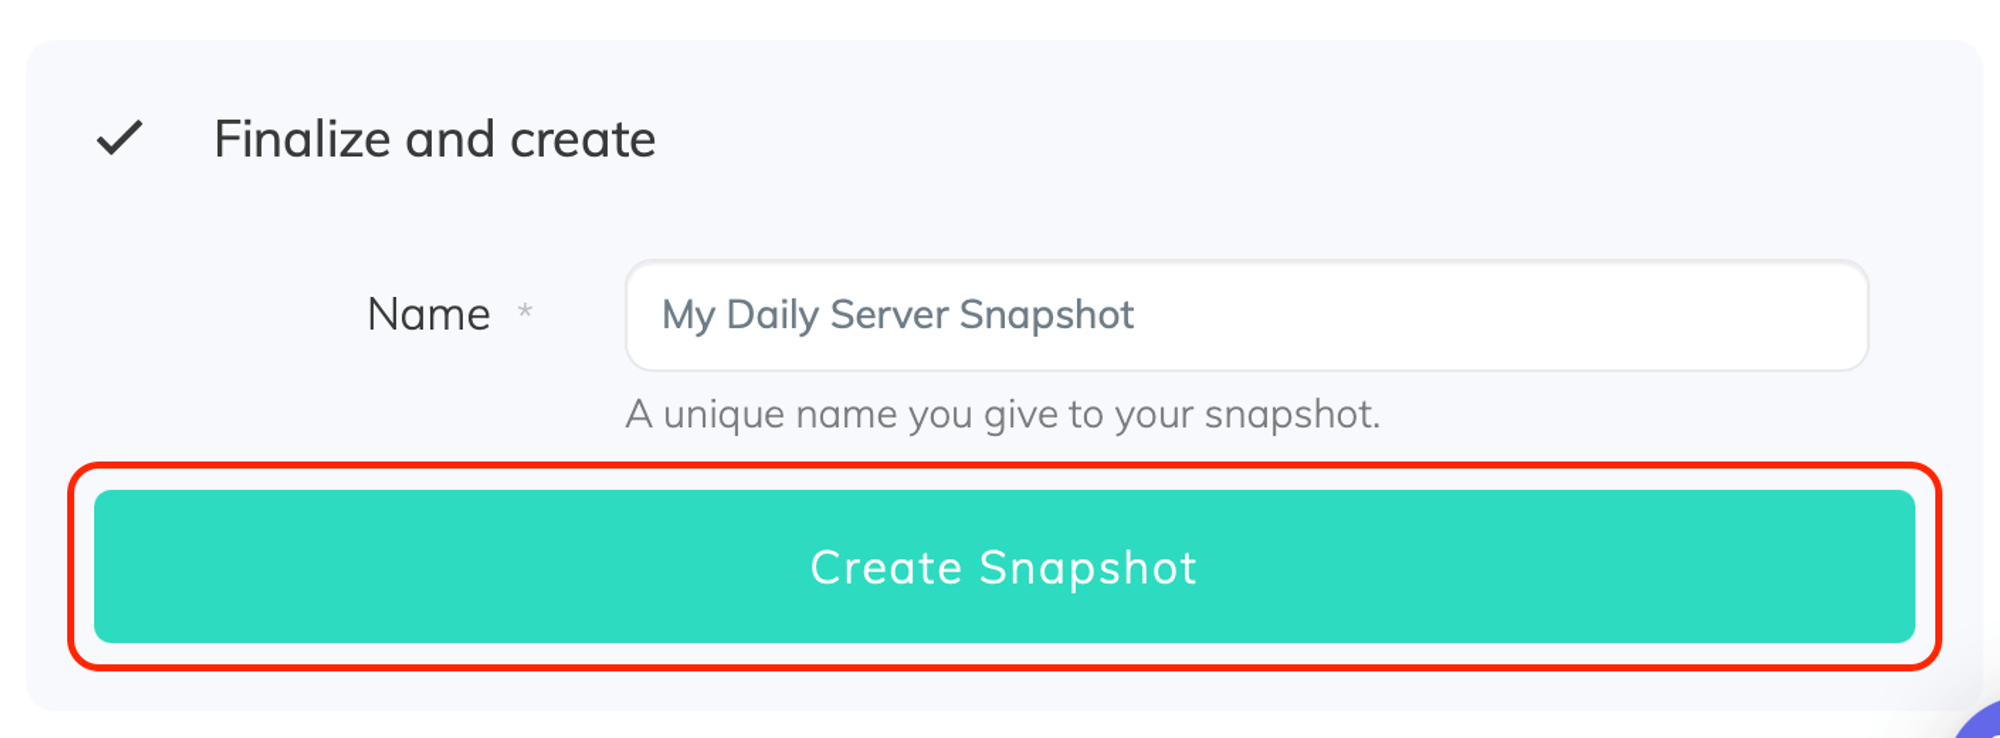
Finally, give your snapshot backup job a friendly name, then click Create Snapshot.
Congratulations, you now have an automated DigitalOcean snapshot backup.
Run it once manually (using the "Run" snapshot button from the snapshots list) and you'll trigger your first snapshot backup!
How to restore a Droplet Snapshot on DigitalOcean
If you are taking snapshots of your Droplets on DigitalOcean and want to restore one of these snapshots, you just need to follow these simple steps.
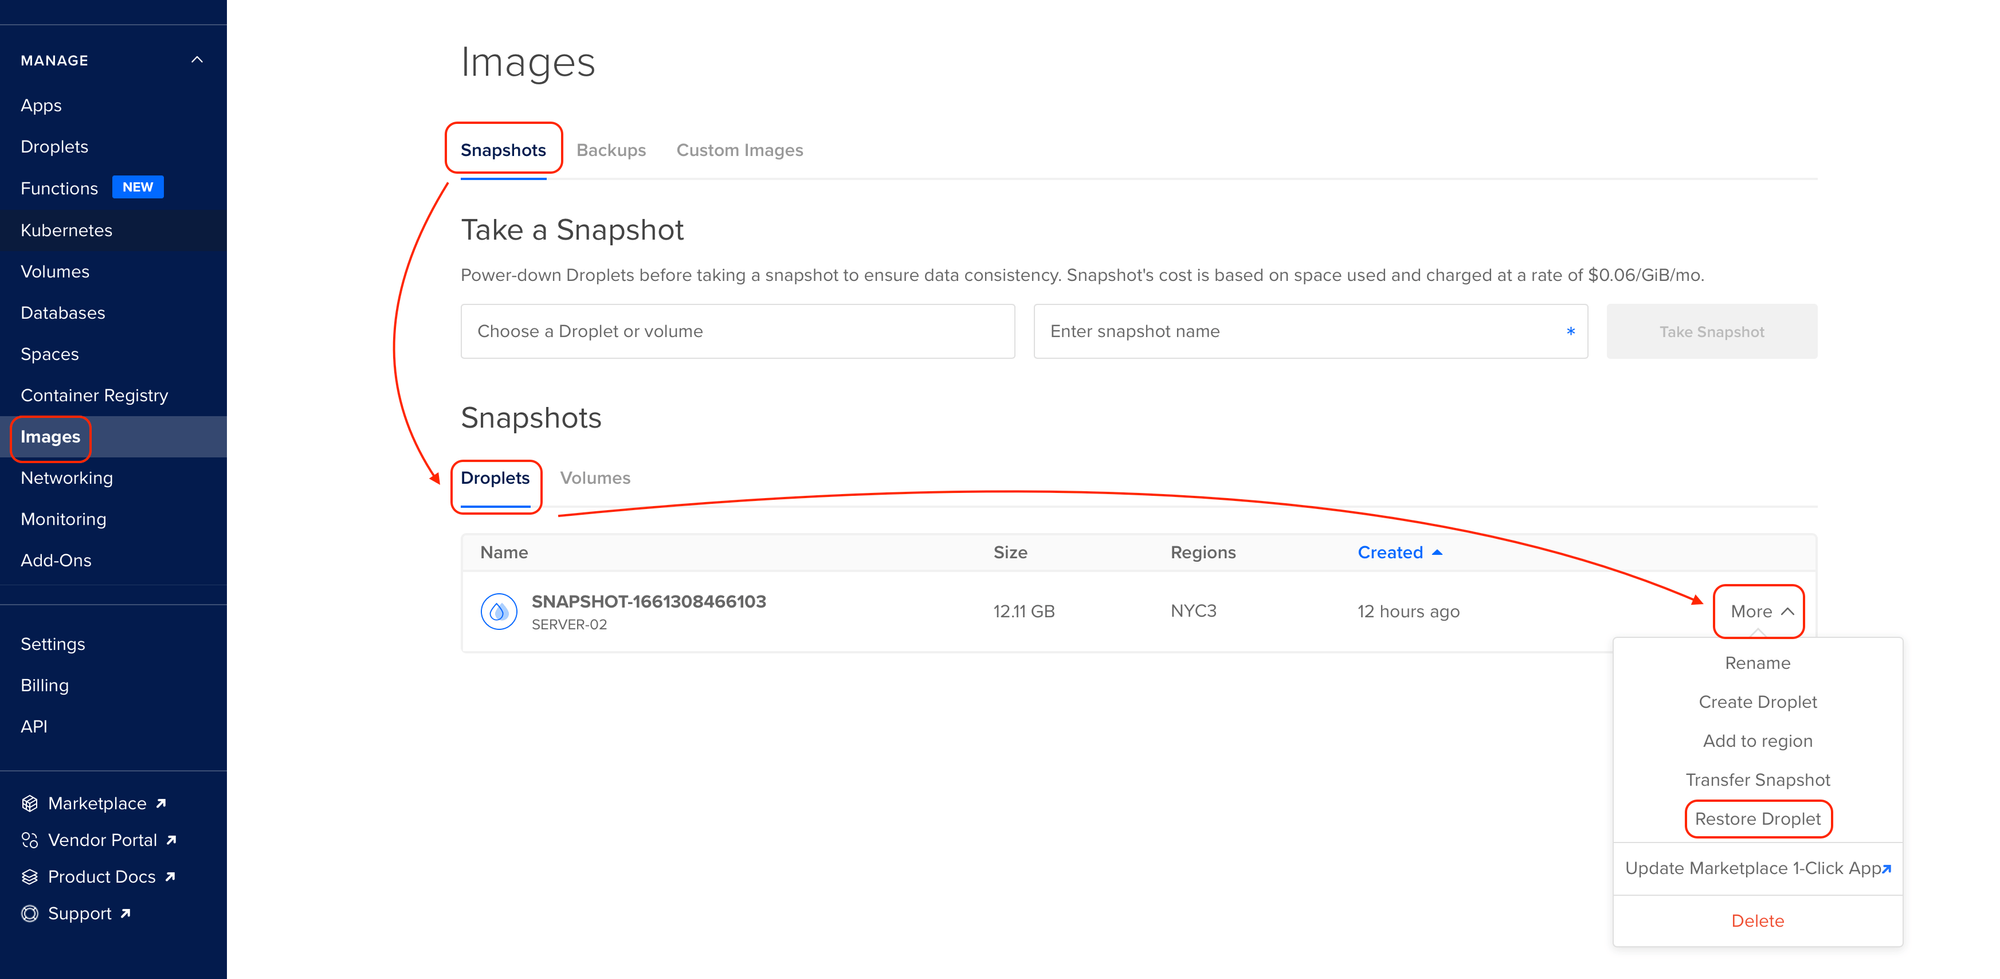
- Step 1: Click on Images
- Step 2: Click on Snapshots
- Step 3: Click on Droplets
- Step 4: Find the snapshot would like to restore then click on More
- Step 5: From the context method, click on Restore Droplet
How to configure “Multi Regions” Snapshots?
When creating a DigitalOcean Snapshot, you can have the snapshot transferred to multiple regions. This comes handy if you need to restore a Snapshot a another region if there is an outage the the original region of your Droplet.
- Simply select the regions you want the Snapshot to be copied to
- When your Snapshot runs, it will automatically transferred to all selected regions

FAQ
Message: “DigitalOcean "rate-limited - one request per 10m0s”
You might get this error message while running Droplet or Volume Snapshots on DigitalOcean if your DigitalOcean account wasn't verified yet.
In this case, make sure to reach out to DigitalOcean to speed up the process.More can be found here: https://docs.digitalocean.com/products/accounts/#:~:text=Account%20verification%20is%20automatic%20and,button%20on%20your%20billing%20page.
Last updated on August 6, 2021