Amazon Lightsail
Step by step guide to automate Amazon Lightsail server and volume snapshots on a custom schedule, daily, hourly, weekly, etc.
Create your AWS credentials
In order for SimpleBackups to manage your Amazon Lightsail Snapshots, a IAM Users to be created with the right policies.
We will create a custom policy first to allow us to manage your Amazon Lightsail Snapshots. The policy will include the least required permissions to manage snapshots.
Create a custom Lightsail policy for snapshots
- Connect to your AWS Console
- Head to IAM/Policies management page
- Click on "Create policy"
- Click on JSON and paste the custom policy below:
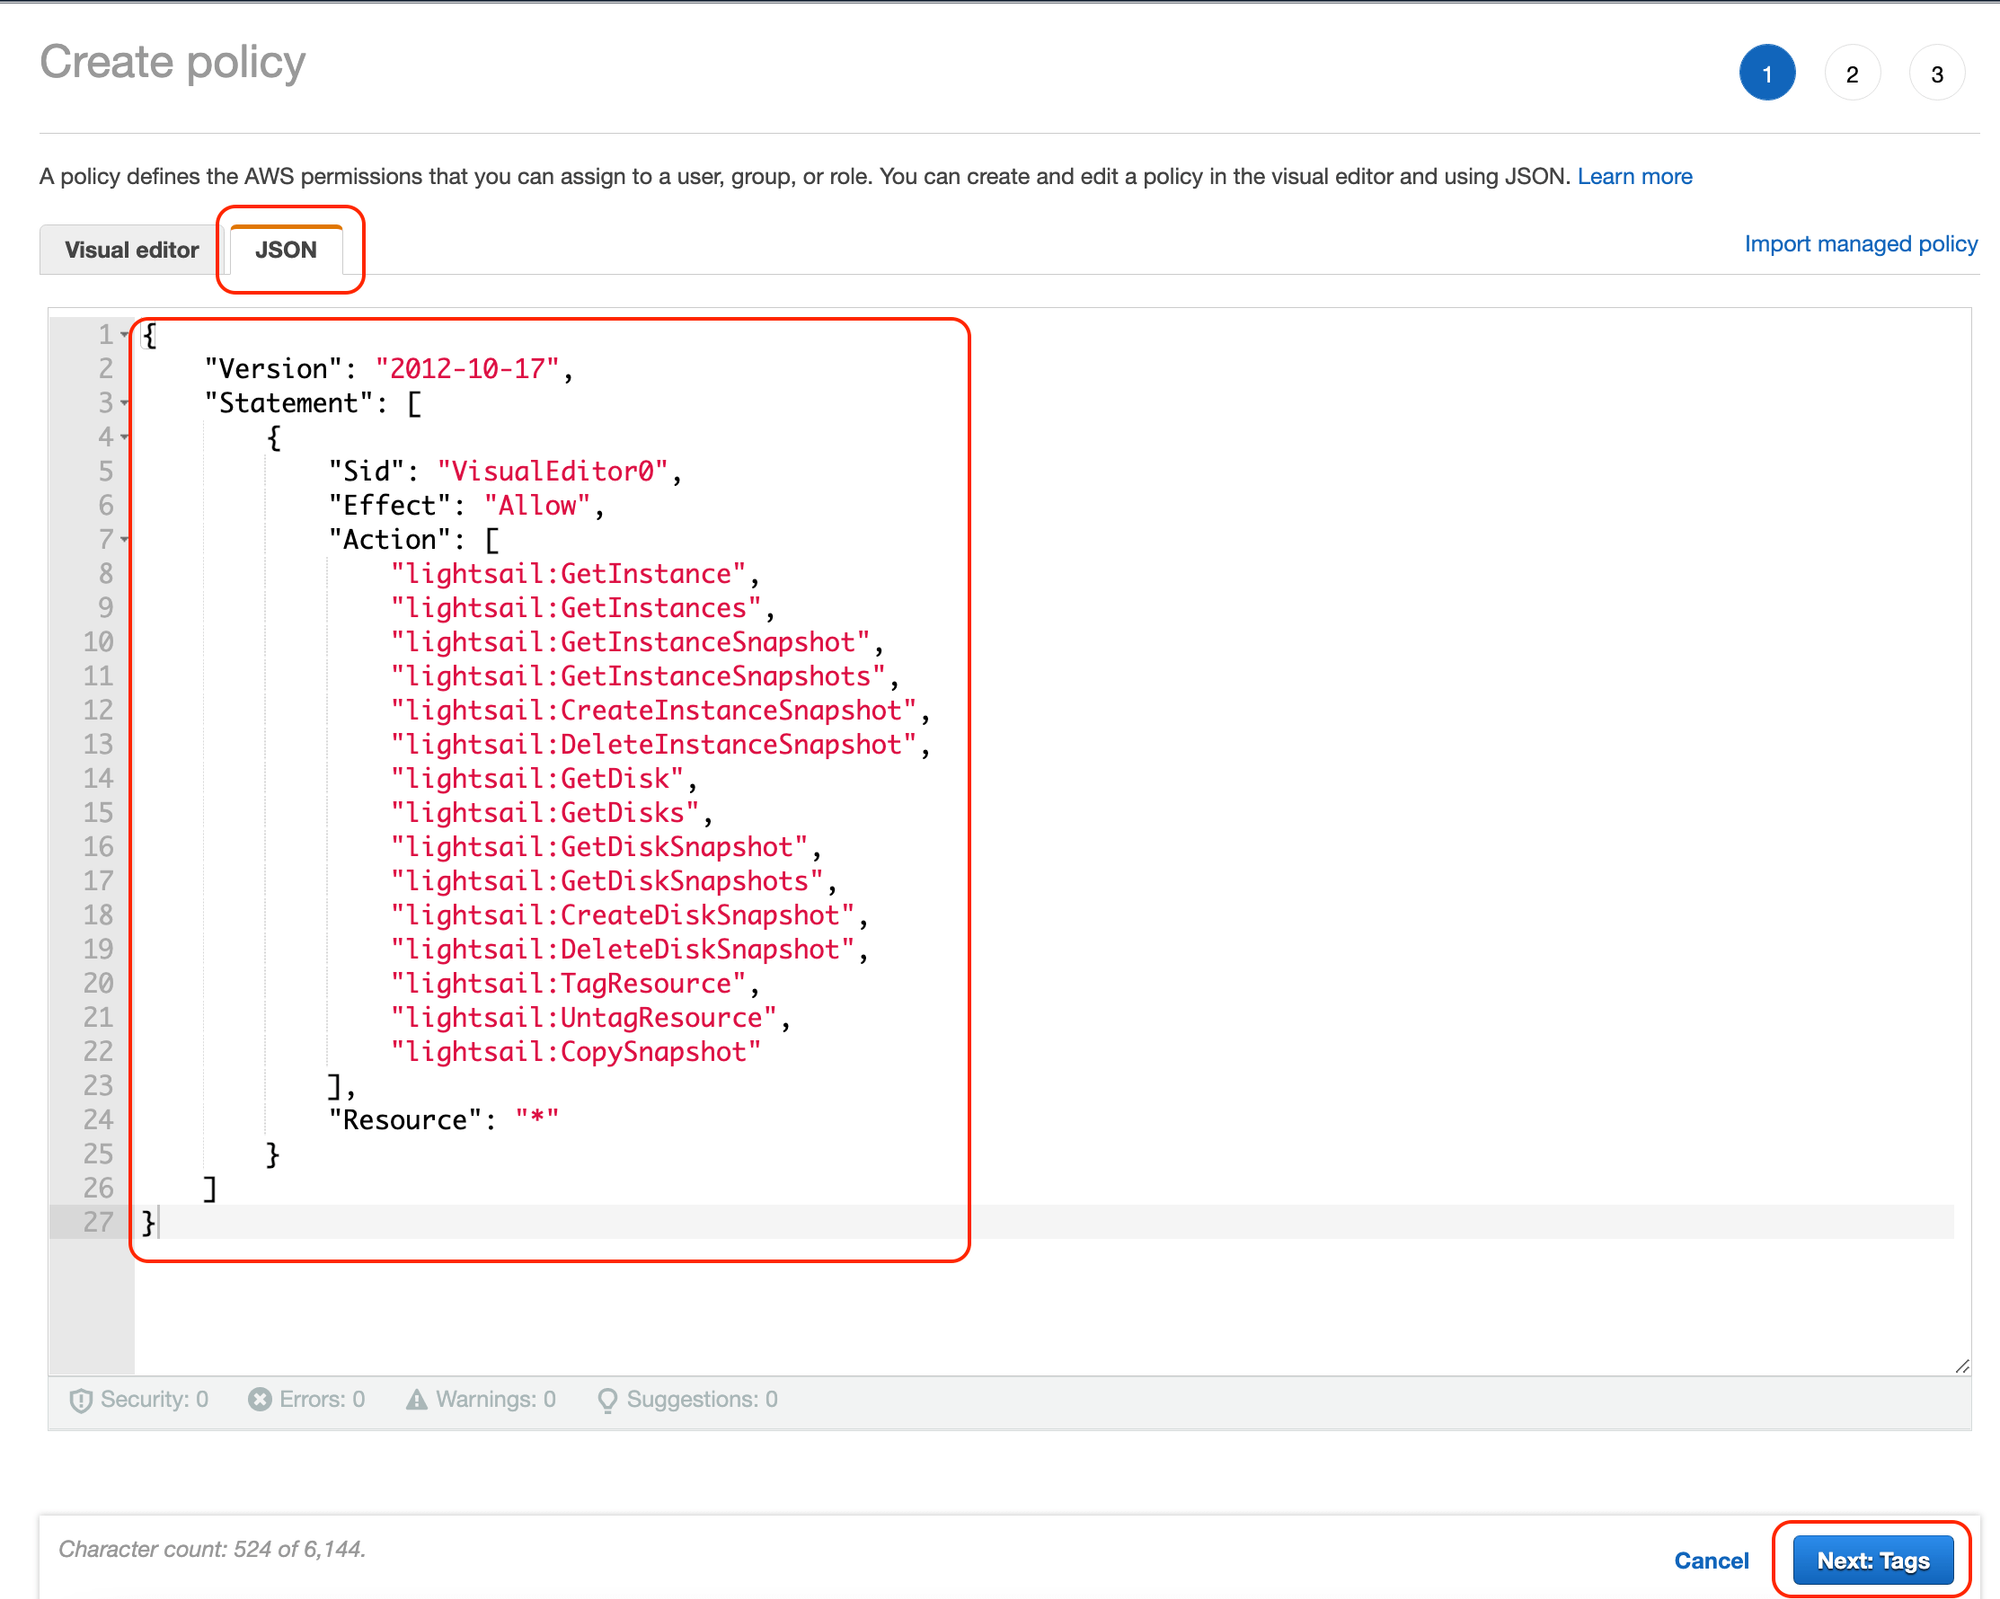
For your reference, here is the policy to copy and paste:
{
    "Version": "2012-10-17",
    "Statement": [
        {
            "Sid": "SimpleBackupsLightsailSnapshots",
            "Effect": "Allow",
            "Action": [
                "lightsail:GetInstance",
                "lightsail:GetInstances",
                "lightsail:GetInstanceSnapshot",
                "lightsail:GetInstanceSnapshots",
                "lightsail:CreateInstanceSnapshot",
                "lightsail:DeleteInstanceSnapshot",
                "lightsail:GetDisk",
                "lightsail:GetDisks",
                "lightsail:GetDiskSnapshot",
                "lightsail:GetDiskSnapshots",
                "lightsail:CreateDiskSnapshot",
                "lightsail:DeleteDiskSnapshot",
                "lightsail:TagResource",
                "lightsail:UntagResource",
                "lightsail:CopySnapshot"
            ],
            "Resource": "*"
        }
    ]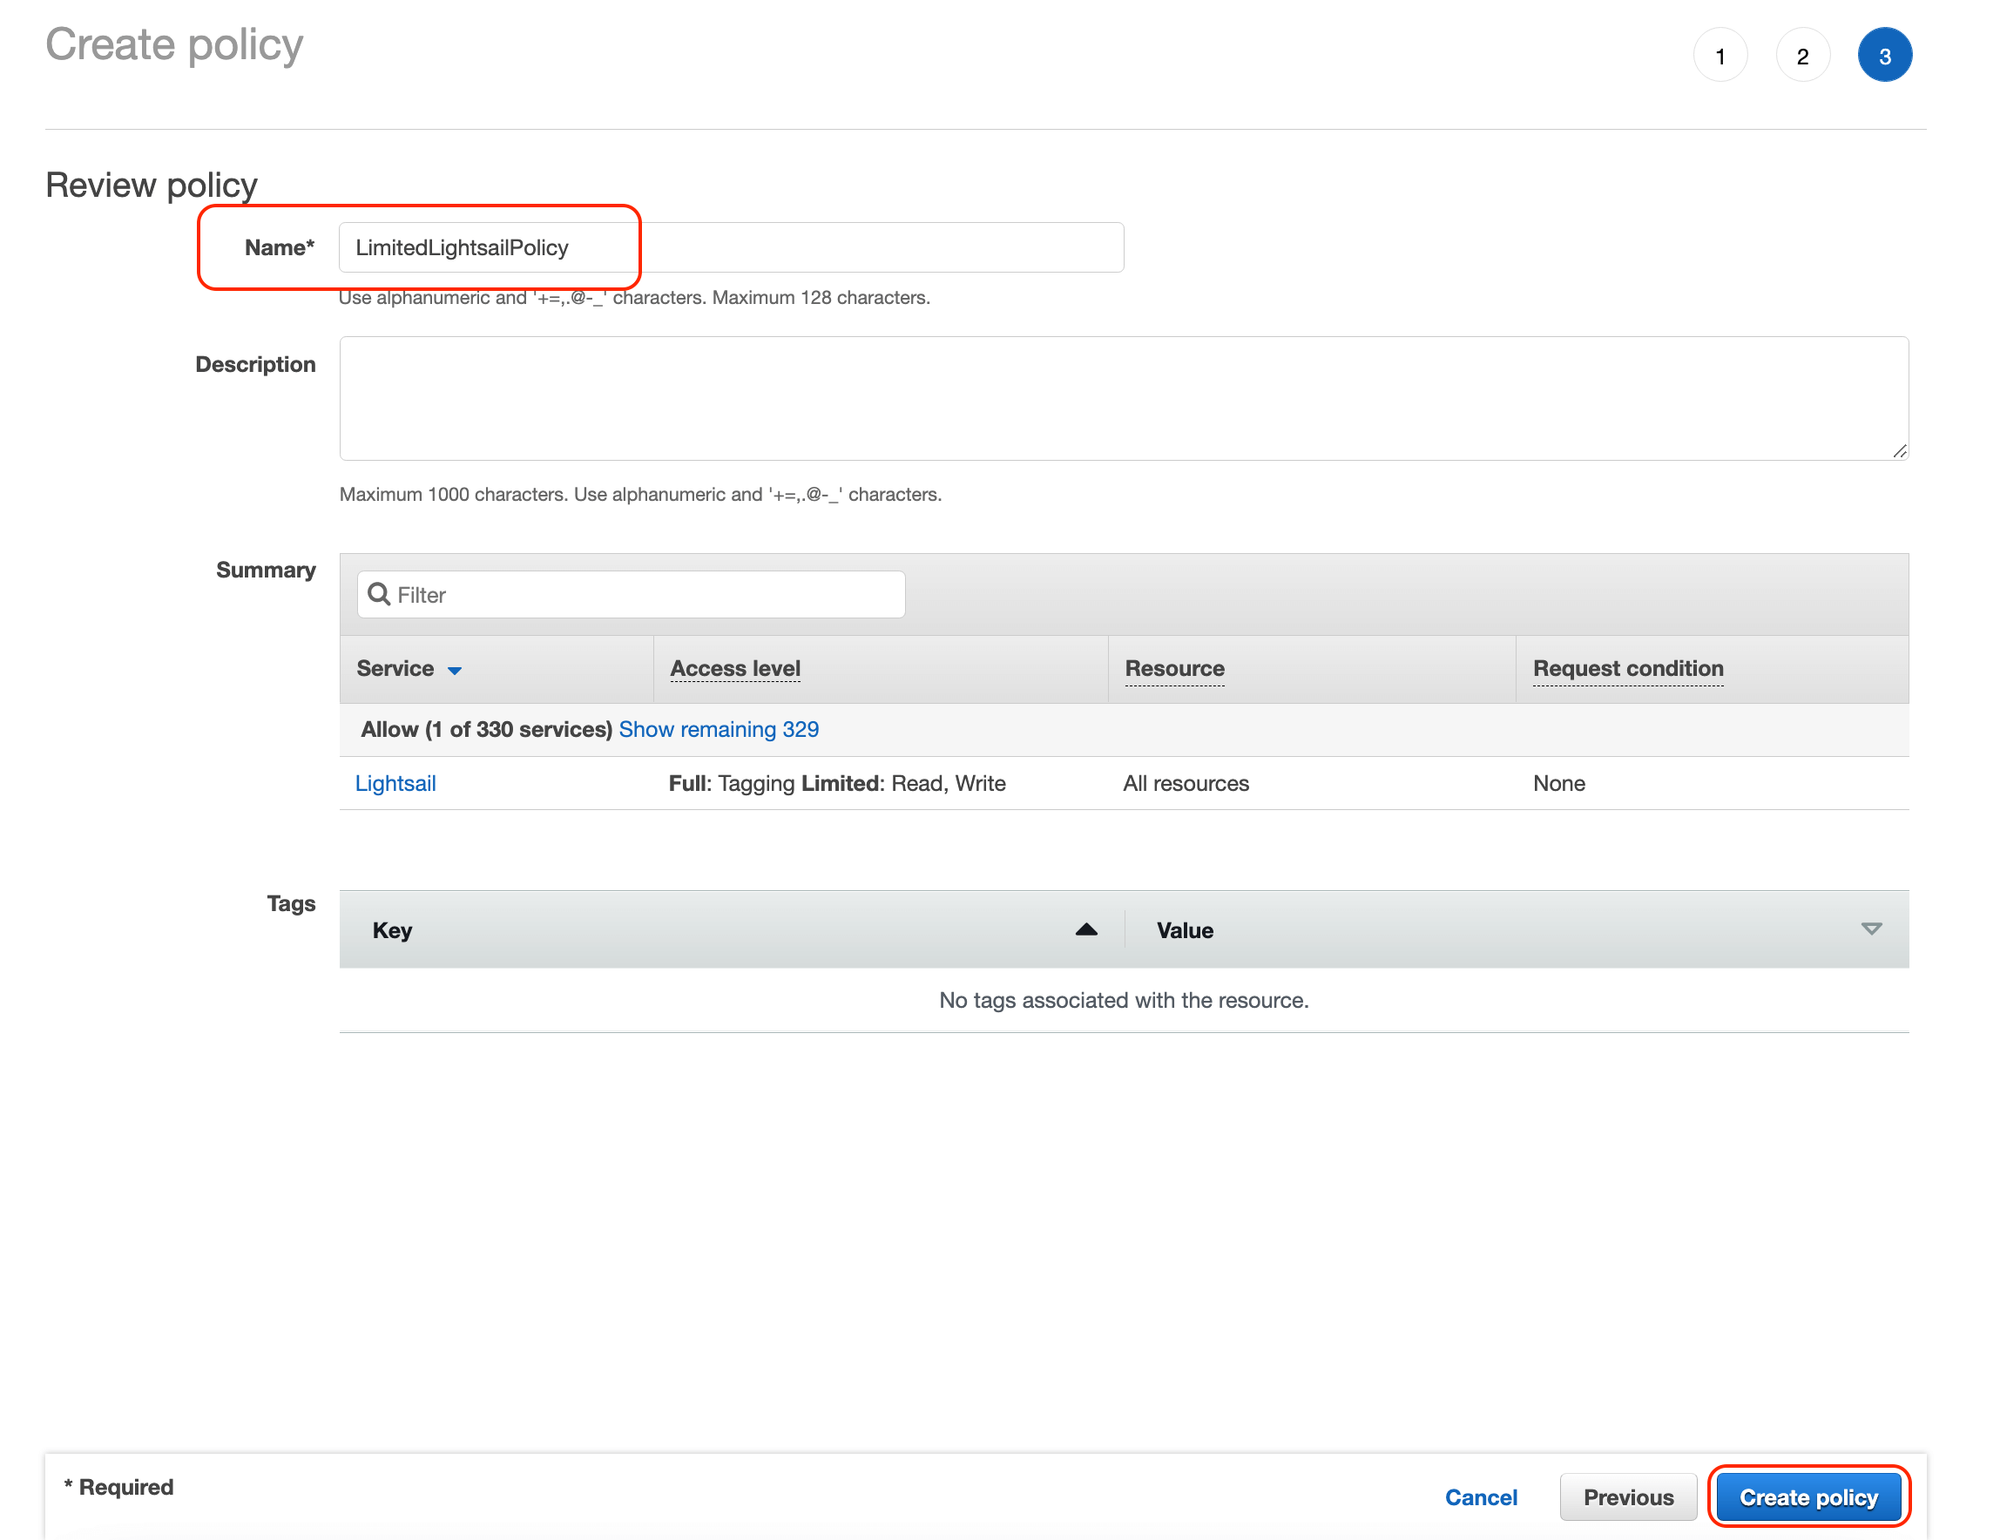
}- Click on "Next: Tags" then "Next: Review"
- Give the policy a name, "LightsailSnapshotsPolicy" then click on "Create policy"
Create a Lightsail user for snapshots
- Head to IAM/Users management page
- Click on "Add users"
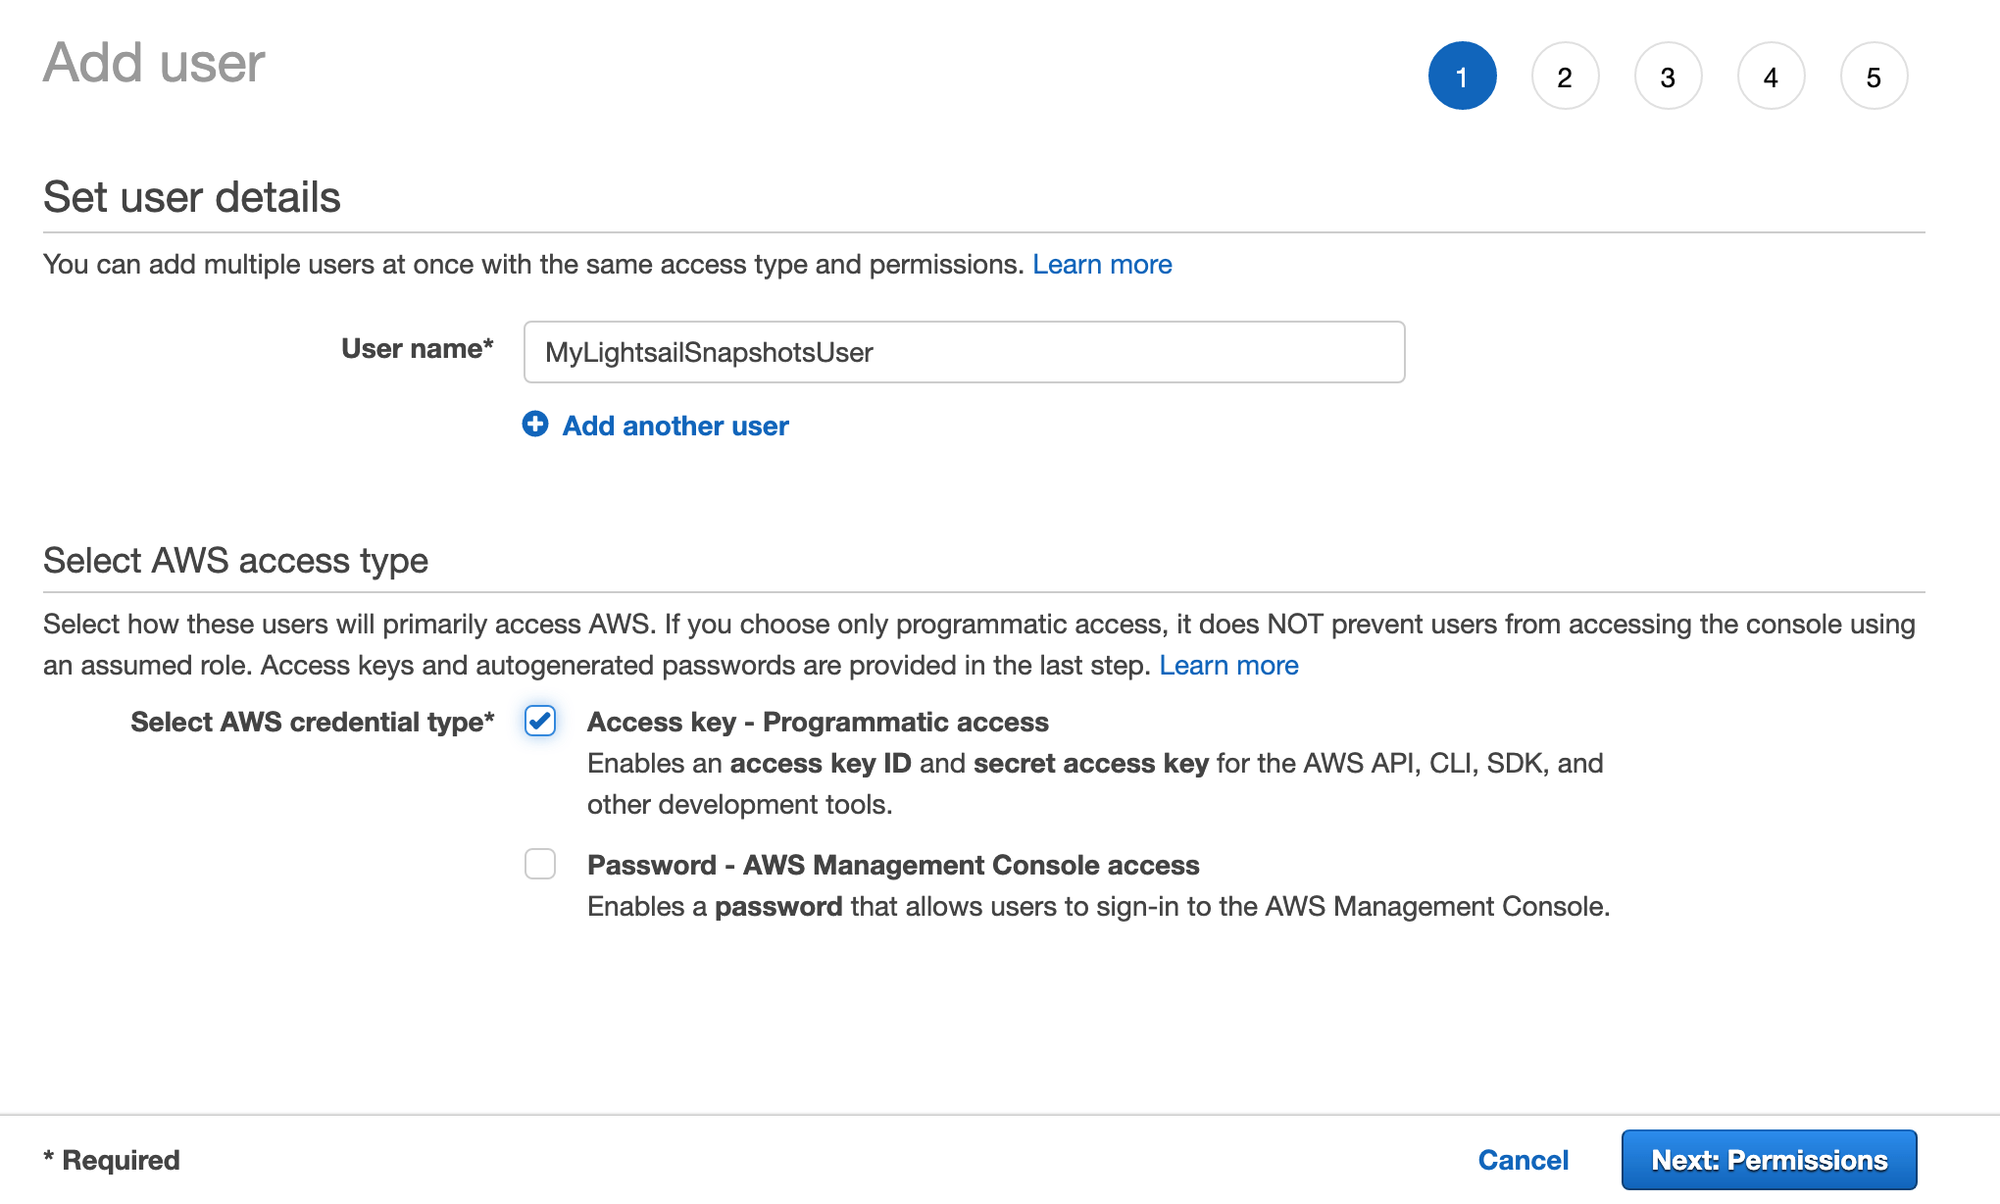
In the "Add user" form fill in information shown below:
Step 1: Set user access
- Define a name to your user.
- Choose "Access key - Programmatic access" for "Select AWS Credential type".
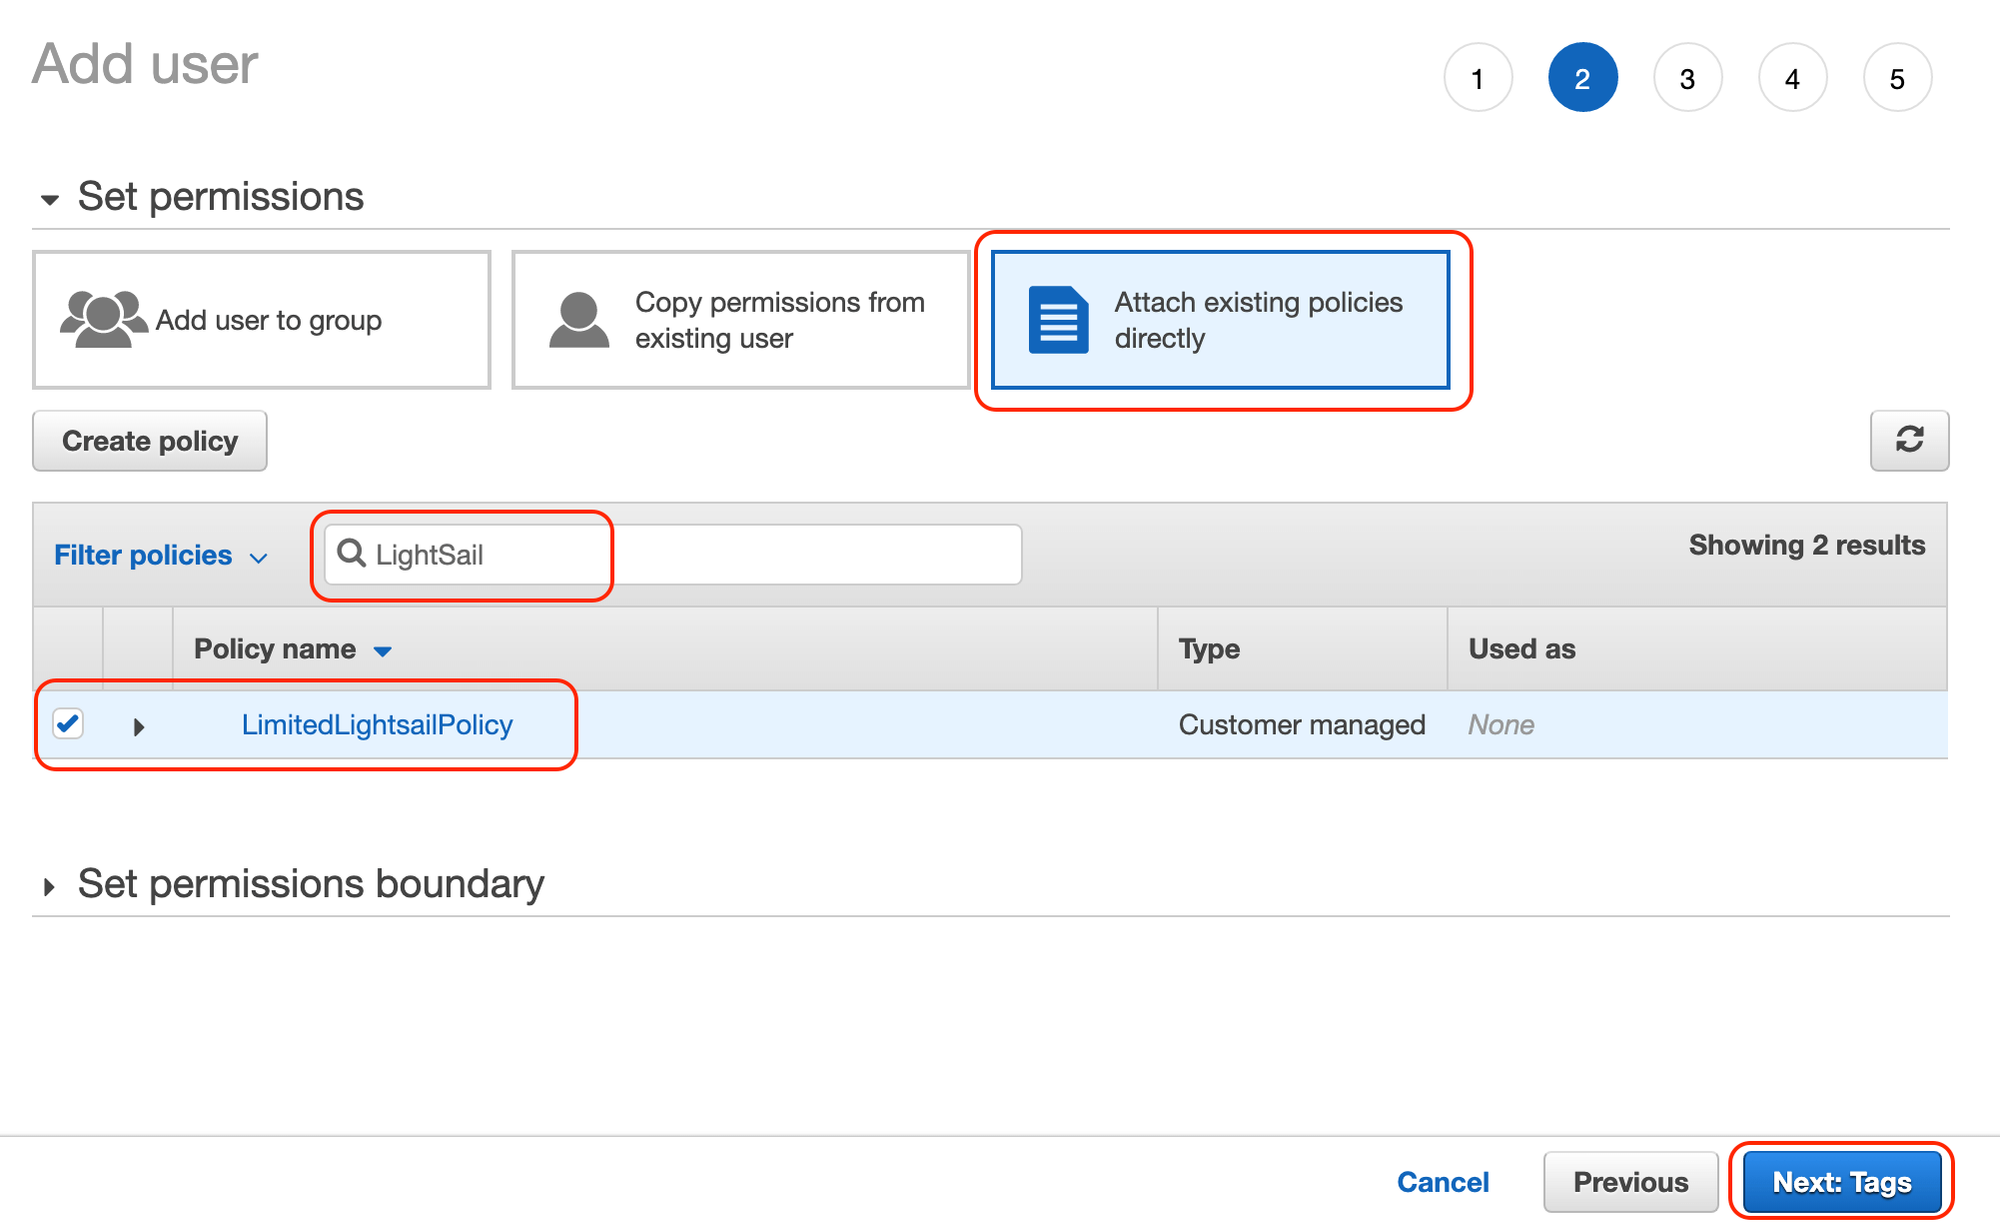
Step 2: Attach policy to user
- Select "Attach existing policies directly" and select "LightsailSnapshotsPolicy" (we created in the earlier step).
- Select "Create user without a permission boundary" in the "Set permissions boundary" section.
Step 3: Finalize user creation
- You don't have to add any specific tag, just click "Next".
- Review and create the user.

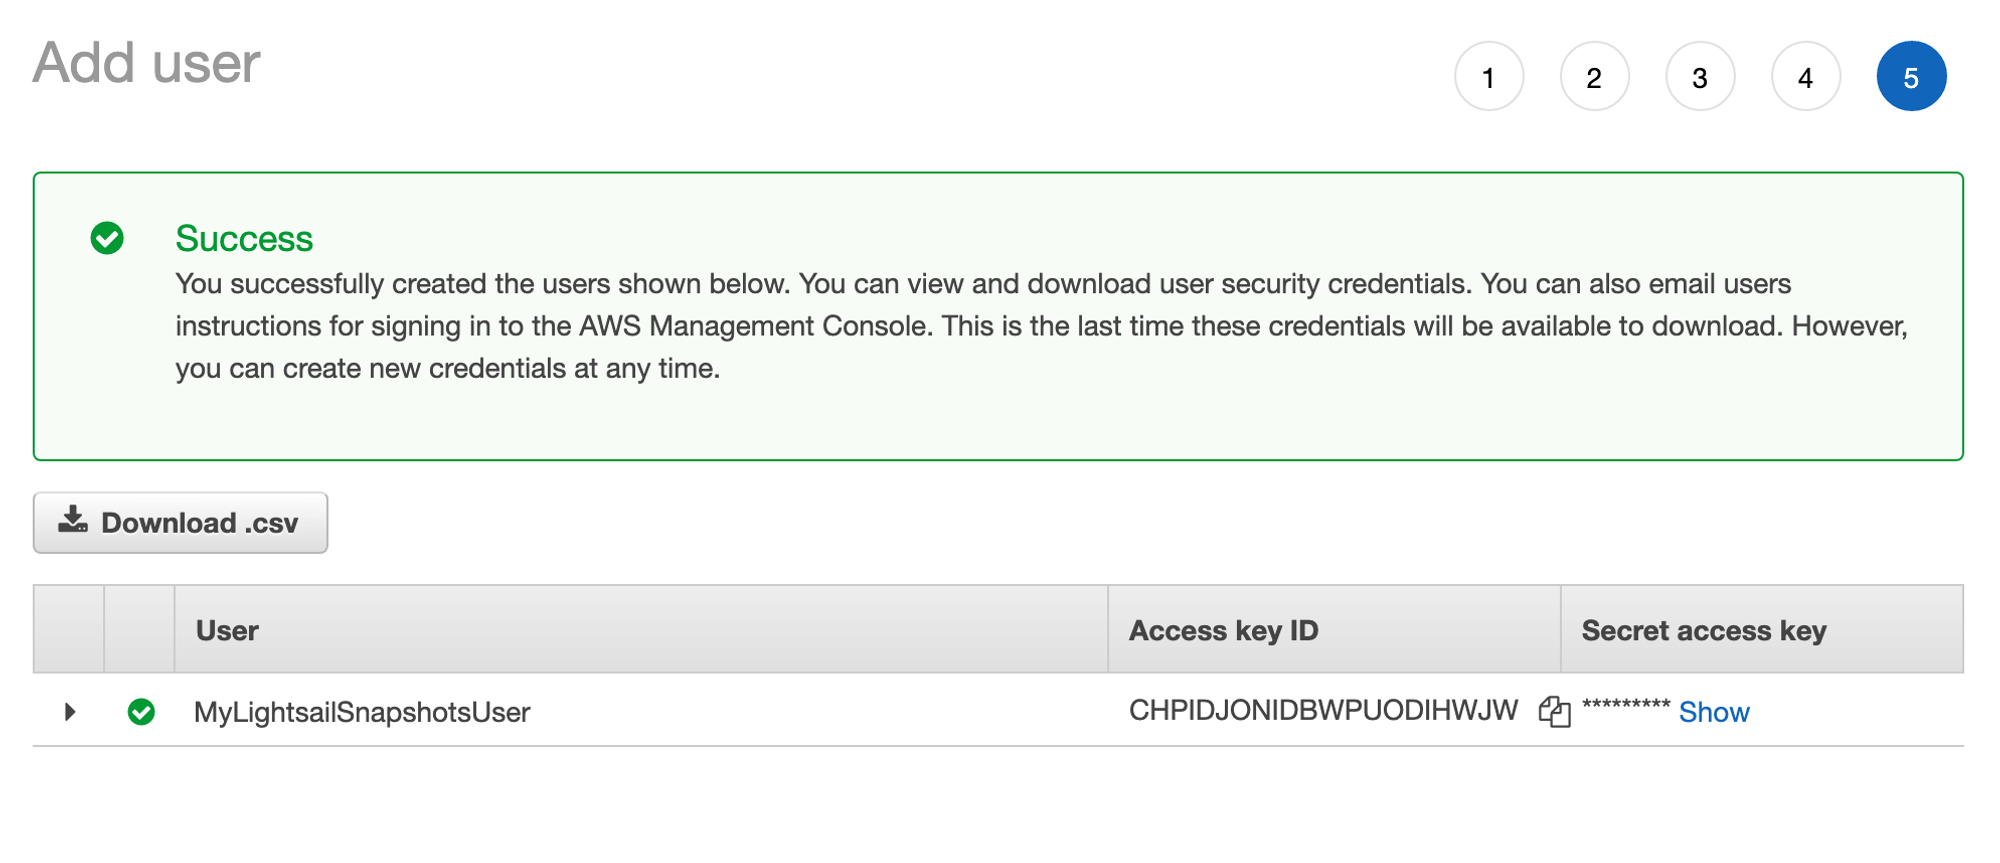
Step 4: Copy your access and secret keys
Copy your "access key id" and secret "access key".
Connect AWS Lightsail Account to SimpleBackups
With this done, you now have a IAM User with an access key and secret that we'll be able to use in SimpleBackups to automate your Amazon Lightsail Snapshots.
- Log in to your Lightsail account and navigate to the Lightsail instance you want to backup. Note which region your Lightsail instance is hosted on.

- Navigate to SimpleBackups new snapshot job creation page.

- Click on "Connect a new Provider" and select Amazon Lightsail from the provider dropdown menu.

- Once you have selected your provider, give it a name and paste in the values for your Key and Secret. Then choose the region where your Lightsail instance is hosted and click on "Save provider."

- Select your Lightsail instance.

- Give your snapshot job a schedule, the number of snapshots to retain, and a friendly name you can remember.

That's it! Your AWS Lightsail instance is now set up with SimpleBackups!
Last updated on June 5, 2023