Restore MongoDB Atlas Collection using MongoDB Compass
How to import a MongoDB collection in MongoDB Atlas Step by step using Compass
- MongoDB Atlas is a fully-managed cloud database developed by the same people that build MongoDB.
- MongoDB Compass is a GUI that allows you to analyze your documents and displays rich structures within your collections.
In this article, we will go through connecting to our MongoDB Atlas database using MongoDB Compass and importing a sample collection into your MongoDB Atlas database.
Step 1: Grab your MongoDB Atlas Database Credentials
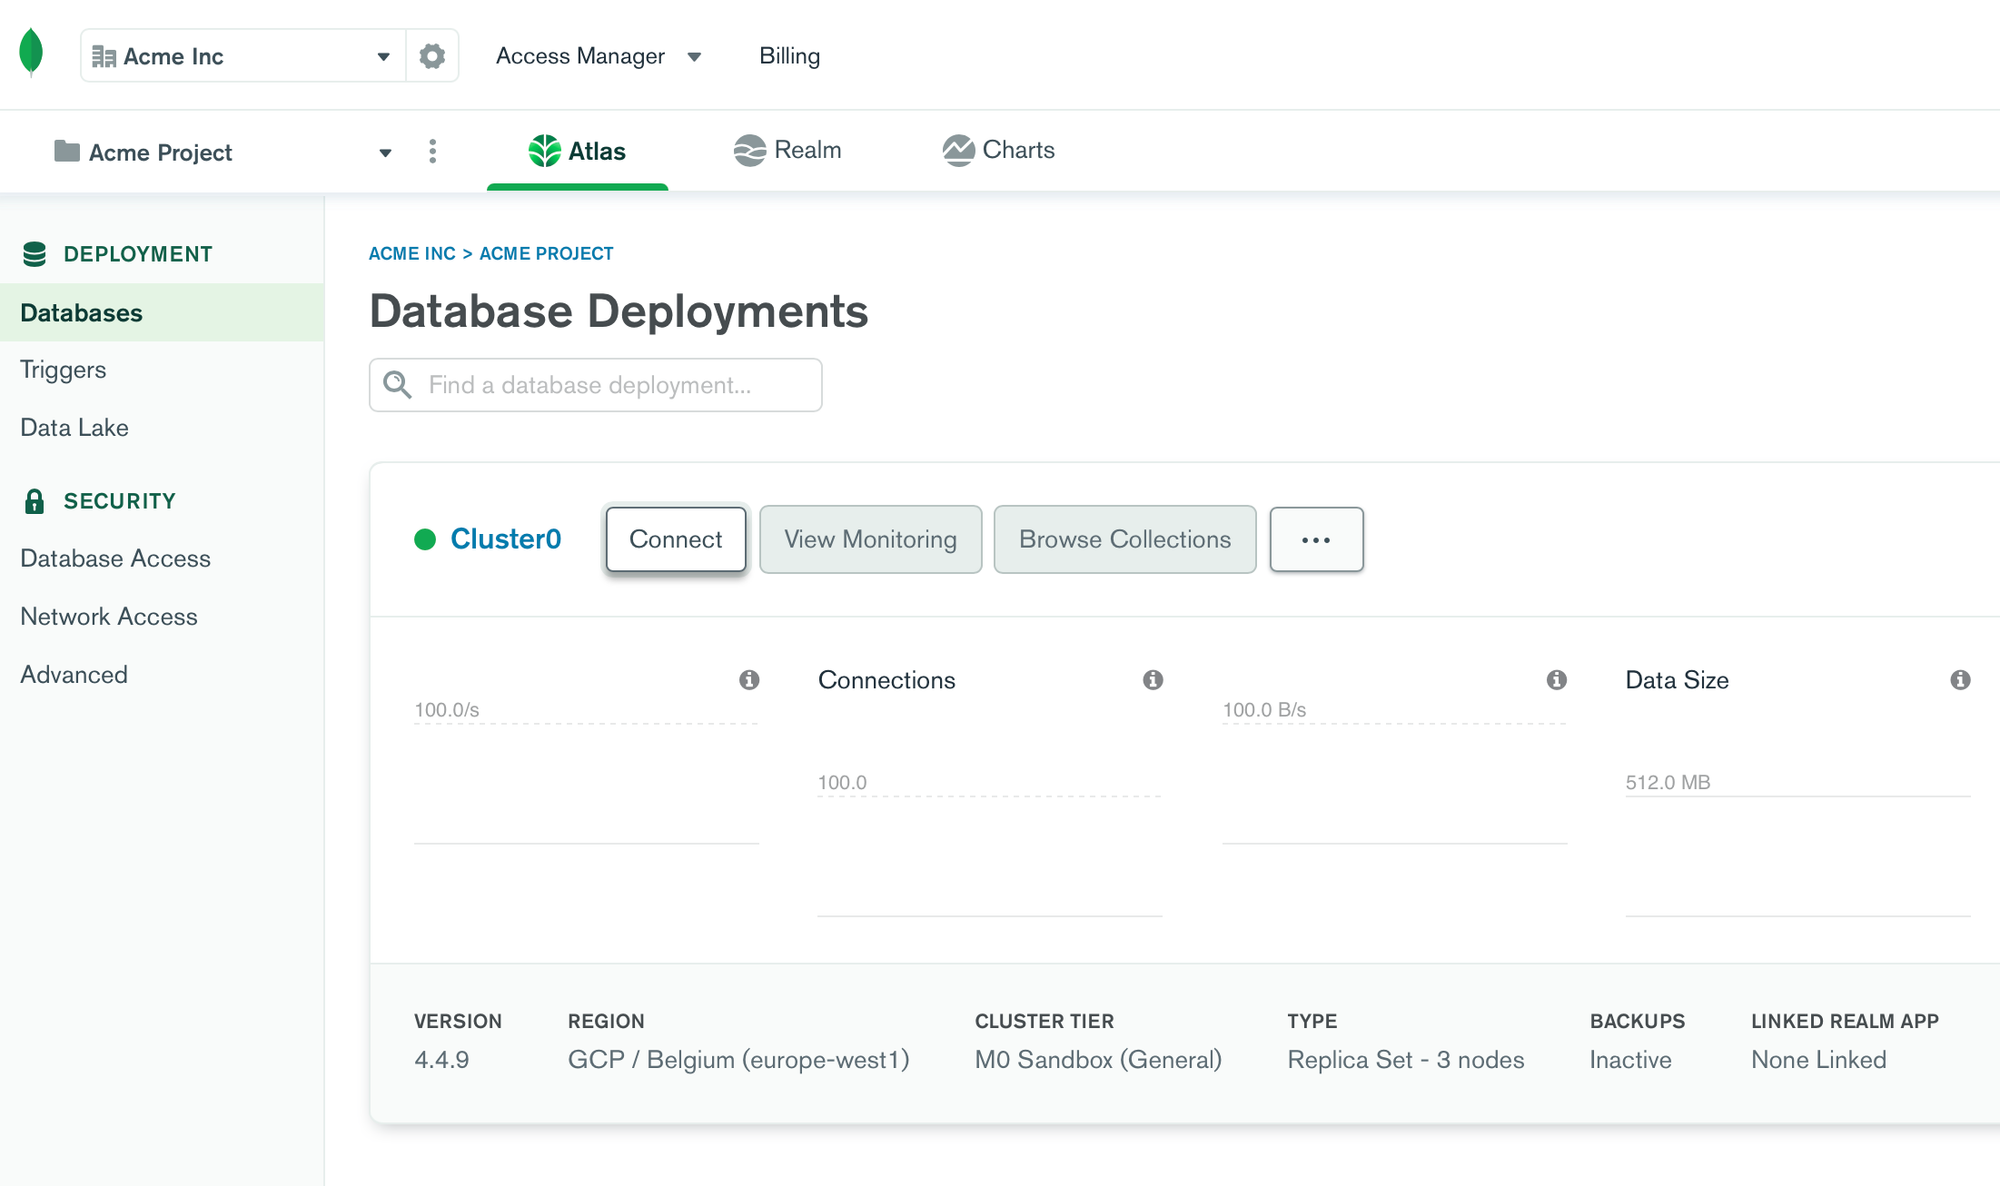
Head over to https://cloud.mongodb.com/v2/ then choose your MongoDB cluster and click on "Connect" on the cluster you want to connect to.
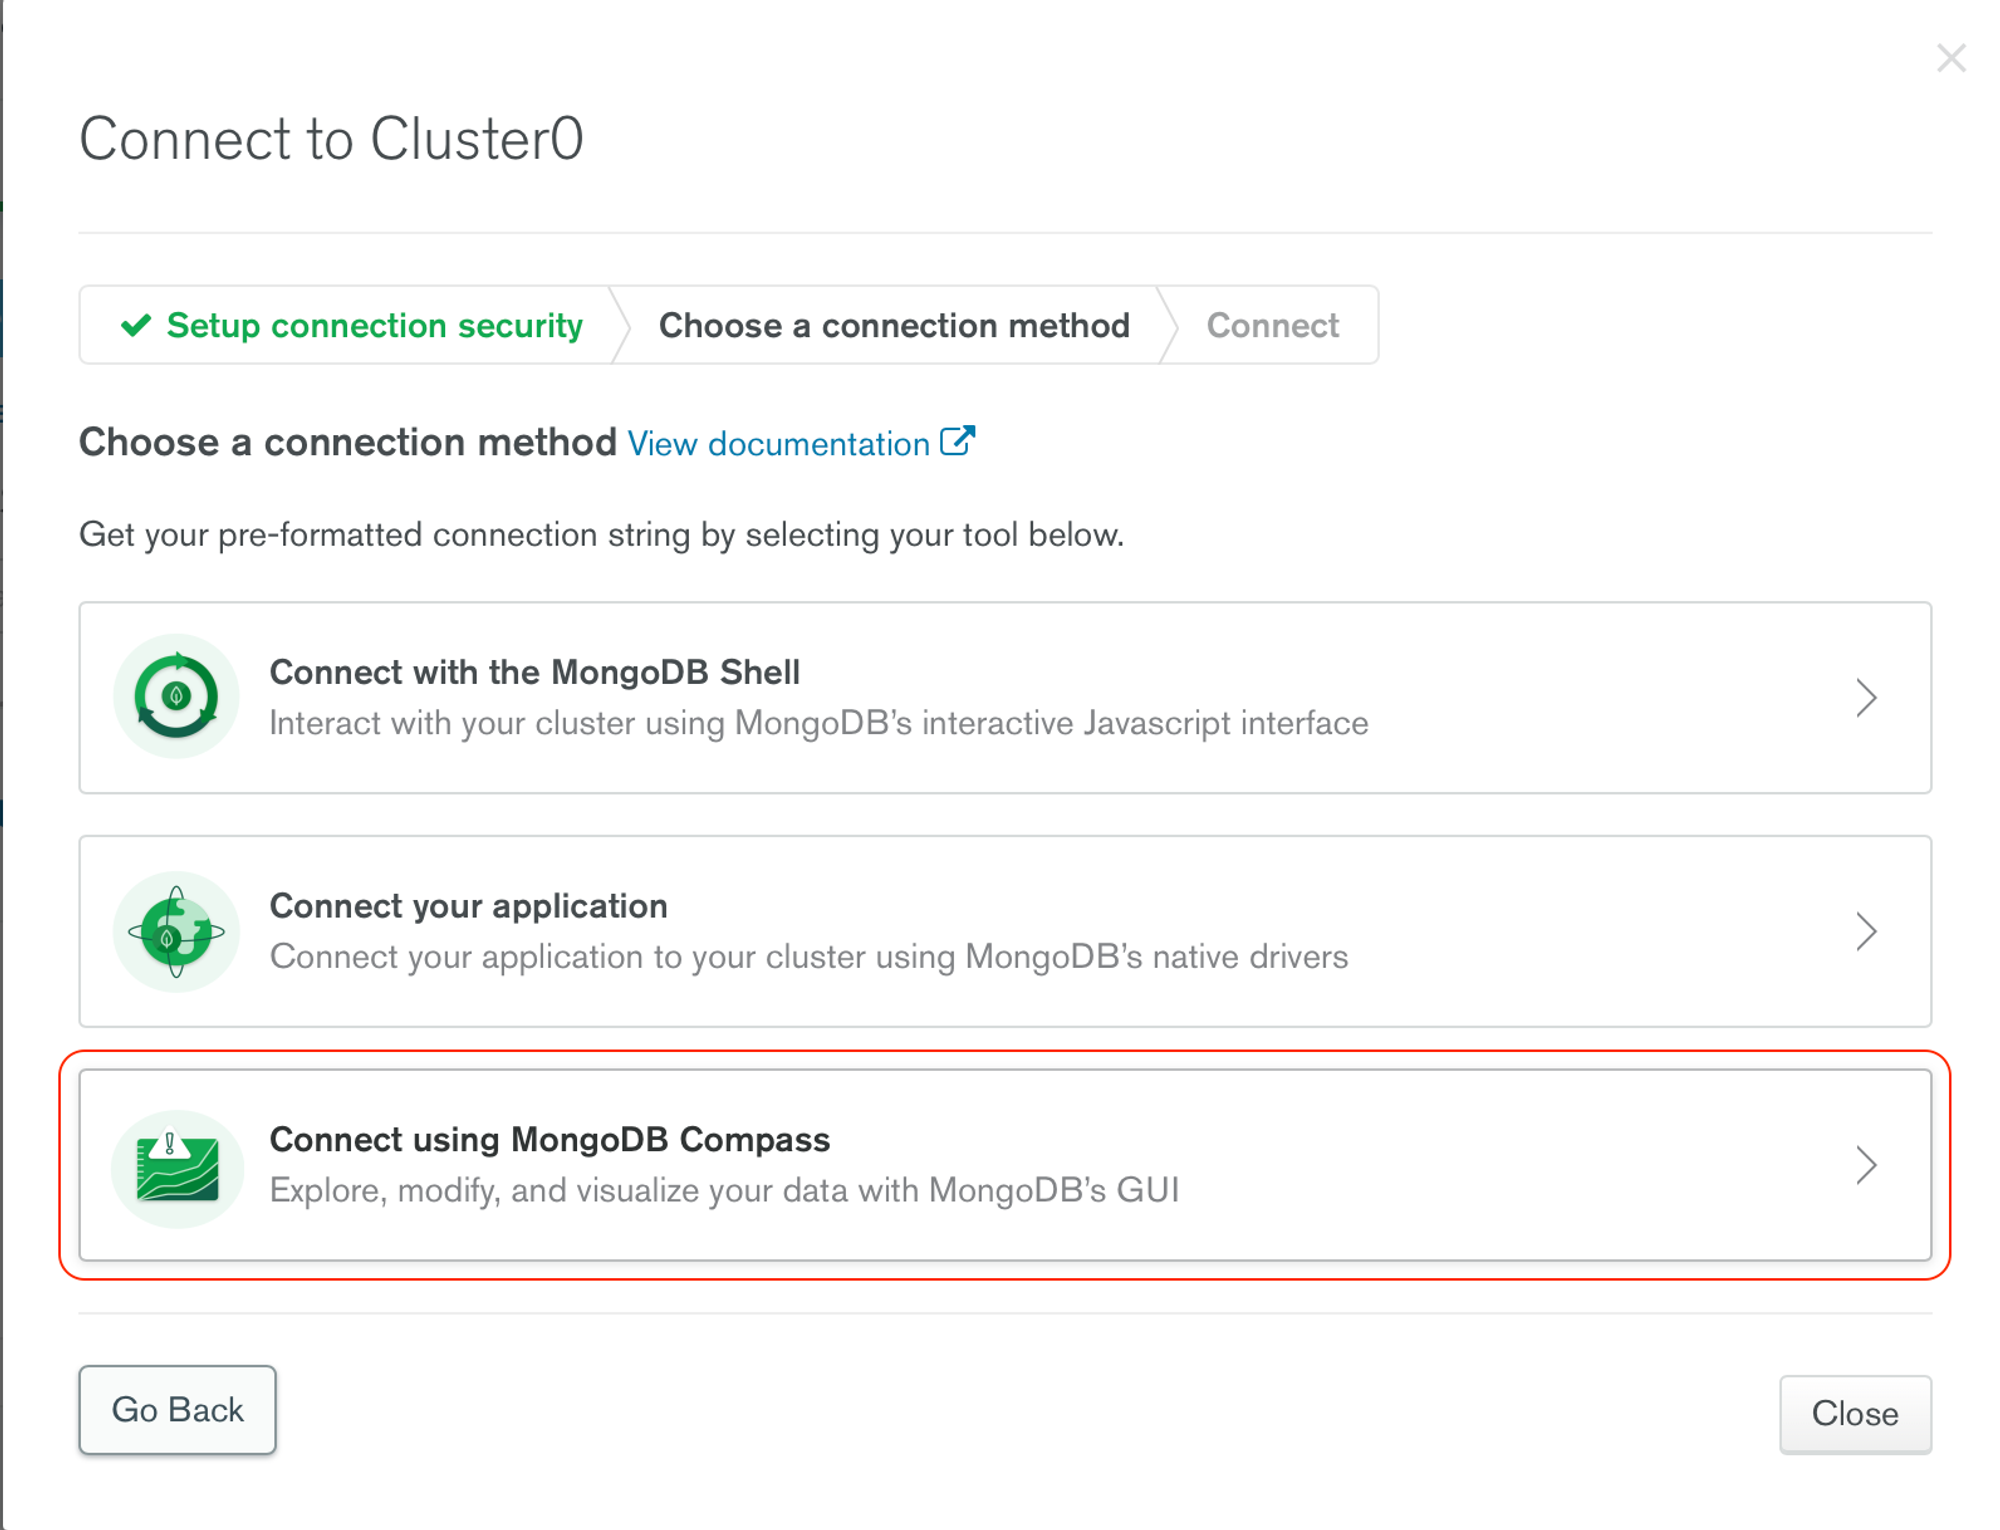
When the list of option pops up, make sure you choose the MongoDB Compass option.
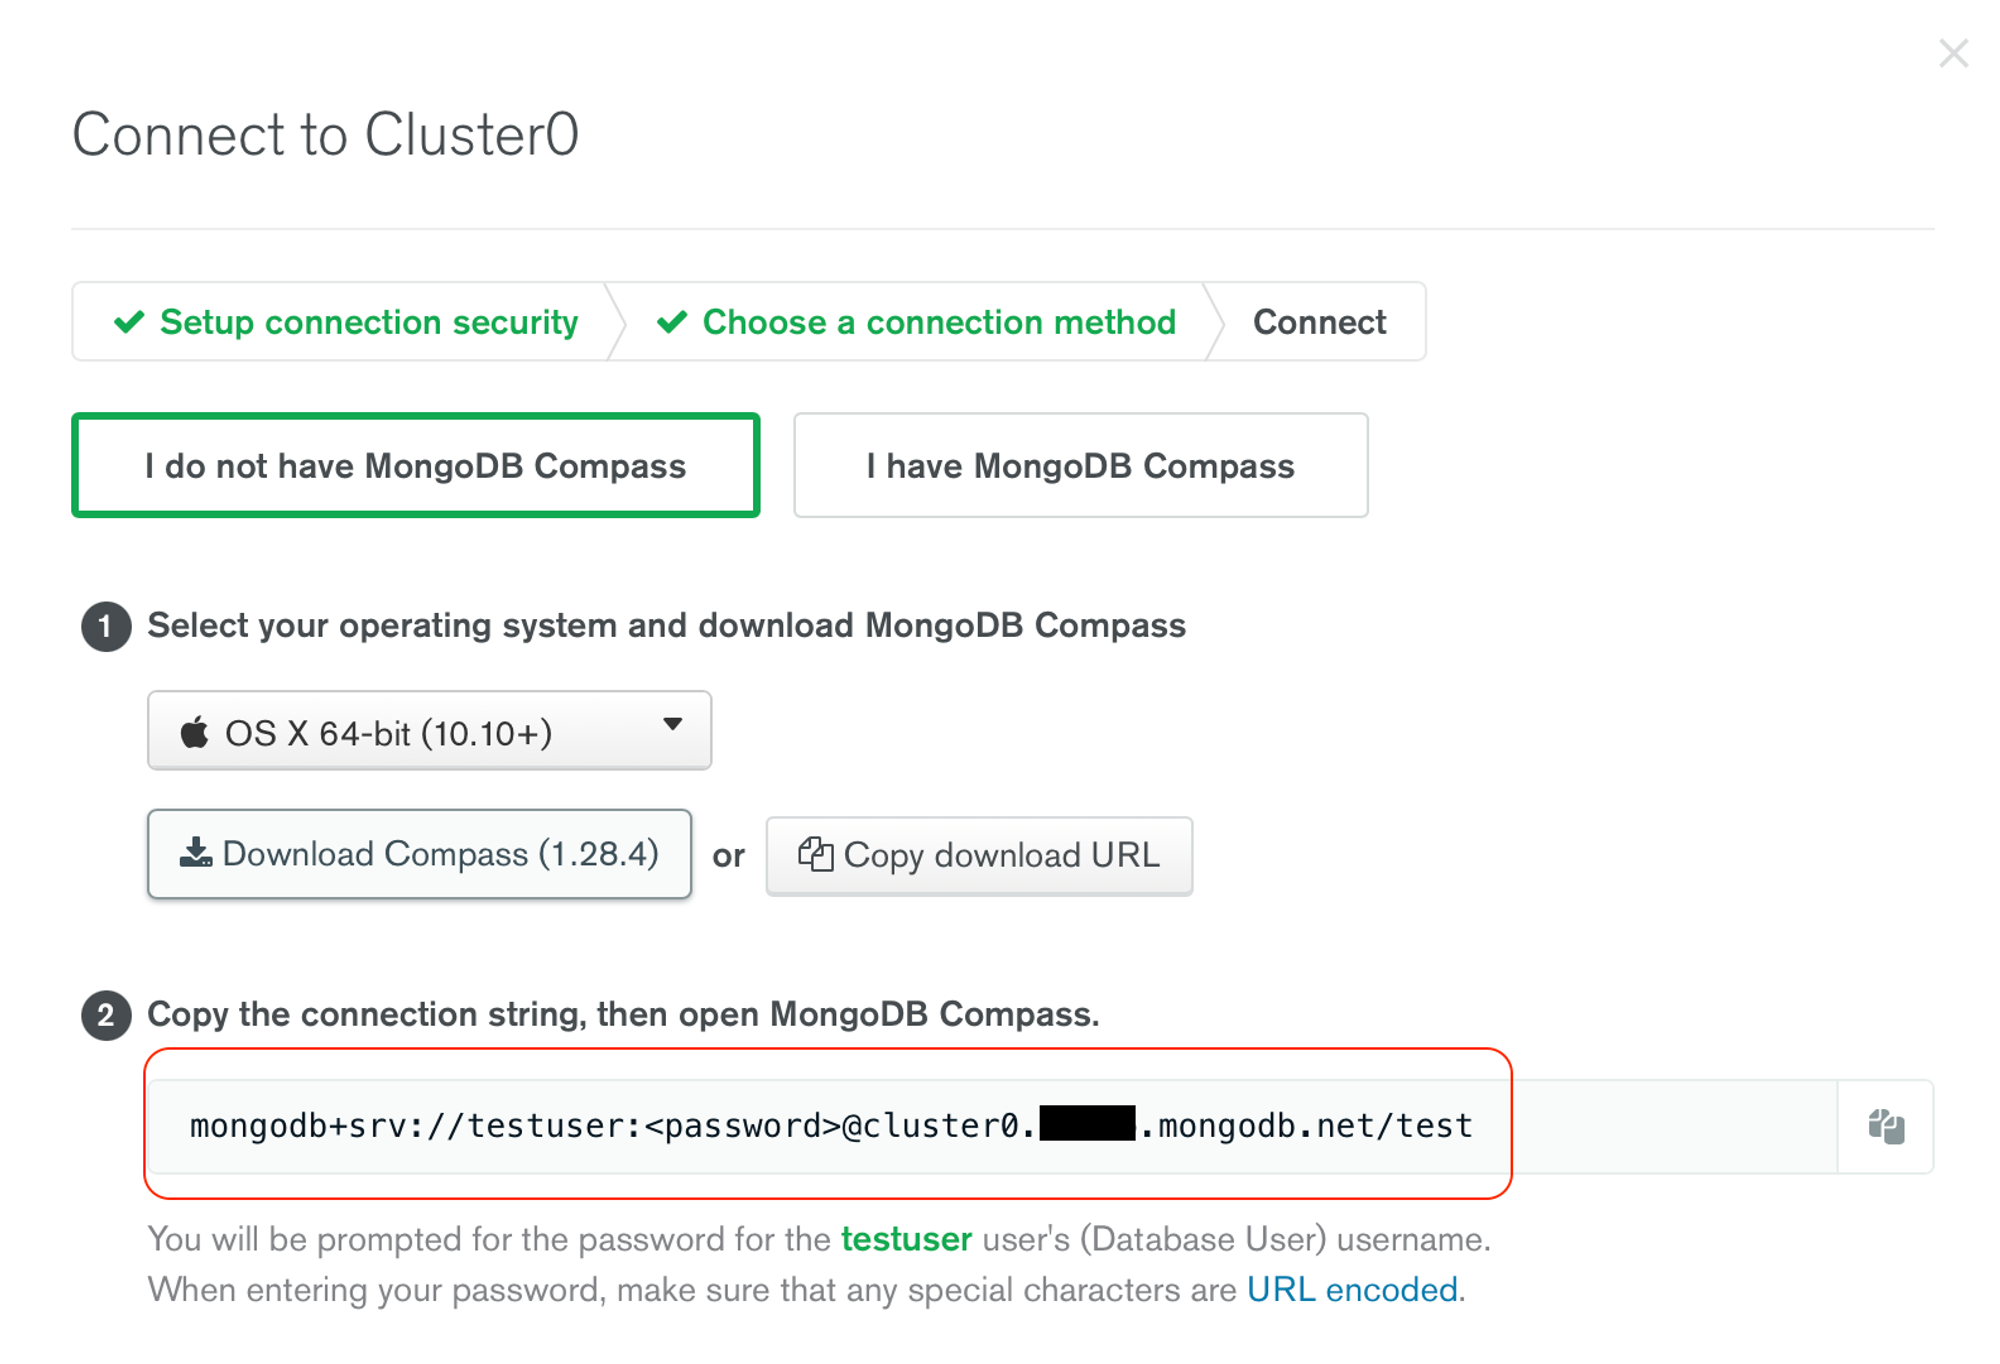
From this screen, you can copy the connection string at the bottom which includes the connection details (username, password placeholder, database host and so on).
Step 2: Connect to MongoDB Atlas via MongoDB Compass
Paste the connection string you obtained from the previous step.
<password> from the connection string by the actual password of your MongoDB Atlas user. 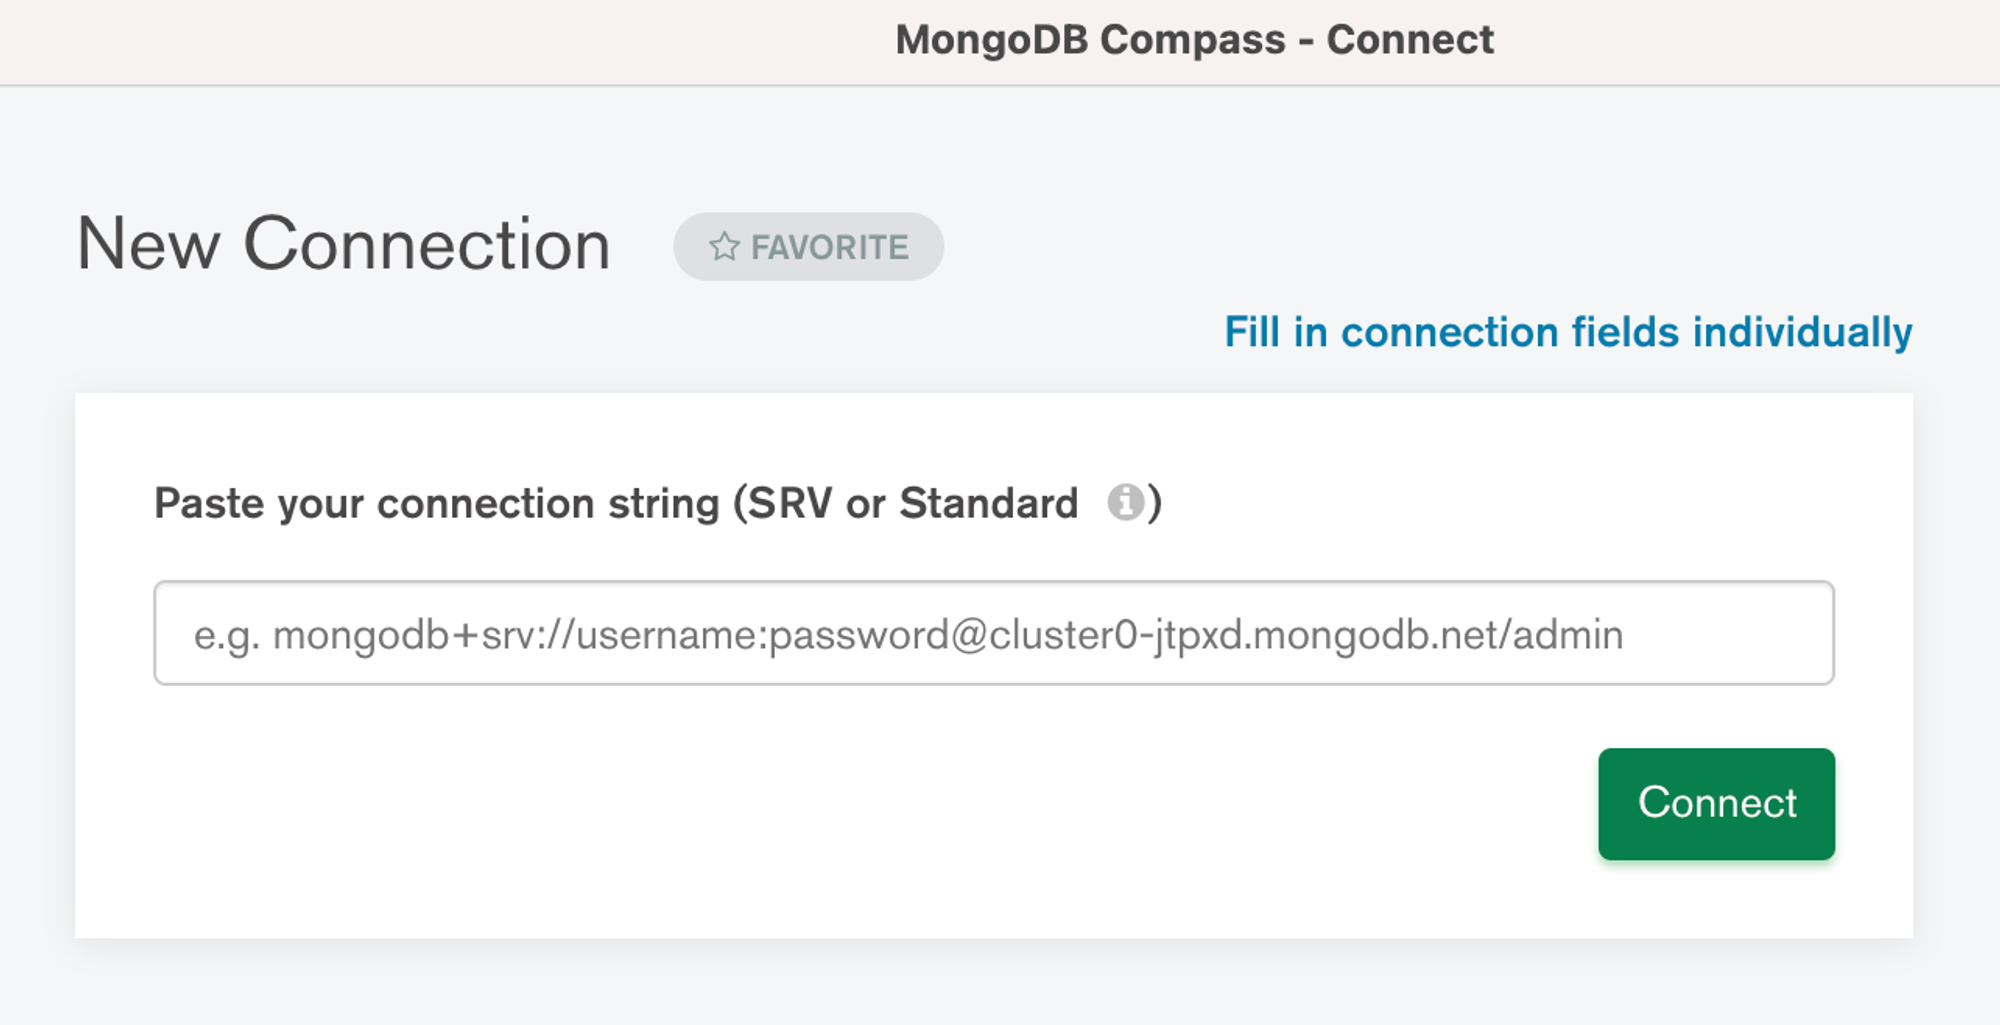
Step 3: Import MongoDB Atlas collection via MongoDB Compass
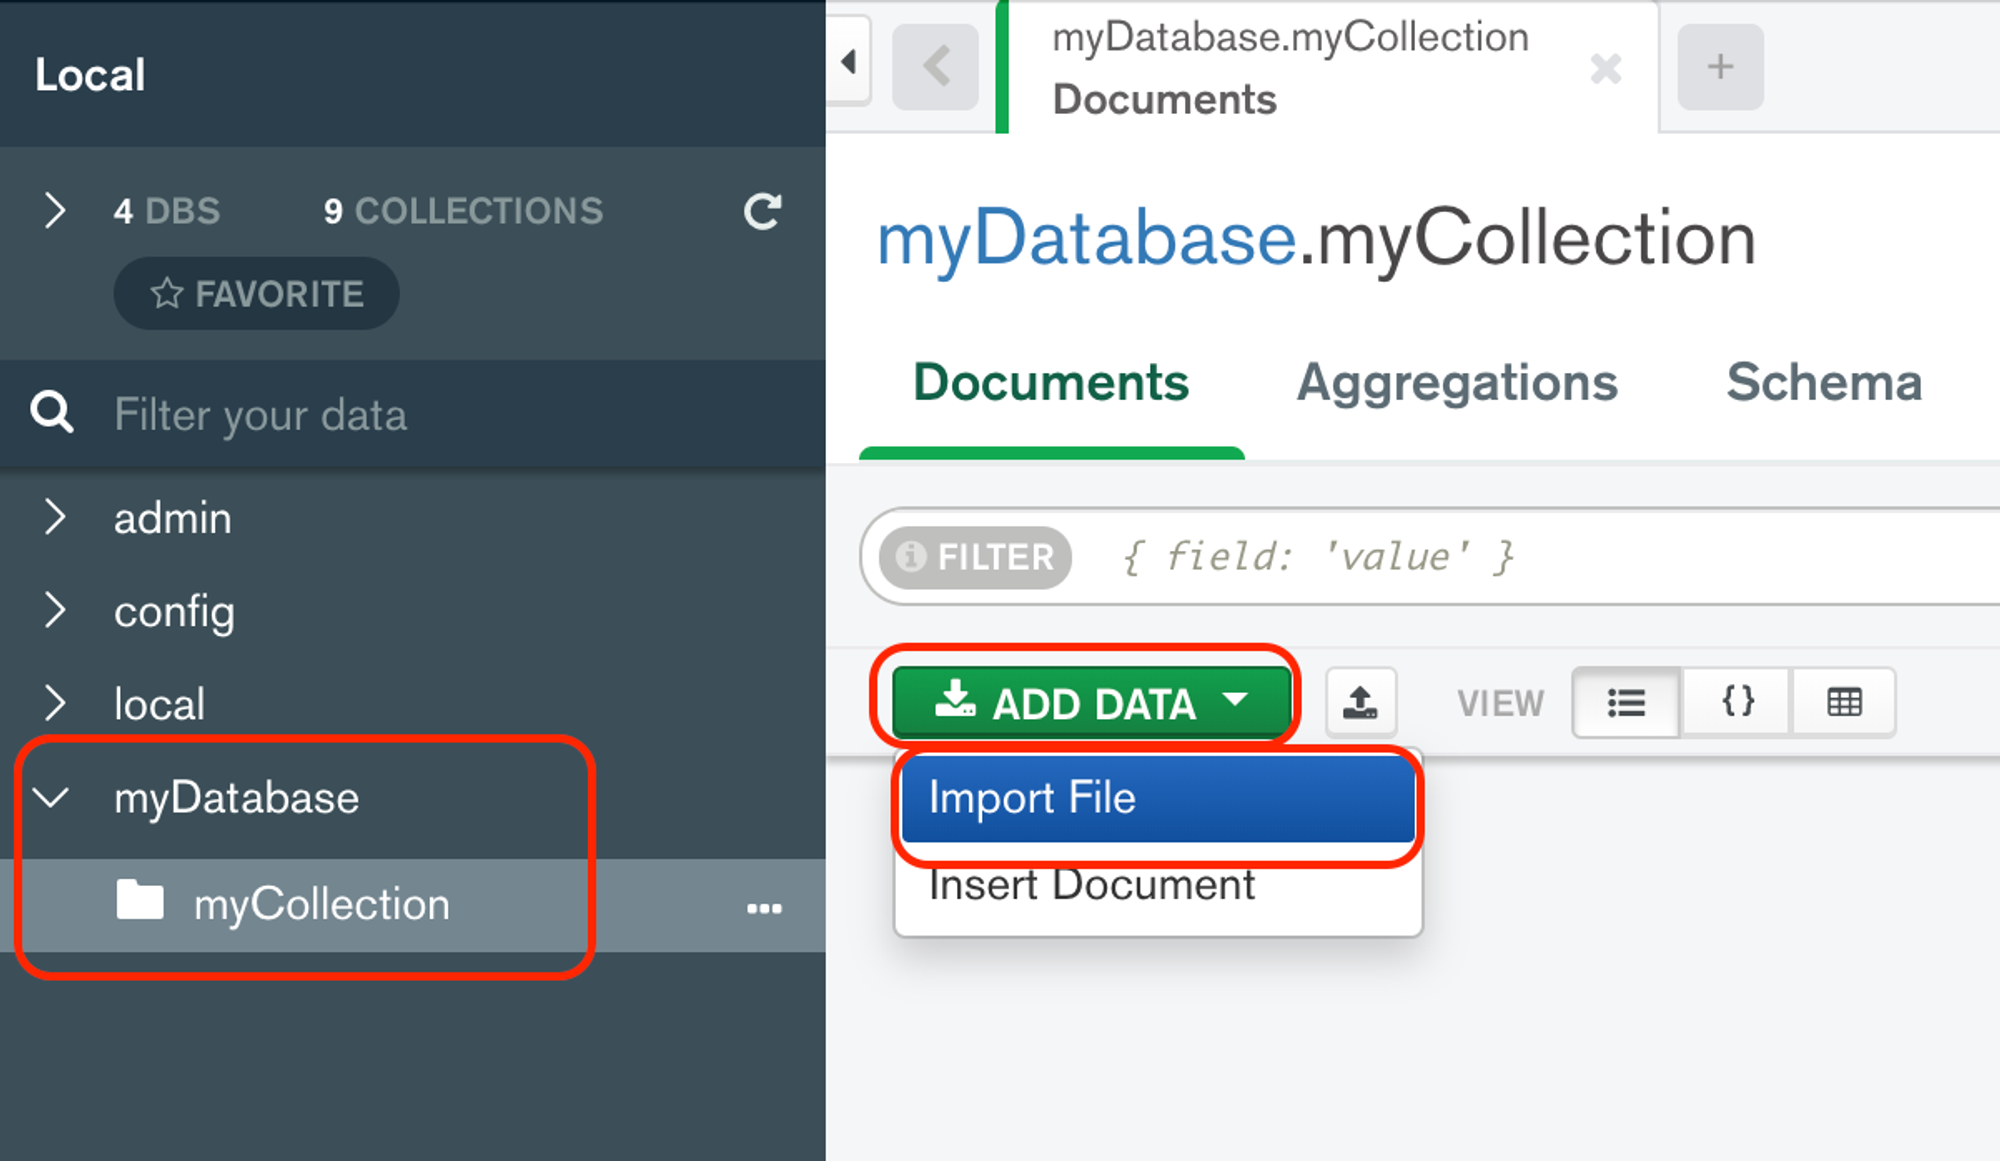
When you connect successfully, you will see all databases under your MongoDB on the left as shown above.
Select the database and the collection you want to import the data into. In this case, we had a MongoDB database called myDatabase and a collection called myCollection.
When you select the target collection form the left hand side, click "ADD DATA" and then "Import File".
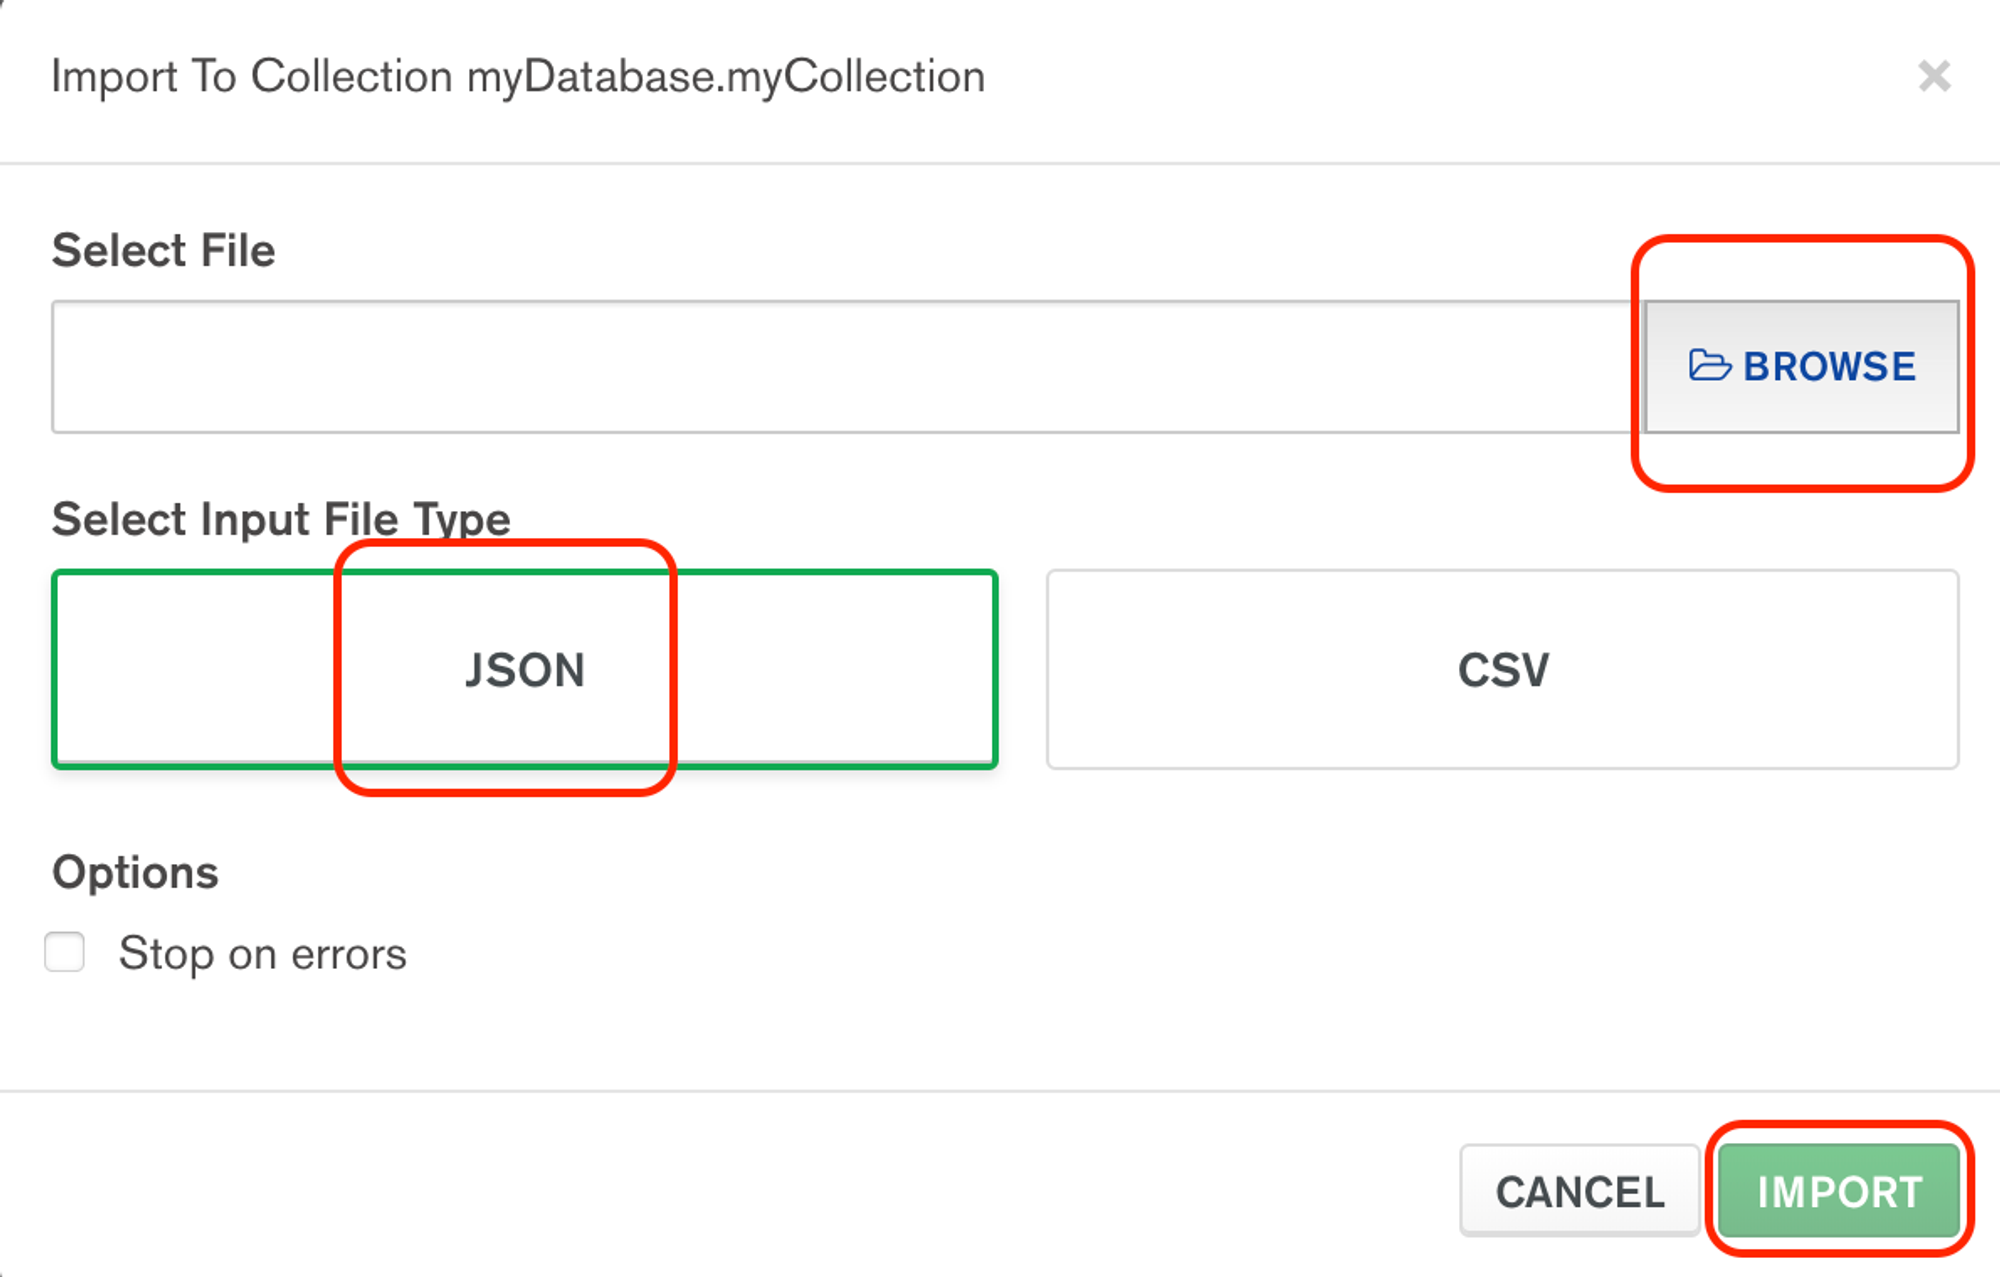
Finally, on the screen below, you can select the JSON document (MongoDB collection) you want to import.
Last updated on August 6, 2021